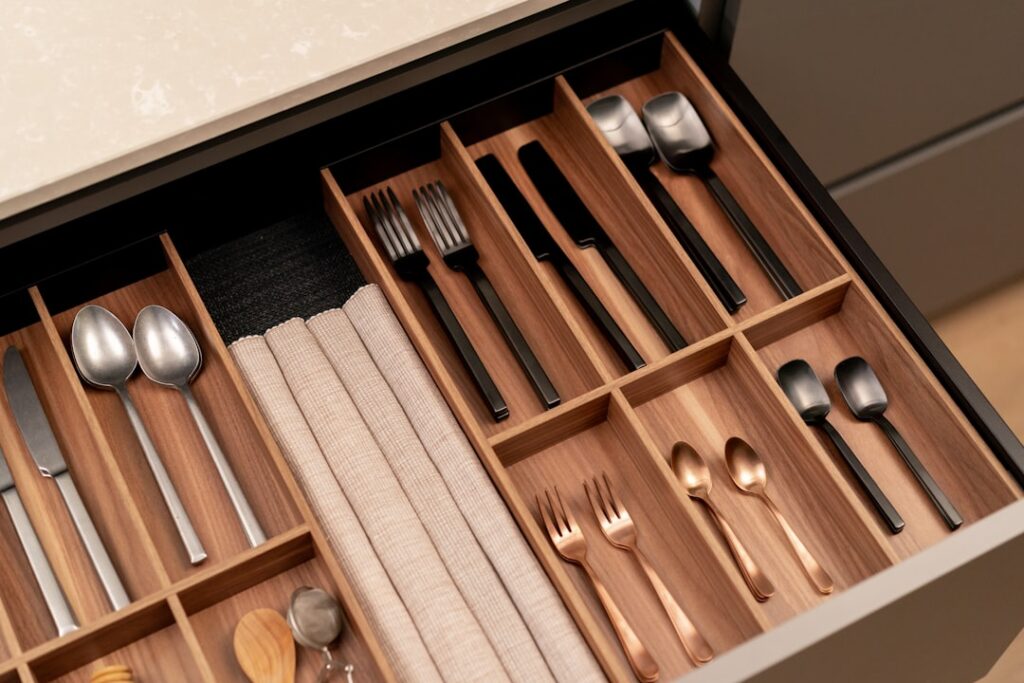
If you dread opening your kitchen drawers because of the tangled mess of spatulas, loose batteries, and mystery takeout menus, you’re not alone. Learning how to organize kitchen drawers is one of the highest-impact home projects you can tackle in a single afternoon — it costs almost nothing, requires no special skills, and immediately makes cooking and cleanup faster. This guide walks you through a proven system that works for every drawer in your kitchen, from the junk drawer to the silverware tray.
- Why Drawer Organization Matters
- Supplies You Need
- Step 1: Empty & Declutter Every Drawer
- Step 2: Clean & Line Your Drawers
- Step 3: Categorize Everything
- Step 4: Plan Your Layout
- Step 5: Install Dividers & Organizers
- Organization by Drawer Type
- Best Drawer Organizer Products (2026)
- How to Maintain Your Organized Drawers
- Frequently Asked Questions
Why Drawer Organization Matters
The average home cook opens kitchen drawers 20–40 times per day. Disorganized drawers waste an estimated 2–5 minutes daily searching for items — that’s 12–30 hours per year. Beyond time savings, organized drawers protect your knives from dulling against loose utensils, prevent broken gadgets, and reduce the frustration that makes cooking feel like a chore.
Good kitchen organization also connects to every other part of your home. The same principles apply when you organize a small closet or tackle any storage challenge — declutter first, categorize second, containerize third.
Supplies You Need
| Supply | Purpose | Estimated Cost |
|---|---|---|
| Bamboo drawer dividers | Separate utensil categories | $15–$30 |
| Expandable cutlery tray | Silverware organization | $10–$25 |
| Non-slip drawer liner | Prevent sliding, protect surfaces | $8–$15 per roll |
| Small clear bins | Group small items (clips, ties, batteries) | $5–$12 for a 4-pack |
| Label maker or masking tape | Label sections for household members | $10–$20 |
| Trash bag | Decluttering discards | $0 |
Total investment: $25–$80 for a typical kitchen with 6–10 drawers.
Step 1: Empty & Declutter Every Drawer
Pull everything out of every kitchen drawer at once. Yes, all of them — even the ones that seem “fine.” Pile items on your kitchen table or counter. This forces you to see the full volume of what you own and makes duplicate items obvious.
Now sort into three piles:
- Keep: Items you’ve used in the last 6 months.
- Donate/Sell: Working items you don’t need (duplicate peelers, extra measuring cups, gadgets you never use).
- Trash: Broken items, dried-out pens, expired coupons, mystery keys, stained potholders.
Be honest. Most kitchens have 30–40% more utensils and gadgets than needed. If you have three whisks and only use one, keep the best one.
Step 2: Clean & Line Your Drawers
With drawers empty, vacuum out crumbs and debris, then wipe down with a damp cloth and mild all-purpose cleaner. For stubborn grime, a paste of baking soda and water works well. Let drawers dry completely before proceeding. If you’re interested in cleaning other kitchen surfaces, our guide on how to clean stainless steel covers appliances and fixtures.
Install non-slip drawer liner cut to fit each drawer. Measure the inside dimensions (length, width, and depth) and cut the liner with scissors. The liner prevents items from sliding around every time you open the drawer and protects the wood or laminate surface underneath.
Step 3: Categorize Everything
Group your “keep” items into logical categories:
- Daily silverware: Forks, knives, spoons, teaspoons
- Cooking utensils: Spatulas, wooden spoons, tongs, ladles
- Cutting tools: Knives, kitchen shears, peelers
- Measuring & baking: Measuring cups, spoons, rolling pin
- Food storage: Foil, wrap, bags, twist ties
- Serving utensils: Large spoons, pie servers, carving sets
- Small gadgets: Can opener, garlic press, thermometer, timer
- Linens: Dish towels, potholders, oven mitts
- Junk drawer items: Pens, tape, scissors, batteries, menus
Step 4: Plan Your Layout
Assign categories to drawers based on the “zone” principle:
- Prep zone (near the cutting board area): Knives, peelers, measuring tools
- Cooking zone (next to the stove): Spatulas, tongs, spoons, oven mitts
- Cleanup zone (near the sink/dishwasher): Dish towels, sponges, bags
- Serving zone (near the dining area): Silverware, serving utensils, napkins
The golden rule: items should be stored where you first need them, not where you put them away. Silverware goes near the dishwasher for easy unloading but also near the dining table for setting it.
Step 5: Install Dividers & Organizers
Now place your organizers and dividers into each drawer, then arrange items within their designated sections. Follow these principles:
- Most-used items go in front. You should reach the items you grab 5+ times daily without digging.
- Store items upright when possible. Spatulas and spoons stored vertically in a deep drawer divider are easier to grab than flat stacks.
- Use the full depth. Don’t waste the back third of deep drawers — put less-used items there.
- Leave breathing room. If a drawer is packed so tight you can’t slide items in and out, remove 2–3 items.
Organization by Drawer Type
The Silverware Drawer
Use an expandable cutlery tray with at least 5 compartments. Standard layout from left to right: knives, forks, spoons, teaspoons, and a narrow slot for chopsticks or cocktail forks. If space allows, add a sixth section for steak knives or butter knives.
The Utensil Drawer
This is typically the messiest drawer because utensils vary wildly in shape and size. Use adjustable bamboo dividers to create 3–4 sections: flat tools (spatulas, turners), long tools (wooden spoons, ladles), and gripping tools (tongs, whisks). Separate silicone from metal to prevent scratching.
The Knife Drawer
If you don’t use a countertop knife block, a in-drawer knife organizer with angled slots protects blades and fingers. Cork-lined or magnetic strips work well. Never toss loose knives into a drawer — it dulls the edges and creates a safety hazard.
The Junk Drawer
Every kitchen has one, and that’s okay — just organize it. Use small clear bins to group: pens & markers, tape & glue, batteries, small tools (screwdriver, pliers), takeout menus (or better yet, photograph them and recycle the paper). Limit junk drawer contents to items you use at least monthly.
The Linen Drawer
Fold dish towels into thirds, then in half, and store them standing upright like files in a filing cabinet (the “KonMari fold”). You’ll see every towel at a glance and the drawer stays neater. Separate oven mitts and potholders to one side.
Best Drawer Organizer Products (2026)
| Product | Best For | Material | Price Range |
|---|---|---|---|
| Joseph Joseph DrawerStore | Cutlery & utensils | BPA-free plastic | $15–$25 |
| Bambu Expandable Organizer | Adjustable silverware tray | Bamboo | $20–$35 |
| OXO Good Grips Dividers | Adjustable spring-loaded dividers | Plastic & silicone | $10–$18 each |
| Wusthof In-Drawer Knife Tray | Knife storage | Beechwood | $40–$60 |
| mDesign Clear Stackable Bins | Junk drawer, small items | Clear plastic | $12–$18 (4-pack) |
| Con-Tact Non-Adhesive Liner | Drawer lining | PVC-free vinyl | $8–$12 per roll |
How to Maintain Your Organized Drawers
Organization is only valuable if it lasts. Follow the “one in, one out” rule: every time you buy a new utensil or gadget, remove an old one. Schedule a 10-minute drawer audit every 3 months — pull everything out, discard what you’re not using, and wipe down the liner.
Get your household on board by labeling sections (especially helpful for kids). When everyone knows where things go, items get returned to the right spot after dishwasher unloading.
Frequently Asked Questions
How long does it take to organize kitchen drawers?
Plan 2–4 hours for a complete kitchen drawer overhaul, including decluttering, cleaning, and installing organizers. If you tackle one drawer at a time, each takes about 15–30 minutes.
What is the best material for drawer organizers?
Bamboo is the most popular choice in 2026 because it’s durable, moisture-resistant, and looks clean. Clear plastic bins work best for small miscellaneous items because you can see contents at a glance. Avoid cardboard, which absorbs moisture and breaks down quickly in kitchens.
How do I organize kitchen drawers in a rental?
Use non-adhesive drawer liners (no residue when removed), spring-loaded dividers that don’t require screws, and freestanding organizer trays. These solutions are 100% removable and won’t damage the landlord’s cabinetry.
Should I use drawer dividers or an all-in-one tray?
For silverware, an all-in-one tray with fixed compartments works best because silverware sizes are standard. For utensil drawers, adjustable dividers are better because they accommodate oddly shaped tools. Mix both approaches across your kitchen for the best results.
How do I organize deep kitchen drawers?
Deep drawers (6+ inches) work best with vertical storage. Stand pots, lids, and cutting boards upright using tension rods or wire dividers. For utensils, use tall containers or deep dividers so items don’t pile on top of each other. Two-tier inserts that slide are also excellent for deep drawers.
What should I keep in my kitchen junk drawer?
Limit junk drawer contents to: pens, scissors, tape, a small screwdriver, batteries, a flashlight, takeout menus, and rubber bands. Everything else should have a designated home elsewhere. If it doesn’t belong in the kitchen, move it to the correct room.
Last updated: March 2026