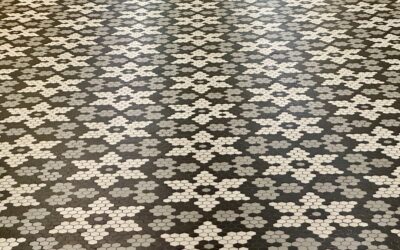
Tile demo looks like the fun part of a remodel — swing a hammer, fill a bucket — but it is where I see DIYers do the most expensive accidental damage: punctured shower pans, gouged tubs, severed pipes hidden an inch behind the wall, and drywall destroyed three feet beyond the tile line. Knowing how to remove bathroom tile properly means knowing what is behind and beneath it before the first strike, controlling the mess, and deciding upfront whether the substrate comes out with the tile or stays for reuse. A standard tub surround takes me two to four hours; a bathroom floor about the same. Here is the process, wall and floor, with the mistakes flagged before you make them.
Part of our Bathroom Remodeling & Flooring guide — explore the full guide →
First decision: save the substrate or take it all?
Tile bonded with thinset to cement board almost never releases cleanly; you will spend more hours chiseling stubborn thinset off backer than the backer is worth. So on walls, if the backer is cement board or an old mud bed, the fastest professional move is to cut the substrate into panels and remove tile and backer together, then hang fresh board. New 1/2 inch cement board costs $12 to $18 per 3×5 sheet — cheap compared to your afternoon.
The exceptions where you remove tile only: tile set on plaster or drywall with mastic (common pre-1990s), which often pops off in satisfying sheets, and floors where tile sits on a slab, since the concrete obviously stays. On wood-framed floors, tile usually comes up with its underlayment layer, leaving the structural subfloor.
Tools and setup
- 3 lb drilling hammer and a 2 to 3 inch masonry chisel or stiff bricklayer’s chisel ($25 to $40 total)
- Flat pry bar and a wide floor scraper
- Rotary hammer with a tile/chisel bit for floors ($40 to $60 daily rental if you do not own one) — the single biggest time-saver on thinset-bonded floors
- Oscillating multi-tool for cutting around valves and flanges
- Utility knife, drywall saw or recip saw for substrate cuts
- Safety: ANSI-rated glasses (non-negotiable — glazed shards fly like glass because they are glass), leather gloves, N95 or better, hearing protection, knee pads, long sleeves
- Heavy tarps, ram board or cardboard for the tub and floor path, buckets or contractor bags rated for weight, painter’s tape and plastic for the doorway
Before demo: kill water to the bathroom if any plumbing wall is involved, remove the toilet if you are doing the floor (new wax ring is $5 to $10), stuff a rag in the drain so debris cannot enter the trap, and pad the tub with a moving blanket under hardboard. A dropped tile shard chips porcelain and cast-iron enamel instantly, and tub refinishing starts around $400.
Know what is hiding behind the wall
Every tub surround has a valve wall with supply lines, and many have vents or even electrical runs in adjacent bays. Work outward from the valve trim with hand tools only — no prying deep, no recip saw plunges — until you can see where the pipes run. The same caution applies at the floor around the toilet flange and any radiant heat; if there is any chance of electric floor heat (look for a thermostat), find and disconnect it first, and assume the cable is everywhere until proven otherwise.
Removing wall tile
- Open a starting hole. Pick a spot mid-wall, ideally where a tile is already cracked or hollow-sounding. Set the chisel on a grout joint at a shallow angle and strike until a tile fractures and lifts. The first tile is always the worst.
- Work sideways, not inward. Get the chisel behind adjacent tiles at a low angle and pop them off. Striking straight into the wall is how backer boards and the drywall behind them get destroyed.
- Mastic on drywall: tiles often lever off in groups with a flat bar; the paper face of the drywall will tear, which is fine if the drywall is leaving anyway. If you hoped to keep the drywall, expect skim-coating repairs — honestly, replacing the board is usually better in a wet area anyway.
- Thinset on cement board: switch strategies. Score your cutout perimeter, locate studs, and cut the field into stud-bay-wide panels with a recip saw set shallow (blade depth barely past the board). Pry each panel off the studs, tile and all, and hump it out in one piece. Pull remaining nails or screws from the studs.
- At edges and trim: where tile meets a tub lip, drywall transition, or window, slow down and use the oscillating tool. These borders are where careless demo grows the drywall repair from zero to a full sheet.
Removing floor tile
Floors are bonded harder than walls, so lead with power. Start at a doorway edge, a heat register, or the toilet flange where you can see the assembly in cross-section — that view tells you whether tile sits on slab, on backer over plywood, or on an old 1 to 2 inch mortar bed.
- On concrete slab: run the rotary hammer with a wide chisel bit at a 30 to 45 degree angle, riding the tool under the tile. Then go back for the thinset itself — a floor scraper handles weak spots, but well-bonded thinset needs the rotary hammer with a wider scaling chisel or a rented floor grinder with a diamond cup ($60 to $90 per day) to get flat enough for new flooring.
- On backer over wood subfloor: find the backer seams, break out a strip of tile along one, then pry the backer (tile attached) off the subfloor. Screws come out; ring-shank nails fight you, so lever close to each nail. Scrape any thinset ridges off the plywood afterward.
- On an old mortar bed: this is the heavy one — a 1930s to 1970s mud floor can weigh 15 to 20 pounds per square foot. It breaks up with the drilling hammer into chunks, usually with wire mesh through it, and cuts to gloves are common. Budget double the time and double the debris bags.
Dust, debris, and disposal
Tile demo generates fine crystalline silica dust, which is a genuine respiratory hazard, not a nuisance. Wear a real respirator, tape plastic over the doorway and HVAC registers, crack a window with a fan blowing out, and mist stubborn thinset areas lightly before scraping. For debris volume, figure roughly 1 bag or bucket per 8 to 10 square feet of wall tile, more for floors with backer. A 100 square foot bathroom demo commonly produces 600 to 1,500 pounds. Options: municipal dumps take tile as clean fill or C&D waste ($30 to $80 per load), bagster-style pickup runs $150 to $250 collected, and a small dumpster is $250 to $450. Do not overload bags — 40 pounds each keeps your back and the bag intact.
After demo: set up the redo
Inspect everything the tile was hiding. On walls: check studs for water damage and mold at the tub line, confirm blocking for grab bars or a glass door while the wall is open, and replace any suspect valve now, because it will never be cheaper. On floors: check the subfloor for rot at the toilet flange (the most common find), re-screw squeaky spots, and vacuum thoroughly before assessing flatness — new tile wants the floor flat within 1/4 inch over 10 feet, and large format tighter at 1/8 inch.
Final advice from a lot of demo days: pace yourself and protect the finish surfaces you are keeping, because nearly all real demo damage happens to things that were never supposed to be part of the job — the tub, the hallway floor, the pipe you could not see. Start small and shallow until the wall or floor teaches you how it is built, then get aggressive. And if a surprise appears — active leak stains, aluminum wiring, a mortar bed where you expected backer board — stop and reassess rather than powering through. Demo is the cheapest phase of a remodel only as long as you break nothing but tile.
Prefer to explore on your own?
See how new flooring looks in your actual room in seconds — free, no signup.
Try the free Floor Studio →