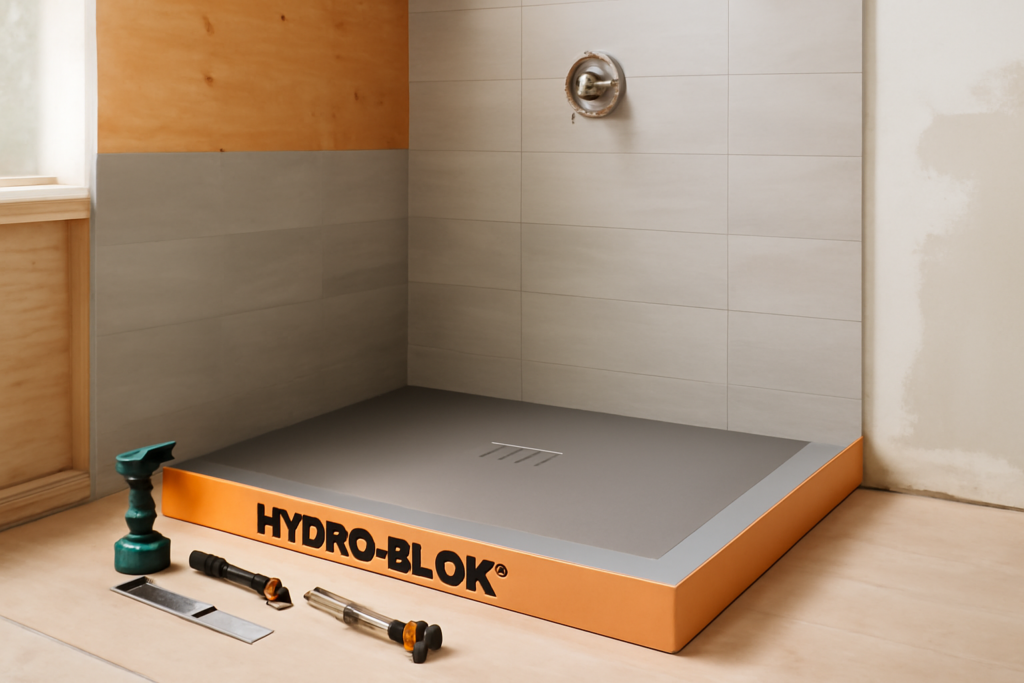
Foam shower systems used to be a premium European specialty with a premium European invoice. The hydro blok shower pan changed the conversation by delivering the same waterproof XPS foam construction as Wedi and Schluter’s trays at prices often 20 to 40 percent lower, which is exactly why it keeps showing up on contractor trucks and in DIY remodels. I have set several of these pans in full bathroom builds. Below is what the product actually is, how to install it correctly, and where it genuinely differs from the bigger names.
Construction: What You Are Buying
A Hydro-Blok pan is a one-piece base of high-density extruded polystyrene (XPS) foam, coated on both faces with a polymer-modified cement layer reinforced with fiberglass mesh. The XPS core is inherently waterproof — it cannot absorb water or rot, ever — and the cement skin gives thinset something to bond to. Slope is pre-formed at the factory at 1/4 inch per foot toward the drain, so the geometry that takes a mud-pan mason years to master comes molded in the box.
- Sizes: common footprints include 32×60, 36×36, 36×48, 36×60, 48×48, and 48×72 inches, in center-drain and offset-drain layouts
- Drain formats: standard round/square point drains bonded into the pan, plus linear drain versions along one edge
- Thickness: roughly 1 1/2 to 2 1/2 inches at the perimeter depending on model
- Compressive strength: high-density foam rated for tiled residential and commercial floors
- Weight: a 36×60 pan weighs around 15 to 20 pounds — one person carries it up the stairs without drama
- Companion parts: curbs, ready-to-tile niches, benches, and 1/2-inch wall board in the same coated-foam construction
Everything trims with a utility knife or handsaw. Cut-to-fit tolerance is the quiet advantage of every foam system: out-of-square alcoves, bowed studs, and offset plumbing all get solved with a straightedge and a blade.
Where a Foam Pan Beats Mud and Acrylic
Against a traditional mud bed, the case is speed and certainty — the pan sets in thinset in an hour, flood tests the same day, and carries no hidden PVC liner waiting to fail at the weep holes two decades from now. Against an acrylic or fiberglass base, the case is tile: foam pans exist so you can have a genuinely tiled shower floor, matched to your walls, with no plastic pan flexing and creaking underfoot and no caulk line collecting mildew where acrylic meets tile. The trade is cost and care during install; an acrylic pan shrugs off a dropped hammer, while a foam pan’s cement skin can be gouged before tile protects it.
Planning the Install
Get four things right before opening the thinset bag. Subfloor: flat within 1/8 inch over 10 feet, structurally solid, no flex — plywood, OSB, or slab all work. Drain rough-in: dry-fit the pan and confirm the 2-inch trap riser centers in the drain opening; the factory-bonded drain will not move to meet a pipe that is an inch off. Framing: pan edges should land tight to studs, with your wall waterproofing designed to lap over the pan’s edge. Sealant: buy the manufacturer’s polyurethane system sealant — plan on two or three tubes for a full shower — because every seam in the system depends on it, and generic silicone is not a structural, bondable substitute.
Step-by-Step Installation
- Dry-fit and trim. Set the pan, check drain alignment and perimeter fit, and trim edges with a saw as needed. Keep factory edges at the curb and entry where possible.
- Connect the drain. Cut the riser to the specified height and make the connection per the drain style — most Hydro-Blok point drains clamp or solvent-connect to a standard 2-inch ABS or PVC riser. Test-fit before any adhesive.
- Bed the pan. Trowel modified thinset over the entire footprint with a 1/4-inch notch — full coverage, no bare islands. Set the pan, apply body weight evenly across it, and level-check the perimeter. Voids under foam become soft spots and cracked grout later, so take this step seriously.
- Set the curb. Bond the foam curb to the pan and subfloor with sealant and thinset, then run a continuous sealant bead along the pan-curb seam.
- Tie in the walls. Install Hydro-Blok board (or your approved wall system) lapping the pan edge, fastening with gasketed stainless washers on studs, and seal every board-to-pan and board-to-board joint with the system sealant, tooled flat.
- Flood test. Plug the drain, fill to an inch, mark it, wait 24 hours. Pass this and the shower is waterproof before a single tile exists — the entire point of the system.
- Tile. Direct thinset onto the pan, same day if you like. Small-format mosaics follow the slope best; anything 4 inches and up needs back-buttering attention near the drain taper.
Sealing Rules That Decide Success
Every foam-system failure I have autopsied traces to seams, not panels. The rules: sealant at every joint, tooled so it fully wets both surfaces; gasketed fasteners only, and only above the flood line where possible; no penetrations through the pan itself, ever; and when the tile guy shows up a week later, protect the pan with a drop board because a pallet jack or dropped trowel can breach the cement skin. Small gouges are repairable with sealant or a patch of mesh and thinset — but only if someone notices them.
Hydro-Blok vs. Wedi vs. Schluter
The three-way comparison comes down to nuance, because all three are proven XPS or foam-core systems. Wedi’s Fundo line has the longest track record, the most rigorous system warranty, and the smoothest factory drain assembly — you pay for it, often $650 to $900 per pan. Schluter’s Kerdi trays are cheaper ($200 to $400) but are foam only, requiring Kerdi membrane over the tray and every wall, which adds labor and skill steps. A hydro blok shower pan typically lands between $250 and $500 with its drain included and needs no membrane, making it arguably the best value of the three on materials-plus-labor. Warranty support and distribution are the honest caveats — Wedi and Schluter have deeper dealer networks and technical support benches, while Hydro-Blok runs leaner. For a straightforward residential shower built by the book, all three end in the same place: a waterproof assembly that outlasts its tile.
Budget Snapshot
- 36×60 pan with drain: $300 to $500
- Curb: $40 to $80
- System sealant, three tubes: $60 to $90
- Wall board for a three-wall alcove: $250 to $450
- Fasteners and washers: $25 to $40
Call it $700 to $1,150 in waterproofing materials before tile — several hundred dollars under an equivalent Wedi build, and a day or more of labor under a Kerdi-membraned build. Add a ready-to-tile niche ($40 to $90) while you are ordering; cutting one in later costs more than the part.
Curbless and Linear-Drain Options
Hydro-Blok’s catalog goes beyond the standard curbed pan, and two variants deserve a mention because they solve real design problems. The curbless (zero-entry) pans are made to recess into the floor framing so the finished shower floor sits flush with the bathroom tile — the look every design magazine sells and every aging-in-place plan requires. Pulling it off means dropping the subfloor between joists or building up the surrounding floor, so involve whoever owns the framing decision early; the pan itself is the easy part. The linear-drain models move the drain to one edge and slope the entire pan in a single plane, which is what lets you run 12×24 or larger tile across a shower floor without hacking it into pie slices. Linear versions cost more — typically $450 to $800 with the drain — and the drain body’s outlet position needs to match your joist bays, so measure before ordering. Both variants follow the same install logic as the standard pan: full thinset bed, system sealant at every seam, flood test before tile. If you are already committed to a foam system, deciding between curbed, curbless, and linear at the design stage costs nothing; retrofitting that decision after the plumbing is roughed in costs plenty.
Final Word
Hydro-Blok delivers the modern foam-shower formula — molded slope, inherent waterproofing, same-day tile — at the most accessible price in the category. Its pans reward exactly the same discipline every foam system demands: full thinset coverage underneath, system sealant at every seam, and a 24-hour flood test before tile hides your work. Follow those three rules and the cheapest part of your shower to get wrong becomes the part you never think about again.