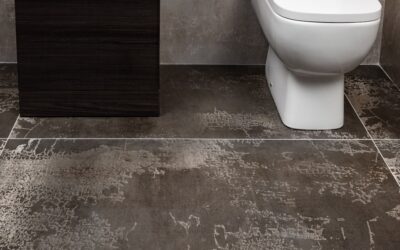
Bathrooms are small, which means even budget flooring can look great without breaking the bank, if you pick a material that handles water. Inexpensive bathroom flooring options like sheet vinyl, peel-and-stick tile, and budget LVP can cost as little as $1 to $3 per square foot while still standing up to splashes, steam, and daily traffic. This guide compares the best affordable choices, their real costs, pros and cons, and the install tips that keep moisture from ruining your savings.
Sheet Vinyl: The Budget Champion
Sheet vinyl is the most economical waterproof bathroom flooring you can buy, starting around $0.50 to $2 per square foot for material. It comes in large rolls that cover the floor in one or two seamless pieces, which means almost no seams for water to penetrate, ideal for a wet room.
Modern sheet vinyl convincingly mimics tile, stone, and wood, and it feels softer and warmer underfoot than ceramic. The main drawbacks are that it can look less premium up close and is harder to repair if gouged. For a rental, a quick refresh, or a tight budget, sheet vinyl delivers waterproof performance at the lowest possible price.
Luxury Vinyl Plank and Tile (LVP/LVT)
Budget LVP and LVT hit the sweet spot of price, looks, and durability. Entry-level products run $2 to $4 per square foot and click together as a floating floor, making them genuinely DIY-friendly. Many are 100 percent waterproof thanks to rigid or composite cores, so they shrug off bathroom moisture.
LVP gives a realistic wood look and LVT a realistic tile or stone look, both far warmer and more forgiving than ceramic. Because the planks click together, a handy homeowner can install a small bathroom in a weekend, saving on labor. Choose a product with a wear layer of at least 12 mil for good durability in a high-use bathroom.
Peel-and-Stick Vinyl Tile
Peel-and-stick vinyl tiles are the cheapest DIY option, often $0.50 to $2 per square foot, and require nothing more than a clean, flat subfloor and a utility knife. Peel the backing, press the tile down, and you can transform a small bathroom in an afternoon for under $100 in materials.
The trade-off is longevity and water resistance at the seams. Self-stick tiles work best in low-moisture half-baths and powder rooms; in full bathrooms with showers, water can creep into the seams and lift edges over time. To extend their life, seal the perimeter and seams with a clear caulk and make sure the subfloor is bone dry before installing.
Budget-Friendly Tile Options
If you want true tile on a budget, basic ceramic tile starts around $1 to $3 per square foot for the material itself, the cost driver is labor. Standard white or neutral ceramic in a simple layout keeps both material and installation costs down while delivering a hard, fully waterproof, long-lasting surface.
Tile’s downside for budget projects is installation: it requires thinset, grout, cutting tools, and skill, so DIY-ing saves money only if you are comfortable with the process. Grout also needs periodic sealing to stay water-tight. But for a permanent, waterproof floor that lasts decades, inexpensive ceramic tile is hard to beat on cost-per-year.
Comparing Your Inexpensive Options
Here is how the budget choices stack up at a glance:
- Sheet vinyl: $0.50 to $2/sq ft. Most waterproof and cheapest; lower-end looks.
- Peel-and-stick tile: $0.50 to $2/sq ft. Easiest DIY; weak at seams in wet baths.
- Budget LVP/LVT: $2 to $4/sq ft. Best balance of looks, waterproofing, and DIY ease.
- Basic ceramic tile: $1 to $3/sq ft material. Most durable and waterproof; higher install effort.
For most homeowners, budget LVP offers the best overall value, waterproof, attractive, and installable without specialized skills. For the absolute lowest cost, sheet vinyl wins; for a permanent surface, ceramic tile is the long-term play.
Install Tips to Protect Your Savings
Cheap flooring fails fast if water gets underneath, so a few steps protect your investment. Start with a clean, flat, dry subfloor, any dips or moisture will telegraph through or cause adhesive failure. Test for moisture over concrete and address leaks before laying anything.
Seal the edges. Caulk the perimeter where the flooring meets the tub, toilet, and walls so splashes cannot seep beneath. For vinyl and peel-and-stick, run a bead of clear silicone along seams in high-splash zones. Reset the toilet on a fresh wax ring after flooring is installed to keep that critical seal water-tight. Handle these details and your inexpensive bathroom floor will stay flat, dry, and good-looking for years.
Mistakes to Avoid on a Budget Project
Saving money should not mean cutting the wrong corners. The biggest mistake is installing over a damp or damaged subfloor; no flooring, cheap or expensive, survives moisture trapped underneath. Replace any soft, water-stained subfloor before laying new material. Another common error is choosing a non-waterproof product, like a wood-look laminate without a sealed core, in a full bath, where it will swell within a season.
Skipping the perimeter caulk and the fresh toilet wax ring also leads to failures that show up months later as lifting edges or sneaky leaks. And do not overlook subfloor flatness, peel-and-stick and sheet vinyl telegraph every bump and dip. A little prep and the right waterproof product make the difference between a budget floor that lasts a decade and one that fails in a year.
Getting a High-End Look for Less
Inexpensive does not have to look cheap. Wood-look and marble-look LVP and sheet vinyl mimic premium materials convincingly, especially with realistic embossing. For ceramic, splurging on a stylish grout color or laying basic white tile in a herringbone or hexagon pattern elevates an otherwise budget material into something that looks custom.
Pair your flooring with a quality bath mat, a fresh coat of paint, and updated fixtures, and even the most affordable floor reads as part of a put-together bathroom. The truth is that a small bathroom’s modest square footage lets you stretch a tight budget further than any other room in the house. Choose a waterproof, appropriately rated product, prep the subfloor properly, and seal the edges, and your inexpensive bathroom floor will be both durable and genuinely attractive for years to come.
Prefer to explore on your own?
See how new flooring looks in your actual room in seconds — free, no signup.
Try the free Floor Studio →