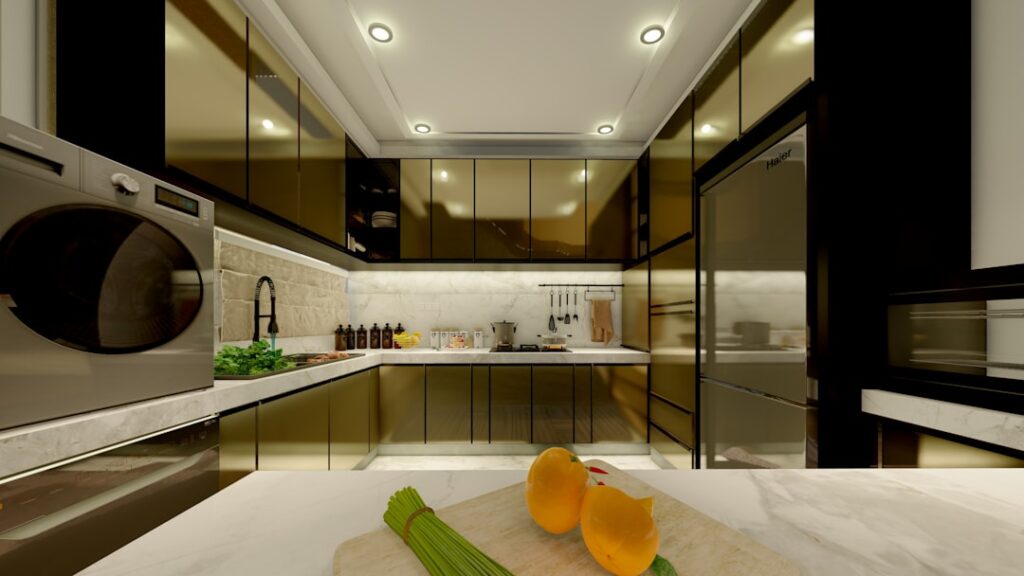
Great kitchen counter decor strikes the perfect balance between beautiful and functional. Your countertops are the most visible surfaces in your kitchen, and how you style them sets the tone for the entire space. The challenge is creating an intentional, magazine-worthy display while keeping your counters useful for daily cooking and meal prep.
- Counter Styling Principles
- The Rule of Three
- Vary Heights and Textures
- Anchor With a Tray or Board
- Follow the 30 Percent Rule
- Be Intentional About What Stays Out
- Essential Counter Decor Items
- Creating Counter Zones
- Counter Decor by Kitchen Style
- Modern and Minimalist
- Farmhouse and Rustic
- Transitional and Classic
- Coastal and Casual
- Industrial and Urban
- The Declutter-First Approach
- Using an Appliance Garage
- Seasonal Counter Styling
- Counter Decor for Small Kitchens
- Budget Counter Decor Ideas
- Frequently Asked Questions
- What should I put on my kitchen counter for decoration?
- How do I keep my kitchen counters clutter-free?
- What should not be stored on kitchen countertops?
- How do I style a kitchen counter on a budget?
- Should kitchen counter decor match?
- What is the best color for kitchen counter decor?
- How many items should be on a kitchen counter?
This guide covers proven styling strategies, essential decor groupings, organization techniques, and seasonal ideas to help you create kitchen counters that look effortlessly curated without sacrificing an inch of functionality in 2026.
Counter Styling Principles
Professional interior designers follow several core principles when styling kitchen countertops. Understanding these rules helps you create arrangements that look polished rather than cluttered.
The Rule of Three
Group items in odd numbers, preferably threes. Three objects of varying heights create visual interest and a natural focal point. A tall item (like a vase or canister), a medium item (like a bowl or plant), and a small item (like a salt cellar or decorative object) form a pleasing triangle that draws the eye.
Vary Heights and Textures
Flat arrangements look bland. Create dimension by combining tall, medium, and short items. Mix textures like smooth ceramic, rough wood, woven baskets, and metallic finishes. This variety keeps the eye moving and prevents the display from feeling monotonous.
Anchor With a Tray or Board
Placing items on a tray, cutting board, or decorative plate visually groups them into a single, intentional composition. This technique makes three or four separate items look like one cohesive vignette rather than a collection of random objects. It also makes cleaning easy since you can lift the entire display to wipe the counter.
Follow the 30 Percent Rule
Keep at least 70 percent of your counter surface clear. Only 30 percent (or less) should be occupied by decor and daily-use items. This ratio ensures you have ample workspace while maintaining a styled, finished look.
Be Intentional About What Stays Out
Every item on your counter should either be beautiful, used daily, or both. If an item is neither attractive nor used regularly, it belongs in a cabinet, drawer, or appliance garage. Edit ruthlessly.
Essential Counter Decor Items
These core items form the foundation of well-styled kitchen counters. Mix and match based on your style, needs, and available space.
| Item | Function | Style Impact | Price Range |
|---|---|---|---|
| Wooden cutting board | Prep surface, serving | Warmth, natural texture | $20 – $80 |
| Utensil crock | Tool storage | Vertical interest | $15 – $50 |
| Small potted herb or plant | Fresh herbs for cooking | Life, color, freshness | $5 – $25 |
| Salt and pepper set | Daily seasoning | Coordinated pair | $10 – $40 |
| Olive oil dispenser | Cooking essential | Refined, professional | $10 – $30 |
| Decorative tray | Grouping base | Organization, cohesion | $15 – $60 |
| Cookbook stand | Recipe display | Personal, culinary | $15 – $45 |
| Fruit bowl or basket | Produce storage | Color, organic shape | $10 – $50 |
| Canister set | Dry goods storage | Uniformity, clean lines | $25 – $80 |
| Hand soap dispenser | Hygiene | Polished detail | $8 – $25 |
The Power of Cutting Boards
A beautiful wooden cutting board is the single most impactful counter decor item. Lean one or two boards of different sizes against the backsplash for an instant styled look. Choose boards in warm wood tones that complement your cabinets and coordinate with your color scheme. They serve double duty as prep surfaces and serving boards.
Living Elements
A small potted herb plant (basil, rosemary, or thyme) or a tiny succulent brings life and freshness to any counter arrangement. Place it in an attractive pot that matches your kitchen’s color palette. If natural light is limited, choose low-light plants like pothos or a high-quality faux plant.
Functional-Decorative Items
The best counter decor items are things you use every day, displayed beautifully. Transfer olive oil into an elegant glass dispenser. Display salt in a marble pinch bowl instead of a cardboard canister. Use a handsome utensil crock instead of leaving tools loose in a drawer. These swaps cost little but elevate the entire kitchen aesthetic.
Creating Counter Zones
Dividing your counter space into specific zones keeps the kitchen organized, functional, and visually balanced.
Coffee and Beverage Zone
Group your coffee maker, a canister of beans or pods, mugs (on a small mug tree or stacked on a tray), and any sweeteners or creamers into a single area. A tray or small cutting board underneath unifies the grouping. Add a small plant or decorative element to soften the look of the appliance.
Cooking Zone
Near the stove, arrange your most-used cooking items: a utensil crock with wooden spoons and spatulas, a salt cellar, an olive oil dispenser, and a pepper mill. These items stay accessible for cooking while looking intentional. A small tray or trivet organizes them visually.
Prep Zone
Keep a clear section of counter (ideally at least 24 inches wide) completely free for food preparation. Frame this clear space with cutting boards leaned against the backsplash on one side and a fruit bowl or canister set on the other. The empty space itself becomes a design element.
Sink Zone
Style the area around your sink with a coordinated hand soap dispenser, a dish soap dispenser, and a small tray to hold them. A tiny plant or a sprig of eucalyptus in a bud vase adds charm. Keep sponges and scrub brushes in a discreet holder rather than leaving them loose on the counter.
Counter Decor by Kitchen Style
Modern and Minimalist
Keep counters nearly bare with only one or two carefully chosen items. A single oversized vase with sculptural branches, a matte black utensil crock, or a marble fruit bowl makes a statement. Choose decor in black, white, concrete, or matte metals. Store everything else out of sight.
Farmhouse and Rustic
Layer natural materials: wooden cutting boards, woven baskets, ceramic crocks, and galvanized metal accents. Display fresh or dried flowers in mason jars, prop vintage cookbooks open on a stand, and use a tiered wire basket for fruit and bread. This style embraces a collected, lived-in quality.
Transitional and Classic
Balance clean lines with warmth. A marble or brass tray anchoring a small grouping of neutral-toned canisters, a potted orchid, and a wooden cutting board creates the right tone. Metallic accents in gold or brass add sophistication without fussiness.
Coastal and Casual
Light, airy arrangements with white and natural tones dominate coastal kitchen styling. Use rattan or woven trays, white ceramic canisters, driftwood elements, and small arrangements of tropical leaves or succulents. Keep the palette to white, sand, sea glass green, and natural wood.
Industrial and Urban
Embrace utilitarian beauty with open storage, metal containers, concrete accessories, and exposed appliances in stainless steel or matte black. A magnetic knife strip, metal spice tins, and a sleek espresso machine become the decor themselves. Soften with one organic element like a potted herb.
The Declutter-First Approach
Before adding decor, remove everything from your countertops. Start with completely bare surfaces and add back only what earns its place. This process is essential for creating styled counters that function well.
Step 1: Clear everything. Remove every single item from your countertops and place them on your dining table or island. Wipe the counters completely clean.
Step 2: Sort into categories. Divide items into four groups: (1) used daily and attractive, (2) used daily but not attractive, (3) used occasionally, and (4) rarely used. Only items from group 1 should go back on the counter in their current form.
Step 3: Upgrade group 2. Items you use daily but find unattractive can be upgraded. Replace a plastic soap dispenser with a ceramic one. Transfer cooking oils into glass bottles. Swap out a cheap utensil holder for a handsome crock. Small upgrades make daily items counter-worthy.
Step 4: Store groups 3 and 4. Occasional-use items belong in upper cabinets. Rarely used items should be stored in hard-to-reach spots or donated. An appliance garage is perfect for items you use several times a week but do not want on display.
Step 5: Style what remains. With only beautiful, functional items remaining, arrange them into the zones described above using the styling principles of grouping, varying heights, and anchoring with trays or boards.
Using an Appliance Garage
An appliance garage is a cabinet section or dedicated enclosure that hides countertop appliances behind a door, keeping them accessible but out of sight. This is one of the most effective ways to maintain clean, styled counters in a working kitchen.
Common items to store in an appliance garage include toasters, blenders, stand mixers, coffee makers, and food processors. The door rolls up, swings open, or slides to reveal the appliances when needed, then closes to restore the clean counter line.
If you do not have a built-in appliance garage, you can achieve a similar effect with a large, attractive breadbox for small appliances or by dedicating a lower cabinet shelf near a counter outlet for daily-use appliances. The goal is reducing visible countertop clutter while maintaining easy access.
Seasonal Counter Styling
Refreshing your counter decor seasonally keeps the kitchen feeling current and engaging. You do not need to overhaul everything, just swap a few key elements.
| Season | Color Palette | Key Elements | Quick Swaps |
|---|---|---|---|
| Spring | Pastels, soft greens, yellow | Fresh flowers, herbs, lemons | Swap fruit bowl contents, add flowers |
| Summer | Bright whites, blues, coral | Citrus, shells, succulents | Add a bowl of limes, lighter linens |
| Fall | Warm amber, rust, cream | Pumpkins, dried wheat, candles | Swap in fall-toned towels, add gourds |
| Winter | Deep green, red, metallics | Evergreen sprigs, candles, pine cones | Add a candle, swap in evergreen sprigs |
Keep a small bin of seasonal swap items so transitioning takes just 10 minutes. The core items (cutting boards, canisters, utensil crock) stay year-round while accent pieces rotate to reflect the season.
Counter Decor for Small Kitchens
In small kitchens where counter space is precious, every item must justify its presence. Less is truly more in compact spaces.
Go vertical. Use wall-mounted racks, magnetic strips for knives, and hanging baskets to free up counter space. A wall-mounted spice rack or floating shelf near the prep area keeps essentials within reach without consuming counter real estate.
Choose multi-functional items. A beautiful cutting board serves as decor, a prep surface, and a serving piece. An attractive canister stores frequently used dry goods while looking styled. Every counter item should serve at least two purposes in a small kitchen.
Keep one focal grouping. Instead of spreading small items across limited counter space, create a single, tight vignette on a small tray. A cutting board leaned against the backsplash, a small plant, and a salt cellar on a 12-inch tray takes up minimal space while providing maximum visual impact.
Eliminate visual noise. In small kitchens, coordinate all visible items in a single color family. Matching white canisters, a white soap dispenser, and a white utensil crock create a calm, unified look that makes the space feel larger and less chaotic.
Budget Counter Decor Ideas
Creating magazine-worthy kitchen counters does not require expensive purchases. These budget strategies achieve professional results.
Repurpose what you have. A clean wine bottle filled with olive oil, a vintage teacup holding a succulent, or a stack of well-loved cookbooks instantly add character. Look at existing kitchen items with fresh eyes and consider displaying them differently.
Shop secondhand. Thrift stores, estate sales, and online marketplaces offer beautiful cutting boards, ceramic crocks, trays, and canisters at a fraction of retail prices. Vintage pieces often have more character and quality than new mass-produced alternatives.
DIY upgrades. Paint mismatched canisters a uniform color with chalk paint ($10). Replace cheap plastic soap dispensers by transferring soap into a matching glass bottle ($5). Cover unsightly appliances with simple cloth covers in your kitchen’s accent color.
Use nature. Fresh lemons in a bowl, a sprig of rosemary in a glass, or a small pot of grocery-store herbs costs under $5 and provides the most impactful counter styling possible. Natural elements add color, texture, and life that no manufactured decor can replicate.
| Budget Item | Cost | Impact |
|---|---|---|
| Fresh lemons in a bowl | $3 – $5 | Color, freshness, life |
| Potted herb from grocery store | $3 – $5 | Living element, functional |
| Thrifted cutting board | $3 – $10 | Warmth, texture, function |
| Dollar store glass bottle (for oil) | $1 – $3 | Refined, professional look |
| Coordinated dish towel | $5 – $10 | Color accent, softness |
| Small tray (thrifted) | $3 – $8 | Organization, cohesion |
Frequently Asked Questions
What should I put on my kitchen counter for decoration?
The best kitchen counter decor combines beauty and function. Start with a wooden cutting board leaned against the backsplash, add a small potted plant or herb, and include daily-use items like an attractive utensil crock and coordinated salt and pepper set. Group items on a tray for a cohesive, styled look.
How do I keep my kitchen counters clutter-free?
Follow the 30 percent rule: keep at least 70 percent of counter space clear. Store infrequently used appliances in cabinets or an appliance garage. Assign every item a home, either on the counter or in storage. Do a weekly counter reset where you return everything to its designated spot.
What should not be stored on kitchen countertops?
Avoid keeping mail, keys, paperwork, medications, rarely used appliances, open food packages, cleaning products, and plastic bags on kitchen counters. These items create visual clutter and do not contribute to the kitchen’s aesthetic. Assign each a dedicated storage spot elsewhere.
How do I style a kitchen counter on a budget?
Use what you already own by displaying beautiful bowls, wooden spoons, or cookbooks. Add a bowl of fresh fruit (under $5) and a small plant (under $5) for instant warmth. Shop thrift stores for cutting boards, crocks, and trays. Simple upgrades like transferring soap and oil into matching glass containers cost just a few dollars but create a polished look.
Should kitchen counter decor match?
Counter decor should coordinate but does not need to match exactly. Choose items within the same color family (all neutrals, all warm tones, etc.) and mix materials for visual interest. Matching sets of canisters or dispensers create order, while varied items like a wooden board next to a ceramic crock add texture and warmth.
What is the best color for kitchen counter decor?
Neutral tones (white, cream, natural wood, black) are the most versatile and create a clean, timeless look. Add one pop of color through a plant, fruit, or seasonal accent. If your kitchen has a strong color (blue cabinets, green tile), choose counter decor in neutral tones that complement rather than compete with the existing palette.
How many items should be on a kitchen counter?
For a standard kitchen with 15 to 25 linear feet of counter space, aim for two to three small groupings of three to five items each, plus any necessary appliances. Each grouping should be anchored on a tray or board. The spaces between groupings are just as important as the groupings themselves.
Last updated: March 2026