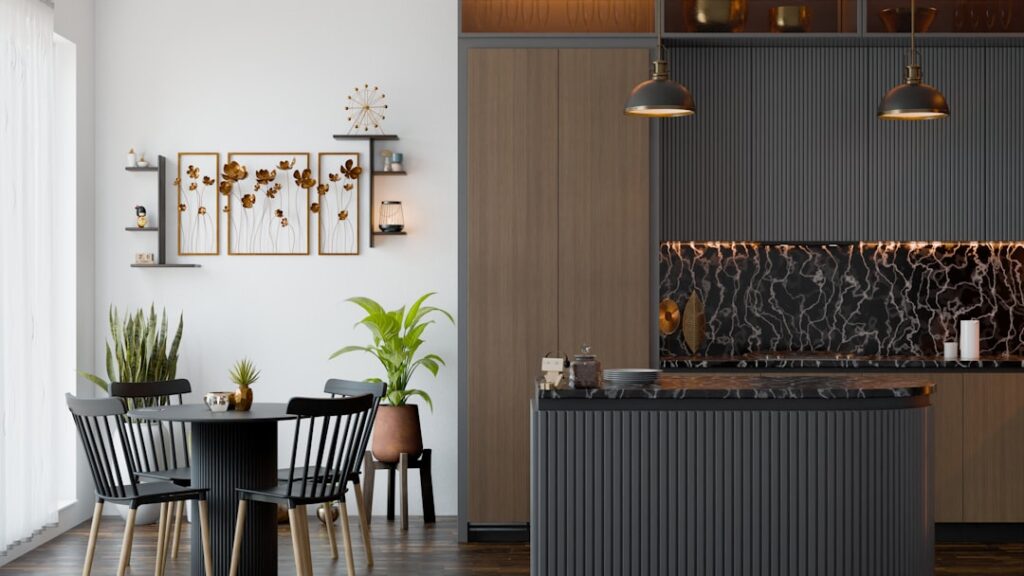
A kitchen island is prime real estate, and how you outfit it determines whether it becomes a clutter magnet or the most functional workhorse in the room. Smart kitchen island storage combines deep drawers, well-planned cabinets, and purpose-built inserts to keep everyday items within arm’s reach of your prep and cooking zones. Whether you are building a new island or retrofitting an existing one, the goal is to match storage type to what you actually use, then organize the interiors so nothing gets buried. This guide covers the layouts, dimensions, and inserts that make an island earn its footprint.
- Understanding Island Dimensions
- Drawers vs. Cabinets
- High-Value Interior Inserts
- Storage for Seating Islands
- Specialty Storage Zones
- Double-Sided and Waterfall Islands
- Organizing to Keep It Functional
- Budget and Build Considerations
- Open Shelving and Display Storage
- Combining Storage With Other Island Functions
- Storage Mistakes to Avoid
Understanding Island Dimensions
Before planning storage, know your working numbers. A standard island is 36 to 42 inches tall to match countertop height and typically 24 to 42 inches deep. Base cabinets are 24 inches deep, so an island wider than that leaves a gap you can fill with an overhang for seating or a second row of shallow cabinets accessed from the far side. You need at least 36 to 42 inches of clearance around the island for comfortable traffic, and 42 to 48 inches if it borders a work zone with appliances that open outward.
Drawers vs. Cabinets
The single biggest storage decision is drawers versus doors. Each has a clear best use.
- Deep drawers pull the contents out to you, so nothing hides in the back. They excel for pots, pans, mixing bowls, and even dishes on peg systems.
- Cabinets with doors are better for tall or bulky items like stand mixers, stock pots, and small appliances, and they cost less per linear foot.
- A mix is ideal: a stack of drawers on the cook’s side and a cabinet bay for large gear.
Full-extension, soft-close slides rated for 75 to 100 pounds are worth the upgrade on any drawer holding heavy cookware.
High-Value Interior Inserts
Empty cabinet boxes waste vertical space. Inserts multiply capacity and keep things tidy.
- Pull-out trash and recycling bins hide waste and free counter space; a dual 35-quart pull-out is a kitchen staple.
- Deep-drawer peg organizers hold plates and bowls upright and keep them from sliding.
- Roll-out trays in door cabinets bring back-of-shelf items forward.
- Vertical tray dividers store baking sheets, cutting boards, and platters on edge.
- Knife blocks and spice inserts in shallow top drawers keep tools by the prep zone.
Storage for Seating Islands
Islands with an overhang for stools sacrifice some cabinet depth, but you can still capture storage on the seating side. A 12-inch overhang gives comfortable knee room while leaving a shallow run of cabinets on the back for cookbooks, table linens, or a wine rack. Open shelving or cubbies under the overhang are a popular way to display baskets and add a decorative layer without eating into your main storage on the working side.
Specialty Storage Zones
Islands are the perfect place to consolidate specific functions that would otherwise clutter perimeter cabinets.
- Baking station: Group a mixer lift, flour and sugar canister drawers, and sheet-pan dividers.
- Coffee or beverage bar: A dedicated drawer for pods, mugs on pull-outs, and a cabinet for the machine.
- Prep and knife zone: Cutting-board slots, a compost pull-out, and knife storage all within one step.
- Appliance garage: A cabinet with an outlet inside keeps the blender or toaster plugged in and hidden.
Double-Sided and Waterfall Islands
Large islands can store from both sides, effectively doubling capacity. Plan the working side for cookware and waste, and the far or seating side for less-frequent items and display. If your island exceeds 42 inches deep, back-to-back cabinets meet in the middle with no wasted core. On waterfall-countertop islands where stone wraps the ends, remember that the finished panels limit access to end-facing storage, so plan those cabinets to open from the long sides.
Organizing to Keep It Functional
Even a perfectly built island fails if the contents are chaotic. Apply a few organizing rules:
- Store by zone, not by category: Keep items where you use them. Mixing bowls belong by the prep counter, not across the room.
- Reserve prime drawers for daily items; relegate seldom-used gear to lower or far-side cabinets.
- Use dividers and bins so items have a home and loose clutter cannot accumulate.
- Leave breathing room: Overpacked drawers jam and discourage you from putting things back.
Budget and Build Considerations
Retrofitting existing cabinets with pull-outs and drawer organizers is the cheapest upgrade, often $30 to $150 per insert. A new stock island cabinet runs $500 to $1,500, while semi-custom islands with premium drawer hardware and specialty inserts range from $2,500 to $7,000. If you are ordering new, prioritize spending on full-extension soft-close slides, a trash pull-out, and at least one deep drawer bank, because those features deliver the most daily value. An electrical outlet in the island, required by code in many new installs for the countertop, also lets you add an appliance garage or charging drawer.
Open Shelving and Display Storage
Not all island storage needs doors. Open shelving and cubbies add function and personality, especially on the ends and seating side where deep cabinets are impractical. Consider how you balance open and closed storage:
- End cubbies are perfect for cookbooks, decorative baskets, or a row of woven bins that hide clutter while looking intentional.
- Open lower shelves keep frequently grabbed items like large serving bowls or a stand mixer visible and reachable.
- Wine cubbies or a small rack tuck bottles into otherwise unused thickness.
- Plate rails and hooks on the side can hold everyday dishware or hanging utensils.
The trade-off is that open storage shows everything, so reserve it for items you keep tidy and use display-worthy containers for the rest.
Combining Storage With Other Island Functions
An island rarely does just one job, and storage has to coexist with cooktops, sinks, and prep zones. When your island houses a sink, the cabinet below loses a drawer bank to plumbing, so plan a tilt-out tray for sponges and a pull-out for cleaning supplies to reclaim that space. If a cooktop sits in the island, the cabinet beneath typically becomes a deep drawer for pots directly under where you cook, the most efficient placement possible. For islands with a downdraft vent or built-in microwave drawer, map out the mechanical footprint first, then fit storage around it. The goal is to let each function claim the storage that serves it best rather than forcing generic cabinets everywhere. Thinking through these adjacencies during planning prevents the frustration of storing pot lids three steps from the pots.
Storage Mistakes to Avoid
Even well-intentioned island plans go wrong in predictable ways, and knowing the pitfalls helps you sidestep them:
- All doors, no drawers: Relying only on door cabinets buries cookware in the back where it is hard to reach.
- Ignoring the corners: Deep islands create dead corners unless you plan pull-outs or access from both sides.
- Forgetting waste storage: Leaving out a trash and recycling pull-out means bins clutter the floor nearby.
- No outlet: Skipping an island outlet rules out an appliance garage or charging drawer, and new code often requires one anyway.
- Overloading seating-side depth: Cramming cabinets behind a seating overhang leaves no knee room, making stools unusable.
Catching these during the planning stage costs nothing, while fixing them after the island is built is expensive and disruptive.
Great kitchen island storage comes down to matching the right container to the right task and keeping it close to where the work happens. Start from your island’s real dimensions, favor deep drawers for cookware and cabinets for bulky gear, then multiply capacity with pull-outs, dividers, and purpose-built zones for baking or coffee. Reserve your best-reaching drawers for daily items and give everything a defined home. Do that, and your island stops being a place clutter lands and becomes the organized, efficient heart of the kitchen it was meant to be.