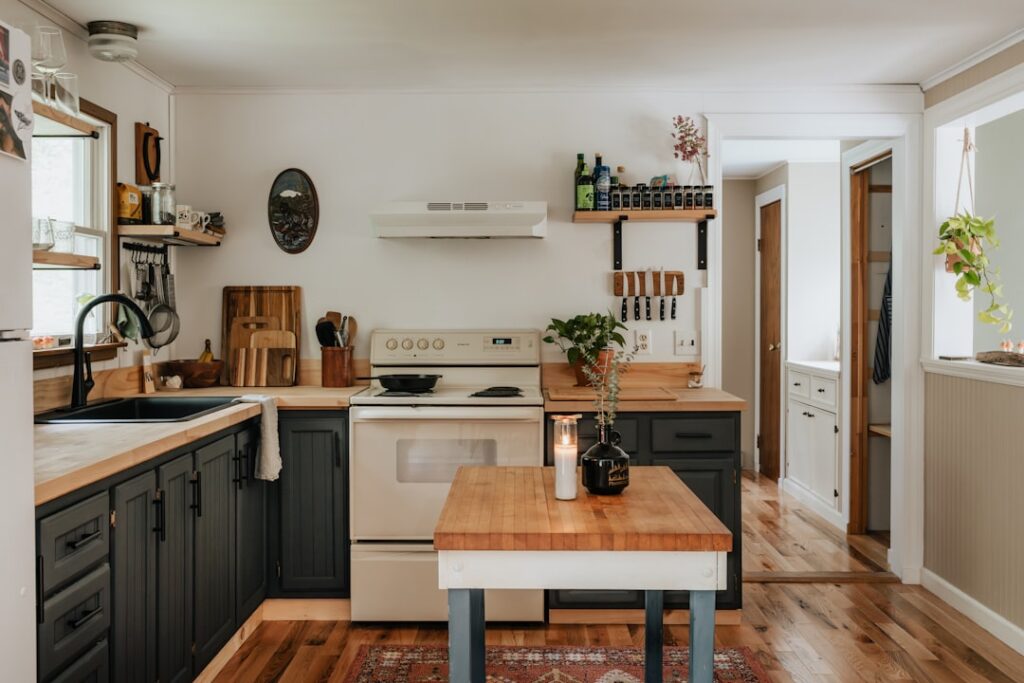
The biggest mistake I see homeowners make is assuming a kitchen redo means ripping the room down to the studs. It rarely does. A full gut renovation runs $30,000 to $60,000 in most markets, yet a well-planned cosmetic refresh that keeps the existing layout can transform the same kitchen for $3,000 to $8,000. The trick is knowing which pieces carry the visual weight and which ones are just eating your budget. After two decades of remodeling work, I can tell you the cabinets, counters, and lighting do about 80 percent of the heavy lifting.
- Decide Between a Refresh and a Full Remodel
- Set a Realistic Budget and Split It Correctly
- Refresh the Cabinets Without Replacing Them
- Choose Counters That Fit the Budget
- Update the Backsplash and Hardware
- Lighting Changes the Whole Feel
- Follow the Right Order of Work
- Where to Splurge and Where to Save
- Don't Overlook the Sink and Faucet
- Small Touches With Big Impact
- Timeline and Living Through It
This guide walks you through a refresh that skips the demolition dumpster. You keep your cabinet boxes, your plumbing rough-in, and your floor plan, then spend money only where it shows.
Decide Between a Refresh and a Full Remodel
Before you buy a single thing, be honest about what actually bothers you. If the layout works, if the sink is where you want it, and if the cabinet boxes are structurally sound, you are a candidate for a refresh. If you are tripping over an island that is too big or the fridge blocks a walkway, no amount of paint fixes that, and you need a real remodel.
Pull open a cabinet door and check the box itself. Particleboard boxes that have swelled from a leak are done. Solid plywood or MDF boxes in good shape can take new doors and paint for another 15 years. That single inspection decides whether you spend $1,200 refacing or $12,000 replacing.
Set a Realistic Budget and Split It Correctly
For a cosmetic redo, I hand clients a rough allocation that keeps them from blowing the whole budget on countertops before they reach the paint aisle. On a $6,000 project, a workable split looks like this:
- Cabinet refresh (paint or reface): $1,500 to $2,500
- Countertops: $1,500 to $2,500 for a small kitchen
- Backsplash: $400 to $800
- Hardware and faucet: $300 to $600
- Lighting: $250 to $600
- Paint and supplies: $200 to $400
Hold back 10 to 15 percent as a contingency. In an older home, you will almost always find something behind the backsplash or under the sink that eats a few hundred dollars.
Refresh the Cabinets Without Replacing Them
Cabinets set the tone of the room, and you have three tiers of refresh. Painting is the cheapest at $200 to $500 in materials if you do it yourself. The work is in the prep, not the brushing. Degrease every surface with a TSP substitute, scuff-sand with 220-grit, prime with a bonding primer like a shellac-based product, and finish with two coats of a cabinet-grade enamel. Rushing the prep is why 90 percent of DIY cabinet paint jobs peel within a year.
Refacing is the middle tier at $1,000 to $4,000. You keep the boxes but install new doors, drawer fronts, and a matching veneer on the exposed frames. It gives you the look of new cabinets for roughly a third of the cost. The top tier, replacing doors with new custom fronts while keeping the boxes, splits the difference and lets you switch to a slab or shaker style.
Choose Counters That Fit the Budget
Countertops photograph like the star of the room, so people overspend here. For a small kitchen with 30 to 40 square feet of counter, you have good options at every price. Laminate has come a long way and runs $15 to $40 per square foot installed. Butcher block lands around $40 to $70 and warms up a white kitchen. Prefabricated quartz or granite in stock colors runs $50 to $80 installed, while full custom slabs push past $100.
If you want stone but not the price, ask fabricators about remnant pieces. A small kitchen or a bathroom-sized run can often be cut from a leftover slab another client paid for, cutting your stone cost by 30 to 50 percent.
Update the Backsplash and Hardware
A backsplash is the single best return on a small dollar amount. A classic 3-by-6-inch white subway tile costs under $3 per square foot, and a typical backsplash is only 25 to 30 square feet. If you have never set tile, peel-and-stick options exist, but real ceramic on a proper thinset bed looks better and lasts decades.
Hardware is the jewelry of the kitchen. Swapping tired brass knobs for matte black or brushed nickel pulls costs $2 to $6 per piece and takes an afternoon. Standardize on 3-inch or 96-millimeter pulls for drawers and a simple knob for doors, and use a template so every hole lines up.
Lighting Changes the Whole Feel
Dark kitchens feel dated no matter how nice the finishes are. Under-cabinet LED strips are the biggest upgrade for the money, running $50 to $150 for a small kitchen and eliminating the shadows that fall across your counter. Swap a single dome fixture for two or three recessed cans or a pendant over the sink, and choose 3000K to 3500K bulbs for a warm but crisp light. Cooler than 4000K starts to feel like an office.
Follow the Right Order of Work
Sequence matters more than most DIYers realize, because doing steps out of order means redoing them. Here is the order I run a refresh:
- Clear and demo only what is leaving, such as the old backsplash or counters.
- Handle any plumbing or electrical rough-in changes while walls are open.
- Paint the walls and cabinets before counters go in, so drips do not land on new stone.
- Install countertops and the sink.
- Set the backsplash tile, then grout.
- Mount hardware, the faucet, and lighting last.
Working top to bottom and dirty to clean keeps you from damaging finished surfaces. Never install a fresh backsplash before your countertop, because the counter is the ledge the first tile row rests on.
Where to Splurge and Where to Save
After hundreds of these projects, my advice is consistent. Splurge on the faucet, the counters you touch every day, and quality paint, because those take daily abuse. Save on trendy open shelving, specialty tile you will tire of, and high-end appliances if your current ones still run well. A $1,200 range that works is not worth replacing during a $6,000 refresh just because it is not stainless.
Plan your kitchen redo around what you actually use, budget honestly, and respect the order of work. Do that, and a weekend-and-a-few-evenings project delivers a room that looks like it cost three times what you spent.
Don’t Overlook the Sink and Faucet
The sink zone gets used more than any other spot in the kitchen, yet it is often the last thing people think about in a refresh. Swapping a tired chrome faucet for a pull-down model in matte black or brushed nickel costs $120 to $300 and changes the whole feel of the room the moment you touch it. If your existing drop-in sink is scratched and dull, an undermount stainless or a composite granite sink runs $150 to $400 and reads as a real upgrade. Just confirm your countertop can accept an undermount before you buy one, because a laminate top cannot support it. A new sink strainer and a modern soap dispenser are five-dollar details that finish the zone.
While you are there, look under the sink. A refresh is the right time to replace corroded shutoff valves and a leaky P-trap, because you have the cabinet open anyway. Spending $30 on new quarter-turn valves now saves a flooded cabinet later.
Small Touches With Big Impact
Some of the highest-return moves in a kitchen redo cost almost nothing. Fresh caulk where the counter meets the backsplash instantly makes an old kitchen look maintained. New switch plates and outlet covers in a consistent color remove the mismatched-builder look for a couple of dollars each. A roll of quality shelf liner tidies the inside of cabinets, and a single open shelf styled with a few pieces reads as intentional design. Even changing the window treatment from a dated valance to a simple Roman shade shifts the room’s whole era.
Paint the walls a warm neutral to tie the new elements together, and do not forget the ceiling; a bright white ceiling makes the whole room feel taller and cleaner. These finishing touches are what push a refresh from “the cabinets look nicer” to “did you remodel the whole kitchen.”
Timeline and Living Through It
Plan a cosmetic redo as a series of evenings and a couple of weekends rather than one marathon. A realistic schedule looks like a weekend for cabinet prep and paint, a day for the countertop install once the fabricator delivers, an evening for the backsplash and a second for grouting, and a final evening for hardware, the faucet, and lighting. Because you are not gutting the room, you can keep cooking through most of it, though expect the sink to be out of service for a day when the counters swap. Order everything before you start so you are not stalled waiting on a back-ordered faucet with your old one already removed.