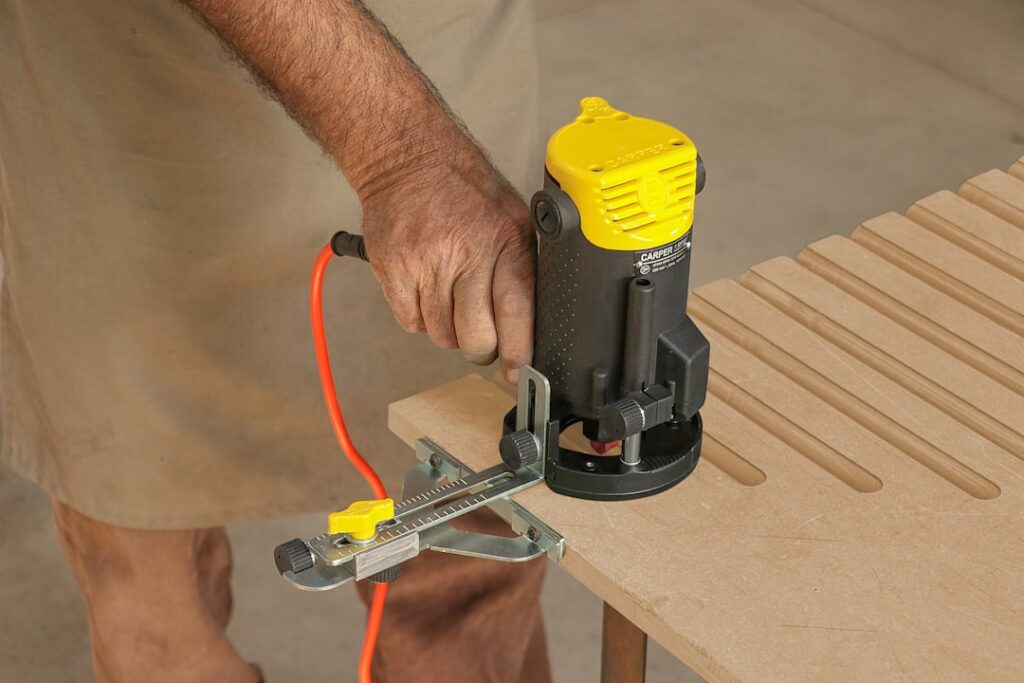
Whether you are trimming plastic laminate on a countertop or shaping the edges of a laminate project, the right cutting tool determines the quality of your finished edge. A dedicated laminate router bit is engineered to trim excess laminate flush to a substrate or add a clean beveled edge without chipping, burning, or leaving a rough line. Understanding the types available and how to use them properly is the key to professional-looking results. This guide breaks down the bit types, features to look for, and the techniques that yield smooth, precise edges every time.
- What a Laminate Router Bit Does
- Common Types of Laminate Router Bits
- Understanding Bearings and Cutting Edges
- Choosing the Right Bit for Your Project
- Tools and Setup for Trimming Laminate
- How to Use a Laminate Router Bit
- Common Mistakes and How to Avoid Them
- Maintaining Your Laminate Router Bits
- Alternatives to a Router for Trimming Laminate
- Achieving Clean Laminate Edges Every Time
Anyone who has laminated a countertop or built a cabinet knows that the surface itself is only half the job; the edges are where a project either looks professionally finished or betrays its amateur origins. A ragged, overhanging strip of laminate can undo hours of careful work, while a crisp, flush edge makes even a first attempt look like it came from a shop. The tool responsible for that transformation is the laminate router bit, a deceptively simple cutter that, used correctly, produces clean edges with remarkable consistency. Choosing the right bit and mastering a handful of techniques is far less complicated than it may seem, and the payoff in quality is immediate and lasting. Because laminate is abrasive and unforgiving of dull or poorly guided cutters, understanding what separates a good bit from a poor one, and how to keep it running smoothly, is well worth a little study before you begin. With that knowledge in hand, you can approach any laminate trimming task with confidence, so let us start by looking at exactly what this specialized bit is designed to do.
What a Laminate Router Bit Does
A laminate router bit is a specialized cutter designed primarily for trimming plastic laminate, the thin decorative surface glued to countertops, cabinets, and furniture. After laminate is bonded to a substrate with slight overhang, the router bit rides along the substrate edge and shears away the excess for a perfectly flush or beveled result. Most laminate bits feature a small guide bearing at the tip or shank that follows the edge of the material, ensuring the cutter removes only the overhang while leaving the substrate untouched. This bearing-guided design is what makes clean, repeatable edges possible.
Common Types of Laminate Router Bits
Several bit profiles handle different laminate trimming tasks, and choosing the right one depends on the edge you want to create.
- Flush trim bit: Cuts the laminate perfectly even with the substrate for a square edge.
- Bevel trim bit: Cuts the edge at an angle, commonly 22 or 25 degrees, for a chamfered look and to relieve sharp corners.
- Combination bit: Offers both flush and bevel cutting, sometimes with interchangeable bearings.
- No-file bevel bit: Leaves a slight gap so the edge needs no hand filing afterward.
Understanding Bearings and Cutting Edges
The guide bearing is central to how a laminate router bit performs. A bearing at the tip follows the substrate below the laminate, while designs with bearings positioned differently suit various setups. The bearing must spin freely and stay clean of adhesive buildup, since a sticky or seized bearing can mar the edge or burn the laminate. The cutting edges, or flutes, are typically carbide for durability against the abrasive laminate surface. Two-flute and multi-flute designs balance cutting speed with smoothness, with more flutes generally producing a finer finish.
Choosing the Right Bit for Your Project
Selecting the best laminate router bit depends on your specific task and tools. First, decide whether you need a flush edge, a decorative bevel, or both, which points you toward a flush trim, bevel, or combination bit. Match the bit’s shank size to your router collet, commonly 1/4 inch for trim routers and laminate work. Prioritize solid carbide cutting edges for longevity, since laminate quickly dulls lesser steel. If you plan frequent laminate work, a combination or no-file bevel bit offers versatility and reduces finishing time. Buying a quality bit upfront pays off in cleaner cuts and longer life.
Tools and Setup for Trimming Laminate
Getting a clean result requires more than just the bit. A compact trim router, also called a laminate trimmer, is the ideal tool because its small size gives excellent control along edges. Before cutting, ensure the laminate adhesive is fully cured and the overhang is consistent. Set the bit depth so the bearing rides cleanly against the substrate. Gather these essentials before starting:
- A trim router or compact router with a matching collet.
- The appropriate carbide laminate bit, flush or bevel.
- Safety glasses and hearing protection.
- A flat file for softening edges if using a standard bevel bit.
- A clean cloth to keep the bearing free of adhesive.
How to Use a Laminate Router Bit
Proper technique produces smooth, chip-free edges. Secure your workpiece so it cannot shift, then set the router to full speed before making contact. Move the router in the correct direction, generally left to right along the near edge, so the bit’s rotation pulls it against the material rather than away. Keep the bearing firmly against the substrate edge and maintain a steady, moderate feed rate; moving too slowly can burn the laminate, while rushing can chip it. Make one continuous pass where possible, and clean the bearing periodically to prevent glue buildup that spoils the cut.
Common Mistakes and How to Avoid Them
A few pitfalls can ruin an otherwise good job. Feeding the router in the wrong direction causes the bit to grab and chip the edge, so always confirm your direction first. Letting the bearing gum up with contact adhesive leads to burn marks and uneven cuts, so wipe it clean regularly. Setting the bit depth incorrectly can cut into the substrate or leave uncut laminate. Dull bits tear rather than shear, so replace worn carbide promptly. Finally, forgetting to file or ease a sharp beveled edge leaves a line that can lift or cut, unless you use a no-file design.
Maintaining Your Laminate Router Bits
A well-maintained bit cuts cleaner and lasts far longer, so a little care pays real dividends. The biggest enemy of a laminate router bit is contact adhesive, which builds up on the cutting edges and bearing and causes burning and rough cuts. After each session, clean the bit with a dedicated pitch-and-resin remover or a citrus-based cleaner, using a soft brush to work residue out of the flutes and bearing. Never scrape carbide edges with metal tools, which can chip them. Check that the bearing still spins freely and add a drop of light oil if it feels stiff, replacing the bearing if it seizes. Store bits so their cutting edges do not knock against other tools, ideally in a case or a block with individual slots. Inspect the carbide periodically and replace any bit that has chipped or dulled, since a worn bit tears laminate instead of shearing it cleanly.
Alternatives to a Router for Trimming Laminate
While a router with the right bit is the gold standard, a few alternatives exist for smaller jobs or when you lack a router. A laminate file lets you hand-trim small overhangs, though it is slow and best for touch-ups. A specialized laminate slitter or trimmer tool scores and snaps thin edges. For rough removal before final trimming, a fine-tooth handsaw or a utility knife with a straightedge can remove the bulk of the overhang.
- A laminate file for slow, precise hand-trimming of small edges.
- A dedicated slitter tool for scoring thin overhangs.
- A utility knife and straightedge for rough pre-trimming.
Achieving Clean Laminate Edges Every Time
Mastering the laminate router bit transforms rough, overhanging laminate into crisp, professional edges that look factory-made. Choose the right profile for your project, whether a flush trim for square edges or a bevel for a softened chamfer, and invest in a durable carbide bit with a smooth-running bearing. Pair it with a compact trim router, keep the bearing clean, feed in the correct direction at a steady pace, and finish sharp edges as needed. With the proper bit and technique, you will produce clean, chip-free results on every laminate project you tackle.
Prefer to explore on your own?
See how new flooring looks in your actual room in seconds — free, no signup.
Try the free Floor Studio →