A full wall of shelves does something no single bookcase can: it turns storage into architecture. A well-executed living room bookshelf wall gives a room a custom, high-end feel, adds enormous storage and display space, and can frame a fireplace, a TV, or a doorway into a focal point. The good news is you do not need a custom cabinetmaker’s budget to get that look. With smart planning and a few proven techniques, you can build a floor-to-ceiling wall of shelving that reads as built-in for a fraction of the cost. Here is how to plan, build, and style one.
Deciding on the Right Approach
There are three broad routes, and your budget and skill level point you to one. Fully custom built-ins from a carpenter deliver a flawless integrated look but often run $2,000 to $10,000 or more for a wall. True DIY built-ins, where you frame the shelving with plywood and finish it with trim, cost far less, typically $400 to $1,500 in materials, and reward moderate woodworking skills. The third route, and the most accessible, is a hack: combining affordable stock bookcases, like IKEA Billy units, and dressing them with trim to look built-in.
For most homeowners, the IKEA-hack approach delivers 90 percent of the custom look for 20 percent of the cost. Standard bookcases provide the boxes and shelves; you provide the integration by scribing them to the wall, closing the gaps with trim, and adding a crown and baseboard so they blend into the room. Decide upfront which route fits your budget and ability before buying anything.
Planning the Layout and Proportions
Good bookshelf walls are all about proportion. Measure your wall precisely, floor to ceiling and corner to corner, and sketch the layout to scale before you buy. If you are flanking a fireplace or TV, plan symmetrical columns on each side for balance. A common and pleasing arrangement is a grid of equal cubbies or a mix of taller and shorter openings that create rhythm.
Standard shelf depth for a living room display wall is 11 to 12 inches, which holds books, baskets, and decor comfortably without eating too much floor space; deeper 16-inch sections work if you want to house a TV or bulky items. For open shelf spacing, 12 to 15 inches of vertical clearance suits most books and objects, while a taller 16-to-18-inch bay accommodates large art books or baskets. Mixing a few larger openings among standard ones keeps the wall from looking like a monotonous grid and gives you flexibility for oversized items.
Making Stock Bookcases Look Built-In
The magic of the hack is in the details that erase the “furniture” look. Start by removing the baseboard along the wall so the cases sit flat against it, then anchor each bookcase securely to the wall studs; this is non-negotiable for safety, since a tall loaded bookcase can tip. Push the units together and, if the ceiling or wall is uneven, scribe and trim the sides so they meet the wall cleanly with no visible gap.
Then dress the assembly as one piece. Add a strip of trim or a filler panel over the seams between units so they read as continuous. Run crown molding across the top to close the gap to the ceiling and a new baseboard along the bottom to match the room’s trim. Cap open toe-kicks and add a face-frame or decorative vertical trim over the front edges of the cases to hide the individual bookcase sides. Finally, paint the whole assembly, trim and cases together, one color, ideally matching or complementing your wall trim. A unified paint color, more than anything, is what convinces the eye it is a single built-in structure.
Building True DIY Built-Ins
If you have the tools and want a fully custom result, framing your own is very achievable. Build a base platform (a simple 2×4 frame) to lift the unit off the floor and align it with the room’s baseboard height, then construct the shelving boxes from 3/4-inch plywood, finishing the visible front edges with iron-on veneer or a hardwood face frame to hide the plies.
Use adjustable shelf pins or a dado system so shelves can move; fixed shelves at least at the midpoint add rigidity to tall units. Anchor everything to studs, then integrate with the room using the same crown, baseboard, and trim techniques. Prime and paint, or stain if you used a nicer plywood. The payoff of DIY built-ins is a truly seamless, wall-to-wall, floor-to-ceiling result sized exactly to your space, and material costs stay modest even for a large wall.
Styling the Finished Wall
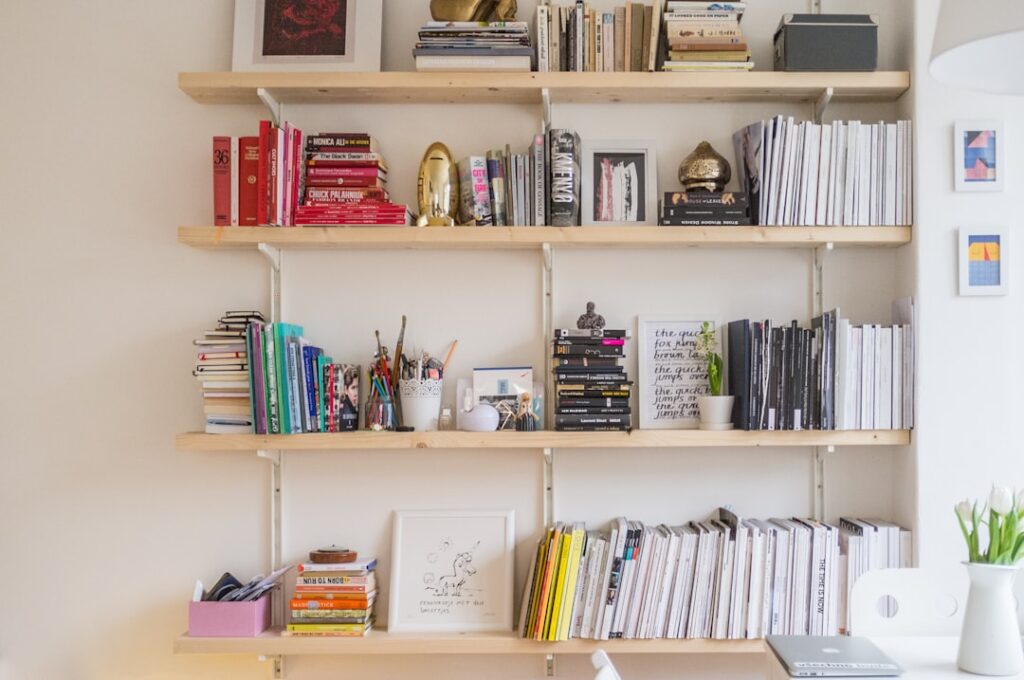
A bookshelf wall is only as good as how it is styled, and a common mistake is packing every shelf tightly with books spine-out. Instead, aim for a curated mix. Combine vertical stacks of books with a few horizontal stacks, and leave deliberate negative space so the eye can rest. Group objects in odd numbers, threes and fives, which reads as more natural than pairs.
Vary heights and textures: mix in framed art, ceramics, plants, baskets for hidden storage, and a few larger statement pieces to anchor the composition. Use baskets or closed boxes on lower shelves to conceal clutter like remotes and games. Consider adding puck lights or an LED strip along the underside of some shelves to highlight display items in the evening. Repeat a color or two throughout the wall for cohesion. The goal is a collected, layered look rather than either a sterile showroom or an overstuffed jumble.
Incorporating a TV or Fireplace
Many bookshelf walls are built around a focal point, and the two most common are a television and a fireplace. For a TV, plan a central bay wide and deep enough to house it with a few inches of clearance on each side, and think about cable management before you build: run a recessed power outlet and a low-voltage conduit behind the TV location so cords disappear into the wall rather than dangling. A bay depth of 16 inches or more accommodates most media components, and open or vented backs prevent heat buildup on electronics.
Flanking a fireplace calls for symmetry, with matching shelf columns on each side and, often, a heavier horizontal element, like a mantel or a run of cabinetry, tying them together across the top. Keep flammable items and the shelving structure itself a safe distance from the firebox per your fireplace’s clearance requirements, and use non-combustible materials near the opening. In both cases, designing the focal point first and building the shelving to frame it produces a far more intentional result than adding shelves around an afterthought.
Lighting the Display
Lighting is the detail that separates a flat, ordinary shelf wall from one that looks professionally designed, and it is inexpensive to add. Battery-powered or hardwired LED puck lights mounted under the top of each bay wash light down over the displayed objects, while continuous LED strip lighting run along the underside of shelves creates an even glow and highlights books and art. Warm-white strips around 2700K to 3000K flatter a living room; cooler tones feel more commercial.
For the cleanest look, plan lighting during the build so you can conceal the strips behind a small lip on the front edge of each shelf and hide the wiring inside the cabinet structure, routing it to a single outlet or a smart plug for remote control. Even simple stick-on rechargeable puck lights, added after the fact, make a noticeable difference on a few key display shelves. Layer this accent lighting with the room’s main lighting rather than relying on it alone, and the wall becomes a genuine feature after dark as well as by day.
Budget, Safety, and Common Pitfalls
An IKEA-hack wall using several Billy bookcases plus trim and paint typically lands between $500 and $1,200 depending on width, a huge saving over custom work. Whichever route you choose, the biggest safety issue is tip-over: always anchor tall shelving to wall studs with the included brackets or L-brackets, especially in homes with children.
Avoid a few common pitfalls. Do not skip measuring for outlets and switches; plan cutouts so you do not cover them, or relocate them before building. Do not neglect the ceiling gap and toe-kick, since those unfinished edges are what give a hack away. And resist overloading shelves beyond their rated capacity, which causes sagging on long spans; keep book-laden shelf spans to about 30 to 36 inches between supports for 3/4-inch material, adding a center divider for longer runs.
The Bottom Line
A living room bookshelf wall transforms a plain room into one with real architectural character, and it is well within reach of a determined DIYer. Plan the proportions carefully, choose between custom built-ins and an affordable stock-bookcase hack based on your budget and skills, and obsess over the integration details, scribing, trim, crown, baseboard, and a single unifying paint color, that make furniture read as built-in. Anchor everything for safety, style the shelves with a curated, layered mix, and you will have a feature wall that looks like it cost far more than it did.