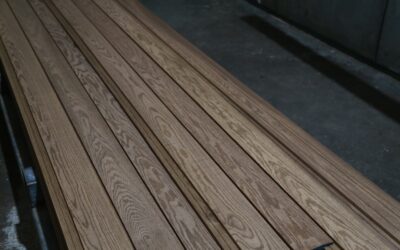

Loose lay vinyl flooring is the easiest-to-install vinyl option on the market. Unlike click-lock planks that interlock at the edges or glue-down vinyl that requires adhesive, loose lay vinyl simply rests on the subfloor held in place by its own weight, a friction-grip backing, and the pressure of the walls and baseboards around the room’s perimeter.
This unique installation method makes loose lay vinyl the fastest flooring to install and, just as importantly, the easiest to remove and replace when it is time for a change. In this guide, we cover how loose lay vinyl works, its advantages and drawbacks, installation tips, costs, and how it compares to other vinyl formats. For a broader look at vinyl options, see our vinyl flooring guide.
- How Loose Lay Vinyl Flooring Works
- Benefits of Loose Lay Vinyl Flooring
- Drawbacks of Loose Lay Vinyl Flooring
- Loose Lay vs. Click-Lock vs. Glue-Down Vinyl
- Installation Tips for Loose Lay Vinyl
- Cost of Loose Lay Vinyl Flooring
- Best Applications for Loose Lay Vinyl
- Maintenance and Care
- When Loose Lay Vinyl Tiles Work Best: Perimeter Adhesive, Grid Tack, and Subfloor Prep
- Final Thoughts
How Loose Lay Vinyl Flooring Works
Loose lay vinyl planks and tiles are thicker and heavier than standard vinyl products, typically 4.5 to 5 millimeters thick. The increased weight is essential because it helps the flooring stay in place without mechanical connections or adhesive. The backing of loose lay vinyl features a textured or rubberized surface that grips the subfloor and prevents sliding.
Planks are laid edge to edge with tight butt joints. Some products have a slight bevel on the edges to create a defined plank look, while others have a flat edge for a nearly seamless appearance. The flooring is cut to fit around walls and obstacles with a simple utility knife.
What Holds It Down?
Three forces work together to keep loose lay vinyl in place. First, the weight of the planks themselves resists movement. Second, the friction-grip backing prevents sliding on smooth subfloors. Third, the perimeter of the room, including walls, baseboards, and transition strips, contains the flooring and prevents it from shifting outward.
In large rooms exceeding 30 by 30 feet, or in areas with heavy rolling traffic like commercial spaces, a perimeter bond using double-sided tape or adhesive along the edges provides extra security.
Benefits of Loose Lay Vinyl Flooring
Fastest Installation
Loose lay vinyl is the fastest flooring to install. A skilled DIYer can complete an average-sized room in two to three hours. There is no waiting for adhesive to set, no need for a flooring nailer, and no complex click-lock alignment. Just measure, cut, and lay.
Easy Removal and Replacement
Because nothing bonds the planks to the subfloor, individual planks can be lifted and replaced in minutes if they are damaged. When it is time to replace the entire floor, removal takes a fraction of the time compared to glue-down vinyl, which requires scraping adhesive residue. This makes loose lay vinyl ideal for rental properties and spaces that get updated frequently.
No Acclimation Required
Most loose lay vinyl products do not require acclimation because they are dimensionally stable and do not expand or contract significantly with temperature changes. You can install the same day the product is delivered.
Can Be Installed Over Existing Flooring
Loose lay vinyl can be installed over most existing hard-surface flooring including tile, concrete, plywood, existing vinyl, and even low-profile laminate. The subfloor must be clean, smooth, and flat. This eliminates the time and cost of demolition in many renovation projects.
Quiet and Comfortable Underfoot
The thick construction and rubberized backing of loose lay vinyl provide built-in cushioning and sound absorption. There is no need for a separate underlayment, which is required with click-lock products. The result is a floor that feels comfortable underfoot and produces less impact noise.
Drawbacks of Loose Lay Vinyl Flooring
Higher Material Cost
Loose lay vinyl is more expensive per square foot than standard click-lock or glue-down vinyl because of its thicker construction and specialized backing. Material costs typically run $3 to $7 per square foot compared to $2 to $5 for click-lock vinyl. However, the savings on adhesive, underlayment, and installation labor can offset the higher material cost.
Limited Style Options
Loose lay vinyl has fewer style and color options than click-lock vinyl, which dominates the residential market. While the selection has grown significantly in recent years, you may find a more limited range of wood looks, stone looks, and patterns compared to other formats.
Subfloor Requirements
Loose lay vinyl requires a smooth, clean, and flat subfloor. Because the planks are not locked or glued together, even small bumps, debris, or ridges in the subfloor can cause planks to shift, rock, or telegraph imperfections through the surface. The subfloor should be flat to within 1/8 inch over 10 feet.
Not Ideal for All Rooms
Loose lay vinyl works best in rectangular and square rooms. Rooms with many angles, curved walls, or large open spans may require adhesive at the perimeter to keep planks from shifting. Very small rooms like powder rooms and closets may not provide enough perimeter pressure to hold the flooring securely.
Loose Lay vs. Click-Lock vs. Glue-Down Vinyl
Each vinyl installation method has its strengths. Here is how they compare.
Installation Speed
Loose lay is the fastest, followed by click-lock, with glue-down being the slowest due to adhesive application and curing time. For DIY projects and rental properties, loose lay and click-lock are the most practical options.
Stability
Glue-down vinyl is the most stable because it is bonded directly to the subfloor. Click-lock provides good stability through its interlocking mechanism. Loose lay relies on weight and friction, making it slightly less stable in extreme conditions but perfectly adequate for most residential and light commercial use.
Removal
Loose lay is the easiest to remove. Click-lock disassembles with moderate effort. Glue-down requires significant labor to scrape up and is the most difficult and time-consuming to remove.
Cost
Click-lock vinyl is typically the least expensive option when you factor in the cost of underlayment. Loose lay is slightly more expensive for materials but saves on underlayment and labor. Glue-down adds adhesive costs and longer installation time. For a related comparison, see our guide to LVP flooring.
Installation Tips for Loose Lay Vinyl
Subfloor Preparation
Clean the subfloor thoroughly with a vacuum and damp mop. Fill any cracks, holes, or low spots with a floor patching compound. Sand or scrape down any high spots. The subfloor must be completely dry before installation.
Layout Planning
Dry-fit a few rows before committing to your layout. Plan your starting point so that the last row is not an awkwardly narrow sliver. Center the layout in the room for a balanced appearance. Stagger end joints by at least 6 inches between adjacent rows.
Cutting
Loose lay vinyl cuts easily with a utility knife. Score the face of the plank with the knife, then snap it along the scored line. For curved cuts and notches, use heavy-duty scissors or tin snips.
Seating the Planks
Press each plank firmly into place, ensuring the edges butt tightly against adjacent planks. Use a rubber roller or hand roller to press the planks flat and ensure the friction backing makes full contact with the subfloor.
Transitions and Edges
Install transition strips at doorways and where the vinyl meets other flooring types. At walls, maintain a small gap of approximately 1/16 inch for minor expansion. This gap is covered by baseboards or shoe molding.
Cost of Loose Lay Vinyl Flooring
For a 300-square-foot room, expect the following approximate costs for a loose lay vinyl project.
- Materials: $900 to $2,100 ($3 to $7 per square foot)
- Professional installation: $450 to $900 ($1.50 to $3 per square foot)
- DIY installation: $0 (basic tools only)
- Transitions and trim: $50 to $150
- Total (professional): $1,400 to $3,150
- Total (DIY): $950 to $2,250
Best Applications for Loose Lay Vinyl
Loose lay vinyl is particularly well-suited for rental properties where easy replacement is valuable, commercial spaces that need quick installation to minimize downtime, basement renovations over concrete, rooms where you want to preserve the existing flooring underneath, and temporary installations in homes you plan to sell or renovate.
For moisture-prone areas, loose lay vinyl’s waterproof construction makes it an excellent choice. Learn more about moisture-resistant options in our waterproof flooring guide.
Maintenance and Care
Loose lay vinyl requires minimal maintenance. Sweep or vacuum regularly to remove dirt and grit. Mop with a damp mop and a vinyl-safe floor cleaner as needed. Avoid abrasive scrubbers and harsh chemicals. Use furniture pads under heavy items to prevent denting.
One unique maintenance benefit of loose lay vinyl is that individual damaged planks can be replaced instantly without disrupting the rest of the floor. Keep a few extra planks from your original purchase for this purpose.
When Loose Lay Vinyl Tiles Work Best: Perimeter Adhesive, Grid Tack, and Subfloor Prep
Loose lay vinyl tiles behave a little differently from loose lay planks. A square tile has more seams per square foot and less length to resist sliding, so tiles rely even more on a flat subfloor, snug perimeter, and the right amount of adhesive for the space. Knowing when tiles can sit fully loose and when they need help prevents shifting, lifted corners, and open joints.
Where Tiles Can Stay Fully Loose. Small to medium rectangular rooms with baseboards on every side are the ideal setting: bedrooms, basements over a dry slab, laundry rooms, and rental units where quick replacement matters. Tiles also make sense where you expect localized wear or stains, since a single square pops out and swaps in without touching the rest of the floor. Stone and concrete looks in tile format are a natural fit for these spaces.
When to Add Perimeter Adhesive or a Grid Tack
- Perimeter bond: A band of the manufacturer’s recommended adhesive or tape around the room edge and at doorways keeps the outer rows from creeping, especially where transitions leave an open edge.
- Grid tack: In larger open areas, a release-type (pressure-sensitive) adhesive rolled in a grid pattern at set intervals ties the field together while still allowing tiles to be lifted later.
- Full spread: Under rolling chairs, carts, heavy furniture that gets moved, or in front of sunny glass doors where heat can make vinyl move, many manufacturers call for full adhesive coverage in that zone.
Always follow the specific product’s installation guide for adhesive type, trowel or roller, and spacing, because using an unapproved adhesive can void the warranty.
Subfloor Prep Specific to Tiles. Every seam is a spot where an imperfection can show, so prep carries more weight with tiles than with long planks. Over old ceramic, fill grout lines with a cement-based patch so the pattern does not telegraph through. Over existing sheet vinyl with a textured surface, apply an embossing leveler. On concrete, check moisture before installing and fix cracks or lips. Once the floor is flat and clean, start from a centered layout line, press each tile tight to its neighbors, and roll the field so the backing grips uniformly.
Final Thoughts
Loose lay vinyl flooring offers a compelling combination of easy installation, simple maintenance, and practical performance. While it costs slightly more per square foot than click-lock alternatives, the savings in labor, underlayment, and future replacement flexibility often make it the more economical choice over time. If you value speed, simplicity, and the ability to change your floors without a major project, loose lay vinyl deserves serious consideration.
Compare other vinyl options in our guides to vinyl flooring, LVP flooring, and SPC flooring.
Prefer to explore on your own?
See how new flooring looks in your actual room in seconds — free, no signup.
Try the free Floor Studio →