LVP flooring installation is one of the most accessible DIY home improvement projects you can tackle. Luxury vinyl plank (LVP) uses a click-lock system that requires no glue, nails, or special skills — just patience, preparation, and the right tools. Most homeowners can install a 300-square-foot room in a single weekend.
This guide walks you through every step of the installation process, from subfloor preparation and acclimation to cutting techniques and finishing touches. Whether you are installing SPC vinyl flooring or WPC planks, these instructions apply to virtually all click-lock LVP products on the market in 2026.
- Table of Contents
- Tools & Materials Needed
- Subfloor Preparation
- Acclimation Requirements
- Planning Your Layout
- Step-by-Step Installation
- Cutting Techniques
- Installing Around Obstacles
- Transition Strips & Moldings
- Common Installation Mistakes
- Installation Cost Comparison
- Frequently Asked Questions
- Can I install LVP flooring myself with no experience?
- Do I need underlayment for LVP flooring?
- How long does LVP installation take?
- Can LVP be installed over radiant heat?
- Which direction should I lay LVP planks?
- Can I install LVP over existing vinyl flooring?
- What is the expansion gap and why does it matter?
Tools & Materials Needed
| Tool/Material | Purpose | Estimated Cost |
|---|---|---|
| Tape measure | Measuring room dimensions and plank cuts | $5 – $15 |
| Utility knife + blades | Scoring and snapping planks for straight cuts | $5 – $15 |
| Straight edge / T-square | Guiding straight cuts | $10 – $25 |
| Rubber mallet | Tapping planks into place without damage | $8 – $15 |
| Tapping block | Distributing mallet force evenly along plank edges | $5 – $10 |
| Pull bar | Closing end joints near walls where mallet cannot reach | $5 – $12 |
| 1/4″ spacers | Maintaining expansion gap along walls | $3 – $8 |
| Pencil | Marking cut lines | $1 |
| Miter saw or jigsaw (optional) | Complex cuts around door frames and pipes | $50 – $200 (or rent) |
| Moisture barrier (6-mil poly) | Required over concrete if LVP lacks attached pad | $0.10 – $0.25/sq ft |
| Underlayment (if needed) | Sound dampening and subfloor cushion | $0.25 – $0.75/sq ft |
Subfloor Preparation
Proper subfloor preparation is the single most important factor in a successful LVP flooring installation. A bad subfloor leads to clicking sounds, gaps, and premature wear.
Subfloor Requirements
| Subfloor Type | Can You Install LVP Over It? | Preparation Needed |
|---|---|---|
| Plywood | Yes | Must be flat, clean, and dry. Fill low spots with leveling compound |
| Concrete | Yes | Must be flat, dry, and cured. Add moisture barrier |
| Existing vinyl | Yes | Must be flat and firmly adhered. Remove loose tiles |
| Existing tile | Yes | Must be flat and stable. Rigid-core LVP bridges grout lines |
| Existing hardwood | Yes | Must be flat and not cupping. Secure any loose boards |
| Carpet | No | Must be removed entirely — LVP cannot float over carpet |
| OSB | Yes | Must be flat and structurally sound. Sand high spots |
Flatness Test
Place a 10-foot straightedge on the subfloor and check for gaps. The subfloor must be flat within 3/16 inch over 10 feet. High spots can be sanded down; low spots should be filled with a self-leveling compound or floor patching compound.
Moisture Testing
For concrete subfloors, perform a moisture test before installation. The calcium chloride test should show less than 3 lbs per 1,000 sq ft over 24 hours. A relative humidity (RH) probe test should read below 75% RH. If moisture levels are too high, apply a concrete sealer or moisture barrier before proceeding.
Acclimation Requirements
Most LVP manufacturers recommend acclimating planks in the installation room for 48 hours before beginning. This allows the material to adjust to the room’s temperature and humidity, reducing the risk of expansion or contraction after installation.
- Store unopened boxes flat in the room where they will be installed
- Maintain room temperature between 65-85 degrees Fahrenheit
- Keep humidity between 30-60%
- Do not store planks in garages, attics, or unheated spaces
Note: SPC vinyl flooring with its stone composite core is less sensitive to temperature changes than WPC, but acclimation is still recommended by most manufacturers and is required to maintain warranty coverage.
Planning Your Layout
Before opening any boxes, plan your layout to achieve a professional-looking result:
Direction
Run planks parallel to the longest wall in the room or toward the primary light source (such as a large window). In hallways, always run planks lengthwise along the hallway — never across it.
First and Last Row Width
Measure the room width and divide by the plank width to determine how many rows you will need. If the last row would be less than 2 inches wide, rip the first row narrower to balance the layout. A last row narrower than 2 inches is structurally weak and looks unprofessional.
Stagger Pattern
End joints between rows must be staggered by at least 6 inches (many manufacturers require 8 inches or more). Open several boxes and dry-lay the first 3-4 rows to plan a random stagger pattern. Avoid H-patterns where end joints line up every other row.
Mix Boxes
Pull planks from 3-4 different boxes as you install. This mixes any slight color or pattern variations between production runs, creating a more natural appearance across the finished floor.
Step-by-Step Installation
Step 1: Install Underlayment (If Needed)
If your LVP does not have an attached underlayment, roll out a thin (1-1.5mm) underlayment designed for rigid-core vinyl. Do not double up — if your product has an attached pad, skip this step. Over concrete, install a 6-mil polyethylene moisture barrier first, taping seams with moisture barrier tape.
Step 2: Start the First Row
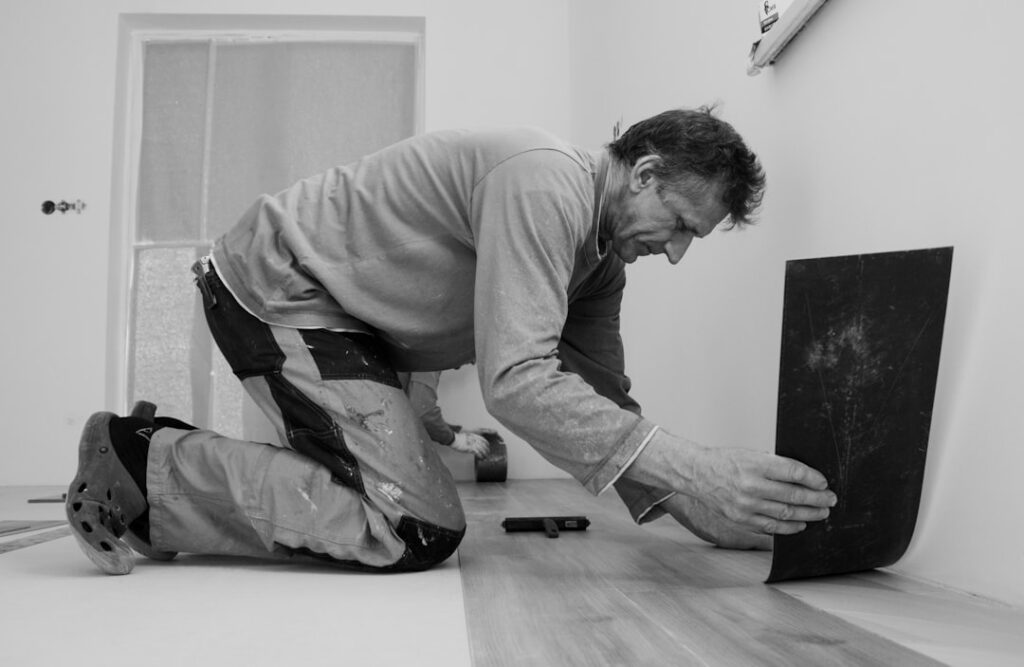
Begin at the left corner of the longest wall. Place 1/4-inch spacers between the plank and the wall on both the long side and the short side. The tongue (or groove, depending on the product) should face the wall. If the wall is not straight, scribe and cut the first row to follow the wall contour.
Step 3: Click the First Row Together
Connect the short end of the second plank to the first by angling it and pressing down (or tapping with a tapping block, depending on the click system). Continue across the wall until you reach the opposite end.
Step 4: Cut the Last Plank
Measure the remaining gap (minus 1/4 inch for the expansion gap), mark the plank, and cut with a utility knife and straight edge. Use the cut-off piece to start the next row (if it is at least 6-8 inches long).
Step 5: Start the Second Row
Angle the long side of the first plank in the second row into the first row. Press down until it clicks. Continue adding planks, connecting both the long and short sides as you go.
Step 6: Continue Row by Row
Repeat the process for each row. Use a tapping block and rubber mallet to close any gaps. Use a pull bar to close end joints near walls where you cannot swing the mallet.
Step 7: Install the Last Row
Measure and rip the last row to fit, leaving a 1/4-inch expansion gap. Use the pull bar to click the last row into place.
Step 8: Finishing Touches
Remove all spacers. Reinstall baseboards (or add shoe molding) to cover the expansion gap. Install transition strips at doorways using the manufacturer’s track-and-snap system.
Cutting Techniques
| Cut Type | Best Tool | Technique |
|---|---|---|
| Straight crosscuts | Utility knife + straight edge | Score the top surface 2-3 times, then snap along the score line |
| Rip cuts (lengthwise) | Utility knife or table saw | Score and snap for narrow rips; table saw for long, precise cuts |
| L-shaped cuts | Utility knife | Score both legs of the L and snap each section |
| Curved cuts (pipes, corners) | Jigsaw or oscillating tool | Trace the shape, cut slowly with a fine-tooth blade |
| Door frame undercuts | Oscillating multi-tool or hand saw | Lay a scrap plank flat against the frame and cut the frame flush |
Installing Around Obstacles
Door Frames
Undercut door frames and jambs so the plank slides underneath. Use an oscillating multi-tool or a pull saw with a scrap plank as a height guide. This creates a clean, professional look without gaps around doorways.
Pipes & Columns
Drill a hole 1/2 inch larger than the pipe diameter. Cut from the hole to the edge of the plank, install the plank, and glue the cut-off piece back in place. Cover the gap with a pipe escutcheon ring.
Toilets
Remove the toilet before installing LVP in bathrooms. Cut the plank to fit around the toilet flange, leaving 1/4 inch of clearance. Reinstall the toilet on top of the new floor using a wax ring or wax-free seal of the appropriate height.
Kitchen Islands & Cabinets
For permanent fixtures, install the flooring up to the base with a 1/4-inch expansion gap, then cover the gap with shoe molding or quarter round. Do not install LVP under dishwashers or heavy appliances without verifying clearance for future appliance removal.
Transition Strips & Moldings
| Transition Type | Use Case | Cost per Linear Foot |
|---|---|---|
| T-molding | Where LVP meets another floor of the same height | $3 – $10 |
| Reducer | Where LVP meets a lower floor (e.g., tile) | $3 – $10 |
| End cap | Where LVP ends at a step, fireplace, or exterior door | $3 – $8 |
| Stair nosing | LVP installation on stair treads | $8 – $20 |
| Quarter round / shoe molding | Covering expansion gap along walls and cabinets | $0.50 – $2 |
Common Installation Mistakes
| Mistake | Consequence | How to Avoid |
|---|---|---|
| Skipping subfloor prep | Clicking sounds, uneven surface, premature wear | Always flatten within 3/16″ per 10 ft |
| No expansion gap | Buckling and lifting in warm weather | Maintain 1/4″ gap on all sides, around all fixed objects |
| Doubling up underlayment | Spongy feel, click-lock failure, voids | Never add underlayment if product has attached pad |
| Poor stagger pattern | H-patterns look artificial, weaken joints | Stagger end joints by 6″+ in a random pattern |
| Forcing planks together | Damaged click profiles, gaps over time | Use proper angle-and-press technique; never hammer directly on plank edges |
| Not undercutting door frames | Gaps around doorways, unprofessional look | Always undercut frames so planks slide under |
| Installing over carpet | Floor moves, buckles, and feels spongy | Always remove carpet and padding completely |
Installation Cost Comparison
| Installation Method | Cost per Sq Ft | 500 Sq Ft Room Total | Time |
|---|---|---|---|
| DIY installation | $0 (your labor) | $1,250 – $3,000 (materials only) | 1 – 2 weekends |
| Handyman | $1.50 – $3.00 | $2,000 – $4,500 | 1 – 2 days |
| Professional installer | $3.00 – $5.00 | $2,750 – $5,500 | 1 day |
| Big-box store service | $2.50 – $4.50 | $2,500 – $5,250 | 1 – 2 days |
DIY installation saves $750 to $2,500 on a typical 500-square-foot room. The main tradeoff is time — expect to spend a full weekend for your first room. Subsequent rooms go much faster as you develop the technique.
Frequently Asked Questions
Can I install LVP flooring myself with no experience?
Yes. LVP is specifically designed for DIY installation. The click-lock system requires no specialized skills. If you can measure, cut with a utility knife, and follow a pattern, you can install LVP. The learning curve is about 30 minutes — expect the first few rows to go slowly, then you will find a rhythm.
Do I need underlayment for LVP flooring?
It depends on the product. Many modern LVP planks, especially SPC products, come with an attached underlayment (IXPE or cork pad on the bottom). If your product has an attached pad, do not add extra underlayment — it will cause the floor to feel spongy and can damage the click-lock system. If your product has no attached pad, add a thin (1-1.5mm) underlayment designed for rigid-core vinyl.
How long does LVP installation take?
A first-time DIYer can install approximately 100-150 square feet per day, including subfloor prep. Experienced installers complete 200-400 square feet per day. A typical 300-square-foot room takes a beginner one full weekend (Saturday for prep, Sunday for installation).
Can LVP be installed over radiant heat?
Most LVP products are compatible with radiant heating systems. Verify the manufacturer’s specifications — most require a maximum subfloor temperature of 85 degrees Fahrenheit. Turn on the heating system at least 2 weeks before installation and maintain it at operating temperature during acclimation.
Which direction should I lay LVP planks?
The standard rule is to lay planks parallel to the longest wall in the room or toward the primary natural light source. In hallways, always run planks lengthwise. If you have an open floor plan connecting multiple rooms, choose one consistent direction throughout.
Can I install LVP over existing vinyl flooring?
Yes, as long as the existing vinyl is flat, firmly adhered, and in good condition. Remove any loose or curling tiles. Do not install over cushioned vinyl with a spongy backing — the cushion undermines the click-lock system. If the existing vinyl is in poor condition, remove it or skim coat over it with a leveling compound.
What is the expansion gap and why does it matter?
The expansion gap is a 1/4-inch space left between the flooring and all walls, cabinets, and fixed objects. LVP is a floating floor that expands and contracts slightly with temperature changes. Without the expansion gap, the floor has nowhere to move and will buckle or lift. Baseboards or shoe molding hide the gap after installation.
Prefer to explore on your own?
See how new flooring looks in your actual room in seconds — free, no signup.
Try the free Floor Studio →