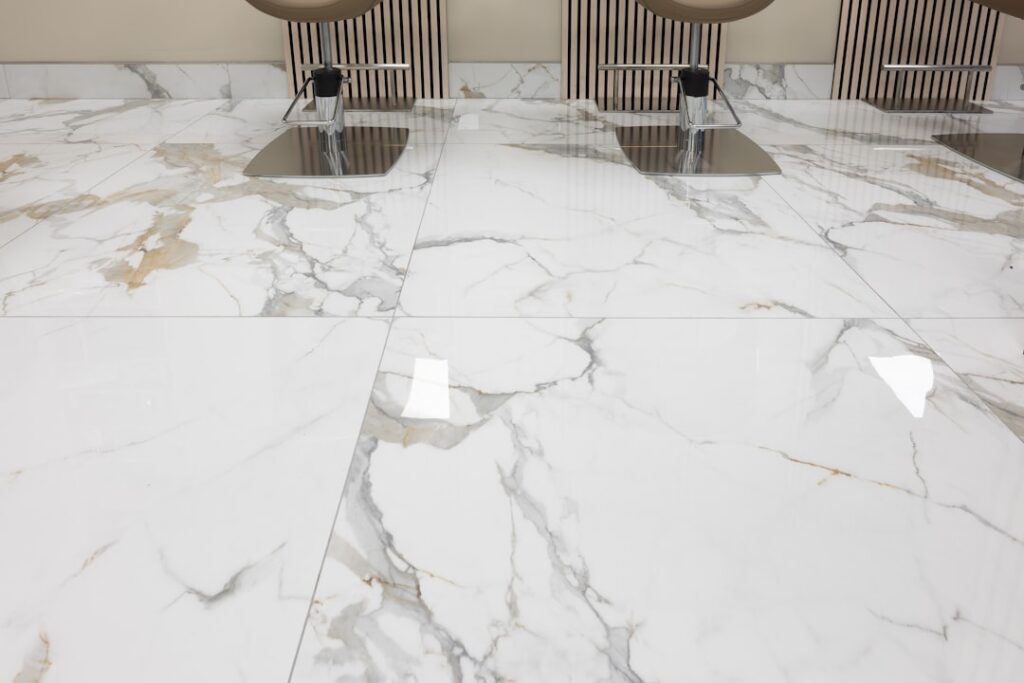
Dull, etched, traffic-worn marble can be brought back to a mirror shine, but only with the right diamonds and a patient hand. Marble flooring polishing is the process of grinding away surface damage and progressively refining the stone until it reflects light like new, and it’s as much about technique as product. Done well, it restores a luxury surface for a fraction of replacement cost. Done wrong, you can permanently scar a soft, expensive stone. Understanding the grit progression, the sealing that follows, and when to call a pro keeps you on the right side of that line.
Part of our Countertops guide — explore the full guide →
- Why Marble Loses Its Shine
- Honing vs Polishing
- The Diamond Grit Progression
- Crystallization and Polishing Powders
- Sealing After Polishing
- Pros and Cons of Polishing Marble
- DIY vs Hiring a Pro
- Preventing Damage Between Polishes
- How Often Marble Needs Repolishing
- The Bottom Line
- What a Polished Finish Actually Is
- Assessing Your Marble's Condition First
- DIY Polishing Methods, Step by Step
- What Marble Polishing Costs
- Where a Polished Finish Belongs, and Where Honed Wins
- Installation Considerations
- Frequently Asked Questions
- Can I polish my marble floor myself, or do I need a pro?
- How do I get etch marks or water rings out of marble?
- Does polished marble get slippery when wet?
- Will sealing keep my marble from etching?
- Can dull marble be restored without full diamond grinding?
- Is polished or honed marble better for a kitchen or bathroom?
- How much does professional marble polishing cost?
Why Marble Loses Its Shine
Marble is a soft, calcium-based stone, which is exactly why it scratches and dulls. Foot traffic grinds grit into the surface, creating fine scratches that scatter light. Worse, marble etches: acidic liquids like wine, citrus, or even some cleaners eat tiny dull spots into the polish through a chemical reaction, not a scratch. Over time these etch marks and micro-scratches turn a glossy floor cloudy. Polishing physically removes that damaged top layer and rebuilds a smooth, reflective surface.
Honing vs Polishing
These two terms get confused, but they’re different goals. Honing grinds the stone to a smooth, flat, low-sheen matte finish, removing scratches and leveling lippage without high reflectivity. Polishing continues past honing with progressively finer abrasives to develop a glossy, reflective shine. You almost always hone first to remove damage, then polish to bring up the gloss. If you actually want a contemporary matte look, you can stop at the honed stage.
The Diamond Grit Progression
The heart of the job is working through diamond abrasive pads from coarse to fine, never skipping steps. Each grit removes the scratches left by the previous one, and jumping ahead leaves marks you can’t buff out later.
- Coarse grits (50 to 100): Remove deep scratches, etching, and lippage. Skip these if the floor is only lightly dulled.
- Medium grits (200 to 400): Refine the surface and erase coarse scratches.
- Fine grits (800 to 1500): Begin developing clarity and a soft sheen.
- Polishing grits (3000 and up): Bring out the glossy, reflective finish.
Use a weighted floor machine or variable-speed polisher with the pads run wet to control heat and dust. Keep the surface flooded with a little water and move steadily so you don’t dig in.
Crystallization and Polishing Powders
Two finishing methods can produce or restore shine. Polishing powders, such as those based on tin or aluminum oxide, are buffed into the honed surface with water and a white pad to chemically and mechanically bring up gloss, a popular approach for refreshing a floor without full diamond grinding. Crystallization uses a fluorosilicate compound and steel wool under a buffer to create a hard, glossy surface layer through a chemical reaction with the calcium in the marble. Crystallization gives a durable shine quickly but is debated among restoration pros because, used repeatedly or wrongly, it can build a film or affect the stone’s breathability. Use it sparingly and follow product guidance.
Sealing After Polishing
Polishing opens and refreshes the surface, so sealing afterward is essential. Apply a penetrating, breathable impregnating sealer made for marble, which soaks in and helps resist staining without changing the look. Note that sealer does not prevent etching, since etching is acid eating the stone itself, not a stain sitting on top. The best protection against etch marks is wiping acidic spills immediately and using only pH-neutral, stone-safe cleaners. Reseal periodically based on the product’s lifespan and how heavily the floor is used.
Pros and Cons of Polishing Marble
Restoring rather than replacing has clear upsides and a few real risks.
- Pro: Restores a luxury floor for far less than replacement.
- Pro: Removes scratches, etching, and dullness for a like-new shine.
- Pro: Can be repeated over the stone’s long life.
- Con: Marble is soft and easy to damage with the wrong grit or pressure.
- Con: Equipment and diamond pads are an investment for one-time DIY.
- Con: Sealing won’t stop etching, so ongoing care is still required.
DIY vs Hiring a Pro
Light refresh work, using a polishing powder to bring back shine on a floor with only minor dullness, is within reach for a careful DIYer with a rented buffer. But full restoration involving coarse diamond grinding, lippage removal, and deep etch repair is best left to a stone-restoration professional. Marble is unforgiving, and a mistake at the coarse-grit stage can leave permanent swirl marks across an expensive floor. Pros typically charge anywhere from a few dollars to several dollars per square foot depending on damage, often cheaper than the cost of getting it wrong yourself.
Preventing Damage Between Polishes
The best way to keep a polished marble floor looking new is to slow down the damage that makes polishing necessary. Place walk-off mats at entrances to trap the grit that grinds fine scratches into the soft stone, and use felt pads under furniture legs to prevent gouges. The single most important habit is wiping acidic spills, including wine, fruit juice, coffee, and many household cleaners, immediately, because acid etches marble in seconds and those dull spots can’t be wiped away once formed.
Use only pH-neutral cleaners labeled safe for natural stone, and never reach for vinegar, lemon, or generic bathroom and tile products, all of which are acidic enough to etch. Dust-mop regularly rather than letting grit accumulate, and damp-mop with stone-safe cleaner as needed. These simple measures stretch the years between polishing sessions and protect the investment you made in restoring the floor.
How Often Marble Needs Repolishing
There’s no fixed schedule, since wear depends entirely on traffic and care. A lightly used residential floor that’s kept clean and protected may go many years before it needs more than a powder refresh, while a busy entryway or a commercial lobby with constant foot traffic may dull within a year or two. Watch for the signs: a loss of reflectivity, visible scratch patterns in traffic lanes, and dull etch marks from spills. Often a light polishing-powder refresh restores shine without full diamond grinding, and reserving the heavy restoration for when damage is genuinely deep keeps you from removing more stone than necessary. Sealing on the schedule the sealer manufacturer recommends rounds out the maintenance.
The Bottom Line
Marble flooring polishing can transform a tired, etched floor back into a gleaming surface, but it rewards respect for the process: hone first, climb the grit ladder without skipping, finish with the right polishing method, and seal with a breathable impregnator. Handle light shine refreshes yourself, but bring in a stone professional for serious grinding and etch repair. After polishing, protect your investment with pH-neutral cleaners and quick spill cleanup, because no amount of polish stops acid from etching soft marble.
What a Polished Finish Actually Is
Polishing is a mechanical process, not a coating. The stone is ground with progressively finer abrasives, often up to 3,000 grit or higher, until the surface reflects light like glass. The shine comes from the density of the marble itself, which is why a genuine polished finish has a depth that surface sealers and waxes only approximate. Polishing also intensifies the stone’s veining and color, making patterns like Carrara and Calacatta stand out. It closes the surface pores somewhat, but marble stays porous and reactive, which is why sealing is still required after the shine is up.
Assessing Your Marble’s Condition First
Before choosing a method, read the floor. The level of damage decides whether a light refresh will do or whether the stone needs professional grinding.
- Light dulling: the surface looks hazy or has lost reflectivity but shows no visible scratches or etch marks. DIY polishing methods work well here.
- Etch marks and water rings: dull spots, rings, or lighter patches from acid exposure. These need targeted spot polishing or a marble polishing compound.
- Scratches and heavy wear: visible scratches, deep dullness, and worn traffic lanes. This level usually calls for professional honing and polishing with diamond abrasives.
- Staining: discoloration from a spill that soaked into the stone. A stain has to be drawn out with a poultice before any polishing will be effective.
DIY Polishing Methods, Step by Step
If your assessment points to light dulling or a few etch marks, these three home methods can bring back shine without hiring a restorer. Always clean the floor thoroughly first: sweep or vacuum away all grit, mop with a pH-neutral stone cleaner, and let it dry completely before you start.
Method 1: Marble Polishing Powder
Polishing powder, usually based on tin oxide or aluminum oxide, is the most effective DIY option for lightly dulled marble. You will need the powder, clean water, a soft cloth or felt buffing pad, a spray bottle, and dry microfiber towels.
- Mix the powder with water per the product instructions to make a paste or slurry.
- Apply a small amount to about two to three square feet of floor at a time.
- Work it in with a damp cloth or felt pad using circular motions and moderate pressure, buffing two to three minutes per section until the shine comes up as the powder fills micro-scratches.
- Wipe away the residue with a damp microfiber cloth, then buff dry with a clean towel and move to the next section.
Expect a noticeable jump in reflectivity after one application. Powder restores lightly dulled marble and softens minor etch marks, but it will not fix deep scratches or worn traffic patterns.
Method 2: Baking Soda Paste for Etch Marks
For individual etch marks and water rings, a baking soda paste gives a gentle polishing action.
- Mix about three tablespoons of baking soda with enough water to form a thick paste.
- Spread it over the etch mark, cover with plastic wrap to keep it moist, and let it sit for 24 hours.
- Remove the paste, rinse with clean water, and buff dry.
- For stubborn marks, follow up with marble polishing powder applied directly to the spot.
Method 3: Buffing With a Floor Machine
For larger areas, renting a low-speed floor buffer with a white or ivory polishing pad speeds the job considerably.
- Apply marble polishing compound to the floor in sections.
- Run the buffer at low speed with a clean pad, working in overlapping passes for consistent pressure and coverage.
- Wipe away residue and inspect; heavily dulled areas may need several passes.
A buffer covers a typical room in roughly 30 to 60 minutes, compared with several hours by hand.
What Marble Polishing Costs
Professional honing and polishing typically runs about three to eight dollars per square foot for standard work. Floors with deep scratches or heavy etching that need multiple diamond passes can run eight to fifteen dollars per square foot. As an example, a 200-square-foot foyer commonly lands between roughly 600 and 1,600 dollars for standard restoration. Straight re-polishing, when the stone is sound and only the shine needs restoring, is closer to two to five dollars per square foot. Because a mistake at the coarse-grit stage can permanently scar the stone, paying a pro for serious grinding is often cheaper than the cost of getting it wrong yourself.
Where a Polished Finish Belongs, and Where Honed Wins
The canonical process treats honing as the step before polishing, but the two are also a finish choice with real consequences for daily life. A polished finish delivers maximum shine and veining, yet it shows etches, scratches, and water spots readily and turns slick when wet. A honed finish stops short of the high gloss for a soft matte look; it hides etching and scratches far better, offers more grip underfoot, and forgives daily wear.
Match the finish to the room:
- Polished works best in formal, low-traffic, dry spaces: foyers and grand entries, formal living and dining rooms, and powder rooms that see light use.
- Honed is usually the wiser choice for busy kitchens, family bathrooms, and homes with kids or pets, where the extra grip and etch-hiding matter more than a mirror shine.
Installation Considerations
Marble is heavy, brittle, and unforgiving of a flexing substrate, so the install itself protects the polish you are paying for. The subfloor must be rigid and flat; installers typically add cement backer board or an uncoupling membrane to absorb movement and prevent tiles from cracking later. Lippage control matters more with a polished finish, because the reflective surface highlights any unevenness between tiles. Plan for 10 to 15 percent waste, since marble chips during cutting and you will want extra from the same lot for future repairs. Large-format polished tiles in particular need a dead-flat substrate and patient setting to keep the mirror surface looking seamless across the room.
Frequently Asked Questions
Can I polish my marble floor myself, or do I need a pro?
A light refresh is realistic for a careful DIYer: polishing powder, a baking soda paste for isolated etch marks, or a rented low-speed buffer can bring shine back to lightly dulled marble. Full restoration that involves coarse diamond grinding, lippage removal, and deep etch repair is best left to a stone-restoration professional, because a mistake at the coarse-grit stage can leave permanent swirl marks across an expensive floor.
How do I get etch marks or water rings out of marble?
For a single etch mark or ring, spread a thick baking soda paste over the spot, cover it with plastic wrap to keep it moist, and leave it about 24 hours before rinsing and buffing dry. For broader dullness or stubborn marks, a marble polishing powder buffed in with a damp felt pad is more effective. Deep etching that these methods cannot lift needs professional honing.
Does polished marble get slippery when wet?
Yes. The smooth, high-gloss surface grows slick when wet, which is a genuine safety concern in bathrooms and entryways. Where slip resistance matters, a honed finish offers better grip while still showing off the stone.
Will sealing keep my marble from etching?
No. A penetrating sealer helps resist staining, but etching is acid chemically eating the stone itself, not a stain sitting on top, so sealer cannot prevent it. The real defense is wiping acidic spills immediately and cleaning only with pH-neutral products labeled safe for natural stone.
Can dull marble be restored without full diamond grinding?
Often, yes. If the floor has only lost reflectivity and has no deep scratches, a polishing-powder refresh can restore the shine without grinding away stone. Reserving heavy diamond restoration for genuinely deep damage keeps you from removing more of the marble than necessary.
Is polished or honed marble better for a kitchen or bathroom?
For busy kitchens and family bathrooms, honed marble is almost always the wiser finish: it hides etching and scratches far better and grips better underfoot when wet. Save the polished finish for formal, low-traffic, dry spaces like foyers, formal rooms, and lightly used powder rooms.
How much does professional marble polishing cost?
Standard honing and polishing typically runs about three to eight dollars per square foot, while heavily damaged floors needing multiple diamond passes can run eight to fifteen dollars per square foot. Straight re-polishing of sound stone is closer to two to five dollars per square foot. A 200-square-foot foyer commonly falls between roughly 600 and 1,600 dollars for standard restoration.
Prefer to explore on your own?
See how new flooring looks in your actual room in seconds — free, no signup.
Try the free Floor Studio →