Screw an awning into the wall of a manufactured home the same way you would on a brick ranch and you may pull the bracket right out of the siding during the first storm. Most mobile home awnings fail not because the awning is weak but because the wall behind it is thin metal or vinyl over widely spaced studs, and the roof is often a lightweight metal or rolled membrane that was never designed to carry extra load. Picking the right style and anchoring it correctly matters far more than the color or panel shape.
The short answer: small aluminum window and door awnings can attach to the wall if every fastener hits a stud or a backing plate, while larger patio and carport-style covers should be freestanding or attached with a roof-mounted rail and supported by their own posts on footings. Before you buy, check your park or community rules, your local permit requirements and your home’s wind zone, which is printed on the data plate or certification label inside the home.
Shade from an awning can also make a noticeable difference in summer comfort. Manufactured homes tend to have less insulation in the walls than site-built houses, so blocking direct sun from windows and doors can cut heat gain and help the air conditioner keep up.
Types of Mobile Home Awnings
Most products sold for manufactured housing fall into three groups. Each one handles weight and wind differently, and each one connects to the home in a different way.
Window awnings
Window awnings for mobile homes are usually 3 to 8 feet wide and project 2 to 4 feet from the wall. Aluminum is the most common material because it is light, rust resistant and inexpensive. Styles include fixed slant panels, rounded or dome shapes, and roll-up or tilt designs that let you lower them in winter for sun or raise them for storms. An aluminum window awning puts relatively little load on the wall, which is why it is the easiest upgrade to do yourself.
Door and entry awnings
Door awnings cover the landing or steps at an entry. They are slightly larger than window awnings and often include side panels or support arms that reach down to the wall underneath. Because people stand underneath them, they need to be secure, shed water away from the door and leave plenty of headroom, usually at least 6 feet 8 inches at the lowest point.
Patio and carport-style covers
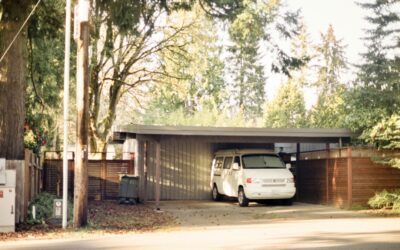
These span a deck, patio or driveway and can run 10 to 40 feet long. Aluminum awnings for mobile homes in this category typically use interlocking roof pans or insulated panels, a header rail or roof-mounted ledger along the house side, and a beam with posts on the outer edge. Some are fully freestanding with posts on both sides so the home carries no load at all. Window awnings for homes of any type look similar, but carport-scale covers on manufactured housing are a different structural problem and deserve extra planning.
Attached vs Freestanding
An attached cover uses the home as one side of its support. That saves money on posts and footings, but it transfers weight, snow and wind uplift into a wall or roof that may not be built for it. Many manufacturers of manufactured homes specify that add-on structures must be self-supporting, meaning they cannot rely on the home for structural support. Read your home’s installation manual or contact the manufacturer before attaching anything larger than a window or door awning.
A freestanding cover has posts on both sides and sits a small gap away from the home or butts up to it with a flexible flashing strip. It costs more because you need extra posts and footings, but it isolates the home from the cover’s movement. That also matters because manufactured homes can shift slightly on their piers over time; a rigid connection between a moving home and a fixed post can crack siding or pull fasteners.
Roof-mounted options exist as well. A roof rider or roof-mount bracket system attaches across the top of a metal roof and carries the awning edge. These are designed specifically for manufactured homes and spread the load over several roof ribs or trusses. They must be sealed carefully at every fastener so the roof does not leak.
Wind Zones, Anchoring and Permits
Manufactured homes in the United States are built to a wind zone rating, typically Zone I, II or III, with higher numbers for coastal and hurricane-prone areas. An awning in Zone II or III needs stronger connections, closer post spacing and deeper anchors than one in an inland Zone I area. Ask your supplier for an engineered version rated for your zone, and keep the paperwork for inspections and insurance.
For patio and carport-style covers, posts usually sit on concrete footings or on approved ground anchors. Footing size and depth depend on soil, frost depth and load, so follow the manufacturer’s engineering or your local building department’s guidance. Call 811 at least a few business days before you dig so underground utility lines, which often run shallow in manufactured home communities, are marked.
Permits are required for many attached and freestanding covers, especially larger ones. Land-lease parks and HOA communities often have their own rules about size, color, setbacks from lot lines and whether the cover can be attached at all. Get written approval before ordering materials. Snow load ratings also matter in northern states: a flat aluminum roof pan that is fine in Arizona can buckle under heavy wet snow in Michigan.
Tools and Materials
- Awning kit with brackets, rails and hardware rated for your wind zone
- Stud finder that works through metal or vinyl siding, or a thin probe drill bit
- Drill/driver and appropriate bits
- Stainless or coated lag screws, sealing washers and through-bolts
- Backing plates or blocking where studs are not available
- Butyl tape or exterior sealant compatible with your siding or roof
- Level, chalk line and tape measure
- Extension ladder with standoff, or scaffolding for roof work
- Post-hole digger, concrete and post bases for patio covers
- Work gloves, safety glasses and a helper
How to Install a Window or Door Awning
- Check rules and ratings. Confirm park approval, any permit, and that the awning is rated for your wind zone.
- Locate the framing. Wall studs in manufactured homes are often spaced 16 or 24 inches apart and may be 2 by 3 or 2 by 4 lumber. Mark stud centers above the window or door. Avoid the area directly over the window header if your home’s manual says not to fasten there.
- Plan the height. Mount the top bracket or header rail about 6 to 12 inches above the window frame so water drains clear of the opening and the awning slopes away from the wall.
- Add backing where needed. If a bracket falls between studs, use a manufacturer-approved backing plate or through-bolt with a large washer on the inside rather than trusting a screw in thin paneling.
- Seal every penetration. Apply butyl tape or sealant behind each bracket and on each fastener so water cannot run into the wall cavity. Wall leaks in manufactured homes can rot studs and floor decking quickly.
- Mount the brackets and level them. Drive fasteners snug but do not crush the siding. Check level across the full width.
- Hang the awning and install support arms. Attach the frame, set the projection angle and fasten any lower arms to studs as well.
- Test. Push firmly on the outer edge. The awning should not flex the wall or rattle. Spray it with a hose and confirm water drains off the front edge rather than back toward the house.
Ladder and Roof Safety
Most awning work happens on a ladder, and manufactured homes sit higher off the ground than people expect because of the piers and skirting. Set an extension ladder on firm, level ground at about a 1-to-4 angle (1 foot out for every 4 feet up), extend it at least 3 feet above any roof edge you step onto, and keep three points of contact. Never stand on the top two rungs of a stepladder. Have a helper hold the ladder and hand up long rails rather than carrying them yourself.
Metal roofs are slippery and can be dented by foot traffic. Step only over roof trusses and avoid walking on the roof when it is wet, frosty or hot from summer sun. For patio covers that need roof-mount rails, large spans, or any work more than one story off the ground, hire an installer who has scaffolding and fall protection.
Troubleshooting Common Problems
Water dripping inside the wall: A fastener or bracket was not sealed. Remove it, clean the area, apply fresh butyl tape and reinstall with a sealing washer.
Awning rattles or hums in wind: Loose fasteners or unbraced panels. Tighten everything and add the cross bracing or tie-down straps the kit includes.
Siding is bowing around brackets: The fasteners missed studs or were overtightened. Relocate to framing or add backing plates.
Water pooling on a patio cover: Not enough slope. Most aluminum covers need about a quarter inch of fall per foot. Adjust post height or the header position.
Gap opening between cover and home: The home has settled on its piers. Use flexible flashing for freestanding designs and have the home releveled if the gap grows.
Typical Costs
Small aluminum window awnings are among the least expensive exterior upgrades, often in the range of roughly 100 to 400 dollars each for the unit. Door and entry awnings commonly run a few hundred dollars up to around 1,000 dollars depending on size and side panels. Patio and carport-style covers vary the most: a basic DIY aluminum kit may cost a few thousand dollars, while professionally installed, engineered covers for high wind zones or with insulated panels can run well beyond that. Permits, footings and park review fees add to the total, so budget for them from the start.
When to Call a Professional
Hire a licensed contractor for any cover attached to the roof, any patio or carport-style structure, and any installation in Zone II or III wind areas. A pro can pull permits, follow engineered drawings and set footings correctly. If you are unsure whether your wall or roof can carry an attached awning, contact the home’s manufacturer or a structural engineer before drilling. For window and door awnings on a single-story home with clearly located studs, a careful DIYer with a helper can usually finish the job in an afternoon.
Frequently Asked Questions
Can I attach an awning directly to a mobile home wall?
Small window and door awnings can attach if fasteners hit studs or approved backing plates and every penetration is sealed. Larger covers should usually be freestanding or follow the home manufacturer’s guidance.
Do I need a permit for a mobile home awning?
Many areas require permits for patio and carport-style covers, and parks often require written approval for any exterior addition. Check with both before you buy.
What material is best for mobile home awnings?
Aluminum is the most common because it is light, rust resistant and easy to install. Insulated aluminum panels are a good upgrade for patio covers in hot climates.
How do I find my home’s wind zone?
Look at the data plate, usually inside a kitchen cabinet, closet or near the electrical panel. It lists the wind zone the home was built for.
How high should a window awning be mounted?
Mount the top about 6 to 12 inches above the window frame and slope it outward so rain drains away from the opening.
Will an awning lower my cooling costs?
Shading sun-facing windows and doors reduces heat gain, which can help the air conditioner run less, especially on south and west walls.