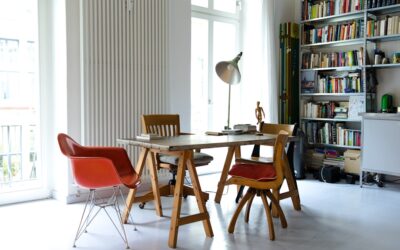
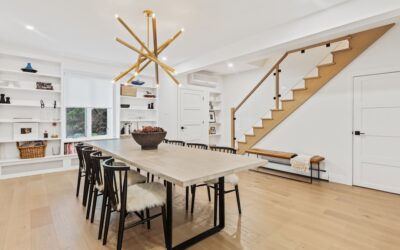
The first time a designer asked me to install plywood as a finished floor, I assumed it was a budget desperation move. Six years and twelve installations later, I still recommend modern plywood flooring to clients who want wide-plank visuals on a fraction of the budget. Done correctly with quality sheet stock, careful cuts, and the right finish, plywood floors look closer to bleached white oak than any vinyl plank product on the market — and the per-sq-ft cost stays under $3.
What Modern Plywood Flooring Is
It is exactly what it sounds like: 4×8 sheets of cabinet-grade plywood ripped into planks, glued and nailed to a subfloor, then sanded and finished like hardwood. Birch is the most common species choice. Baltic birch (a 13-ply European product, sometimes called Russian birch despite production shifts since 2022) gives the cleanest end-grain look. Sandeply, a tropical hardwood plywood from Lowe’s, is a budget alternative.
Standard installation rips 4×8 sheets into 6-inch or 8-inch wide strips, lengths up to 8 feet. The result is wide-plank flooring with continuous grain and minimal end joints — the visual most homeowners are paying $9 per sq ft for in engineered hardwood.
The Real Pros
Cost is the first and biggest. A 4×8 sheet of 3/4-inch birch plywood runs $55 to $80 at home centers, $70 to $110 for Baltic birch from a real lumberyard. That works out to $1.70 to $3.50 per sq ft material — a fraction of even the cheapest hardwood. For a 500 sq ft project, materials run $850 to $1,750 versus $4,000-plus for entry-level hardwood.
Customization is the second pro. You pick the species, the plank width, the finish, and the look — light bleached Scandinavian, dark fumed walnut, natural matte, even painted floors with stenciled patterns. No off-the-shelf flooring product offers this much creative latitude.
Where Plywood Wins
- Lofts and modern apartments — clean, minimalist look
- Beach houses — bleached or whitewashed for coastal vibes
- Cabins — natural finish over knot-cluster sanding
- Studios and home offices — durable and refinishable
- Rental flips — high impact at low cost
The Cons You Need to Plan For
Soft surface is the first reality. The face veneer on most plywood is 1/32 inch (about 0.8mm) — much thinner than the 4mm wear layer on engineered hardwood. Drop a heavy pan and you will create a dent that exposes the second ply underneath. Chair casters punch through over years. Plan to refinish every 8 to 12 years rather than the 20+ on solid oak.
Seams are the second issue. Unlike tongue-and-groove flooring, ripped plywood planks have square edges that telegraph every subfloor imperfection. Shim and self-level any concrete dips greater than 1/8 inch over 6 feet. On wood subfloors, screw down every squeak and replace any soft spots before installation.
Splinters are real until you finish properly. Three coats of polyurethane minimum, four ideally. Skip a coat to save time and you will be picking splinters out of bare feet for years.
Sheet Stock Selection
Not all plywood is suitable. Construction-grade CDX is too rough and has too many voids. Cabinet-grade Baltic birch in 1/2 inch or 3/4 inch is the gold standard — 13 thin plies with minimal voids and a smooth A-grade face on both sides. Domestic AC-graded birch is the workable alternative, though voids in the core may telegraph through after years of foot pressure.
Avoid anything labeled “underlayment-grade” — the face is not stable enough for finishing. Avoid OSB outright, no matter how tempting the $0.75 per sq ft price looks. The strand pattern reads as cheap industrial, not modern, no matter how you finish it.
Finishing Strategy
Sand to 100 grit, then 120, then 150. Going finer than 150 closes the grain and prevents finish penetration. Apply a sanding sealer first — Zinsser SealCoat dewaxed shellac works perfectly — then your topcoat of choice. For a true modern look, water-based polyurethane like Bona Mega ONE or Loba Easy Finish gives the cleanest non-yellowing result.
For stained floors, use a wood conditioner or gel stain to control birch’s natural blotchiness. Skip oil-based stains on raw birch unless you want a leopard-print result. White-wash and bleached looks are achievable with a 50/50 mix of water-based stain and clear sealer.
Finish Schedule
- Rough sand at 80 grit to flatten seams
- Sand at 100 grit, then 120, then 150
- Tack with mineral spirits and lint-free rag
- One coat sanding sealer, lightly sanded with 220 between coats
- Three to four coats water-based polyurethane
Installation Steps
Rip 4×8 sheets into 6-inch or 8-inch strips on a track saw with a fresh blade. Cut to random lengths — 4 feet, 5 feet, 6 feet — to avoid the H-pattern look. Acclimate plywood strips in the install room for 5 to 7 days at normal occupancy humidity.
Lay sheets with construction adhesive (Liquid Nails Subfloor or Bostik’s Best for slabs) and 18-gauge brad nails or finish nails every 8 to 10 inches around the perimeter and through the field. Leave 1/8-inch reveals between strips for that intentional plank-floor look — cover with shoe molding at the walls.
Cost Breakdown for 500 Sq Ft
- Plywood (16 sheets at $75): $1,200
- Construction adhesive: $80
- Brads, screws, sandpaper: $120
- Finishing supplies (stain, sealer, poly): $250
- DIY labor: free; contractor labor: $1,500-2,500
- Total DIY: $1,650; Total pro-installed: $3,150-4,150
When Plywood Is the Wrong Call
Skip modern plywood flooring in bathrooms, mudrooms, and kitchens with serious cooking activity — water and steam will swell the seams. Skip it in homes with multiple large dogs unless you accept that claw scratches will show. And skip it for resale-driven flips in luxury markets where appraisers and inspectors expect real hardwood.
Everywhere else, plywood floors give you 80% of the look at 30% of the cost. Build the budget you save into furniture, lighting, and the rest of the room — that is where the modern aesthetic actually lives.
Prefer to explore on your own?
See how new flooring looks in your actual room in seconds — free, no signup.
Try the free Floor Studio →