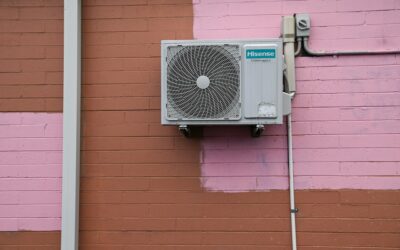
Most ductless systems require a licensed HVAC tech to charge the refrigerant lines, which is exactly why the DIY series changed the conversation. Anyone weighing Mr Cool mini split reviews is usually asking one question: can a homeowner really install one without vacuuming lines or handling refrigerant? The short answer is yes, and that single feature drives most of the brand’s appeal. Here is an honest look at where the system shines and where it falls short.
The DIY Advantage
The headline feature is the pre-charged, quick-connect line set. Traditional mini splits need a technician to pull a vacuum and release refrigerant, but the DIY line comes sealed and charged from the factory. You mount the units, run the line set, tighten the fittings by hand, and the system is ready.
That capability alone can save $1,000 to $3,000 in installation labor. For a handy homeowner with a weekend free, it turns a job that once required a $200-plus service call into a self-contained project. This is the core reason the brand dominates the DIY heat pump category.
Performance and Efficiency Ratings
Efficiency is measured in SEER for cooling and HSPF for heating, and the Mr Cool lineup posts competitive numbers. The popular DIY 4th Generation models carry SEER ratings around 22 to 23, which qualifies many of them for federal energy tax credits and puts them near the top of the residential range.
- Cooling: SEER of roughly 20 to 23 depending on capacity, well above older window units.
- Heating: HSPF near 10, strong for a heat pump.
- Capacity: Single-zone units from 9,000 to 36,000 BTU cover roughly 350 to 1,500 sq ft.
Sizing matters. A 12,000 BTU unit suits a 500 to 550 sq ft room, and going oversized causes short-cycling that hurts both comfort and efficiency. Match the BTU rating to the space rather than buying the biggest unit you can afford.
Cold-Weather Heating
Homeowners in northern climates care most about how the heat pump holds up when temperatures drop. The Hyper Heat and enhanced 4th Gen models are rated to produce heat down to around 5°F, and many owners report the unit keeps a room comfortable well into single-digit weather.
That said, output falls as the mercury drops, so a mini split sized for mild winters may struggle as a sole heat source during a hard cold snap. In genuinely frigid regions, treat it as your primary system with a backup for the coldest nights rather than assuming it covers every scenario alone.
What Owners Praise
Across user feedback, a few strengths come up again and again. The install experience tops the list, followed by quiet operation and the convenience of app and remote control.
- Quiet indoor units: Many run around 20 to 30 decibels on low, barely audible in a bedroom.
- Smart control: The companion app allows scheduling and remote adjustment from a phone.
- Room-by-room comfort: Zoned heating and cooling avoids conditioning space you are not using.
- Solid value: A single-zone 12,000 BTU DIY kit typically runs $900 to $1,400, a fraction of a ducted retrofit.
Common Criticisms
No product is flawless, and honest reviews surface a handful of recurring gripes. The most cited is the pre-charged line set length. Kits come with a fixed 16-, 25-, or 35-foot line, and you cannot easily cut a DIY line to length, so awkward runs mean coiling the excess.
Some owners also note that customer support and warranty claims can be slow, and that self-installing may complicate warranty coverage if you skip the optional registration steps. The condensate drain and electrical hookup, while manageable, still require basic wiring competence and often a dedicated 20- or 30-amp circuit that a licensed electrician should install.
Real Installation Costs
The appeal is DIY savings, but budget realistically. The unit itself is only part of the total, and a few supporting costs are easy to overlook.
Beyond the $900 to $1,400 kit, plan for a wall bracket or ground pad at $50 to $150, a line-set cover for a clean exterior run at around $40 to $80, and electrical work. If you hire an electrician to add the dedicated circuit, expect $300 to $700. Even with those extras, a self-installed single zone commonly lands under $2,000 all in, well below a professionally installed system.
Multi-Zone and Larger Setups
Beyond the single-zone kits, the lineup includes multi-zone condensers that run two, three, four, or five indoor heads off one outdoor unit. This is how homeowners cover several rooms or an entire small house without a separate condenser hanging on the wall for every zone.
Multi-zone systems are more involved to install, since line-set routing and refrigerant handling grow more complex, and some multi-zone models step outside the fully DIY quick-connect approach. Sizing also gets trickier because the outdoor unit’s total capacity is shared across the heads, so if every room calls for cooling at once, an undersized condenser falls behind. Add up the BTU demand of all zones and choose a condenser with enough headroom, and consider having a pro at least verify the design even if you handle the mounting yourself.
The Verdict
For a homeowner comfortable using basic tools and following a wiring diagram, the DIY line delivers genuine value, strong efficiency, and real installation savings. It is the clear pick when you want ductless comfort in a room or two without a full HVAC contract.
If you live where winters turn brutal, size carefully and keep a backup heat source, and if wiring makes you nervous, factor in an electrician. Weighed against the alternatives, most Mr Cool mini split reviews land in the same place: a smart choice for the DIY-inclined, with a few limitations worth knowing before you buy.