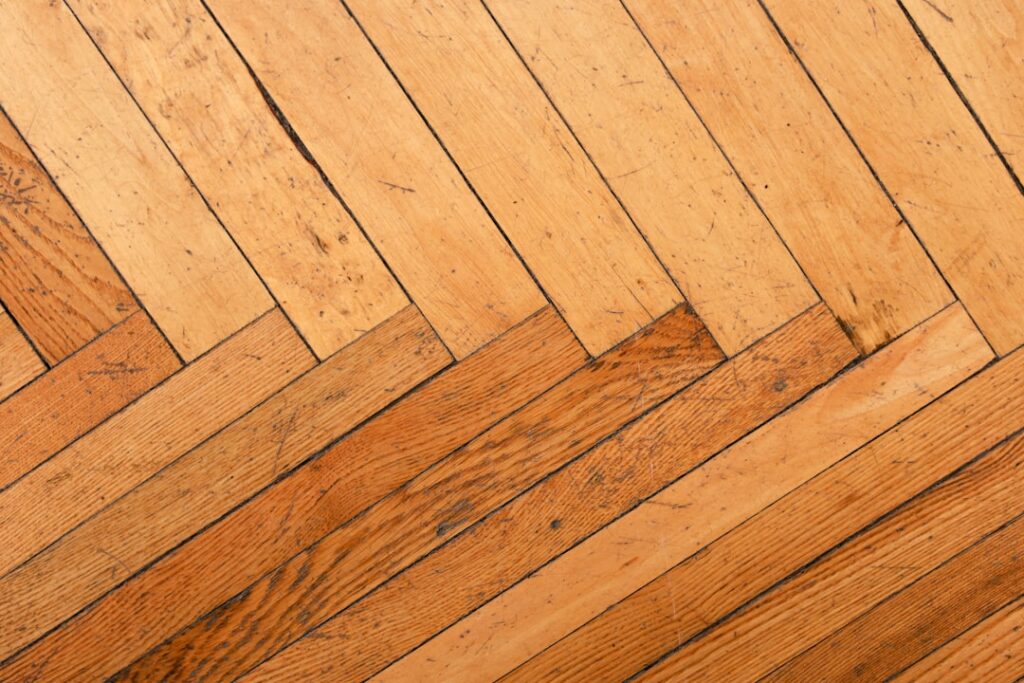
There’s a particular satisfaction in bringing an old timber floor back to life, and few materials reward the effort like reclaimed parquet. Buying parquet flooring used gets you dense, character-rich hardwood blocks that were milled decades ago from slow-grown timber you simply can’t buy new at any sensible price, and it does it at a fraction of the cost of new solid parquet. But salvaged parquet is not a plug-and-play product. It comes with old adhesive on the back, sometimes with a coat of history on the front, and it demands patience. This guide walks you through the whole journey from sourcing to a finished floor.
I’ve laid a lot of reclaimed parquet over the years, and I’ll be honest about the labor involved, because that’s where people underestimate the project. The blocks are cheap. The time is not. If you go in knowing that, reclaimed parquet is one of the most rewarding floors you can put down, full of warmth and provenance that a brand-new floor can’t fake.
Why Buy Used Parquet in the First Place
The appeal of used parquet flooring starts with the timber itself. A lot of reclaimed parquet is old-growth oak, but you’ll also find pitch pine, merbau, teak, iroko, walnut, and other species that were common in institutional and municipal buildings a century ago. This wood is typically denser and more stable than fast-grown modern equivalents, with tighter grain and deeper color that only improves as it ages.
Then there’s the sustainability angle and the character. Reusing timber that’s already been cut keeps beautiful material out of skips and gives you a floor with genuine patina and history. Small nail holes, subtle color variations, and worn edges tell a story that a factory-distressed floor only imitates. For period properties especially, reclaimed parquet is often the most sympathetic choice you can make.
Cost is the third driver. Salvaged blocks frequently sell for a good deal less per square foot than new solid parquet, sometimes dramatically so if you’re willing to do the cleaning yourself. The trade-off is always labor, and understanding that balance is the key to a happy project. You’re swapping money for time, and if you have the time, the value is real.
Where to Source Reclaimed Parquet Blocks
Reclaimed timber merchants and architectural salvage yards are the obvious first stop, and the best of them clean, sort, and sometimes pre-restore their parquet before selling it, which costs more but saves you the worst of the work. When buying from a yard, I always ask whether the blocks are cleaned or raw, what species they are, and crucially how much stock they have, because you need enough of one matching batch to cover your whole floor plus a healthy overage.
Online marketplaces and demolition auctions are cheaper but riskier. You might land a bargain from a school or church being stripped out, but you’re often buying raw, adhesive-caked blocks sight unseen, sometimes still bagged with grit and debris. Buy an overage of at least 10 to 15 percent, because reclaimed blocks always include a share of splits, short offcuts, and pieces too far gone to use.
Whatever the source, inspect for rot, active woodworm, and deep splits. A little historic worm damage that’s no longer active can add character, but soft, crumbling wood or fresh boreholes are a walk-away. Check the block thickness too, since old parquet varies, and a consistent thickness makes sanding to a flat plane far easier once it’s down.
Understanding the Old Adhesive Problem
Here’s the reality that defines any reclaimed parquet job: most old blocks were laid in hot bitumen, a black tar-like adhesive that was mopped onto the subfloor while molten. That bitumen is still stuck to the back and edges of the blocks, hard and brittle when cold. Before you can relay the parquet, that residue has to come off enough for the block to sit flat and for your new adhesive to bond.
Some older floors used other adhesives too, including animal-based glues on very old work, but bitumen is by far the most common and the most stubborn. It’s important to know what you’re dealing with because it changes both the removal method and the disposal, and because bitumen on the back is what makes cleaning the single biggest time cost of the whole project.
A quick word on caution: very old floor adhesives and some old bituminous products can contain hazardous materials, and disturbing pre-1980s flooring occasionally raises asbestos concerns in certain black mastics. If you have any doubt about the origin or age of the material, it’s worth getting it checked before you start grinding and creating dust. Better a small test than a big regret.
Removing Bitumen and Cleaning the Blocks
Cleaning reclaimed blocks is methodical work. The bitumen on the back is usually removed cold, because when it’s chilled it turns brittle and chips off. Many restorers pop the blocks in a cold environment, then knock the bulk of the residue off with a stiff scraper, a chisel held flat, or a wire brush. The goal isn’t a spotless back, it’s a back flat and clean enough to bed properly in fresh adhesive.
You don’t need to remove every last trace from the back, since the new adhesive bonds to the wood and to the residual key, but you do need to get rid of any high spots and loose lumps that would rock the block or hold it proud. The edges matter more, because bitumen squeezed up between tightly laid blocks and if it’s left thick on the sides your new joints won’t close. I clean the edges carefully so the pattern knits back together tightly.
Solvent-based removers exist for softening stubborn bitumen, but they’re messy and slow across a whole floor, so most people reserve them for spot cleaning. Whatever your method, wear gloves, ventilate well, and set up a rhythm: scrape, sort, stack. It’s tedious, but a clean, flat block is what makes the difference between a floor that lies dead flat and one that’s forever slightly proud in spots.
Preparing the Subfloor and Relaying
Your subfloor needs to be sound, dry, and flat before a single block goes down. Over concrete I check moisture with a meter and apply a damp proof membrane if the slab is ground-bearing or shows any moisture, because reclaimed oak will cup and lift over a damp base just like new timber. Over a timber subfloor I make sure it’s rigid and screw down any squeaks first. Any old adhesive on the original subfloor gets scraped or ground back to a bondable surface.
Modern flexible flooring adhesives have made relaying reclaimed parquet far easier than the old hot-bitumen method. I typically use a flexible polymer or a two-part wood flooring adhesive, spreading with a notched trowel and bedding each block firmly, working out from a set-out line so the pattern stays true. Herringbone and basketweave patterns especially reward careful setting out, because a small error early multiplies across the room.
Work in manageable sections, keep the blocks tight, and weight or tap down any that sit proud while the adhesive is still workable. Let the whole floor cure fully before you start sanding, usually giving it at least a day or two so the adhesive has real grip. Rushing to sand a floor that hasn’t cured is how blocks get dragged loose.
Sanding and Restoring the Surface
Once the floor is laid and cured, sanding is where reclaimed parquet transforms. Because blocks vary slightly in thickness and often carry old finish and grime on the face, you start with a coarse grit to level the surface and cut through the history, then work progressively finer. With parquet’s changing grain direction, I favor a belt or planetary sander and take care to avoid deep scratches, since end grain and cross grain sand at different rates.
Herringbone and other patterns can’t be sanded in one direction without scratching, which is why the finer passes and a final buff with a rotary sander matter so much. Take your time with the edges and corners using an edging sander, and vacuum thoroughly between grits so stray grit doesn’t score the surface. This is the stage where a tired, black old floor suddenly reveals bright, honey-toned wood underneath, and it’s genuinely thrilling every time.
After sanding, fill any gaps and small holes with a matching filler or a sawdust-and-resin mix, sand once more, and you’re ready to finish. Reclaimed parquet takes stain and finish beautifully, and its density means it burnishes to a lovely depth.
Finishing and Long-Term Care
For the finish, I usually reach for either a hardwax oil or a modern water-based polyurethane. Hardwax oils give a natural, low-sheen look that suits period parquet and is easy to spot-repair down the line, though it needs occasional re-oiling. Polyurethane builds a tougher film that stands up to heavy traffic and is more forgiving of spills, at the cost of being harder to patch invisibly. Both look superb on old oak, so it comes down to the aesthetic and maintenance you prefer.
Apply the finish in thin, even coats, sanding lightly between coats for adhesion, and let it cure properly before moving furniture back. A freshly finished floor can feel dry to the touch long before it’s fully hardened, so I keep heavy traffic and rugs off it for a couple of weeks while the finish reaches full cure. Patience here protects all the work that came before.
Cared for, a restored reclaimed parquet floor will outlast almost anything else in the house. Keep grit off it with mats, use felt pads under furniture, wipe spills promptly, and refresh the finish when it starts to look tired. Choosing parquet flooring used isn’t the fastest way to get a floor, but it may be the most rewarding, giving you a surface with genuine soul that only gets better with the years you spend on it.
Prefer to explore on your own?
See how new flooring looks in your actual room in seconds — free, no signup.
Try the free Floor Studio →