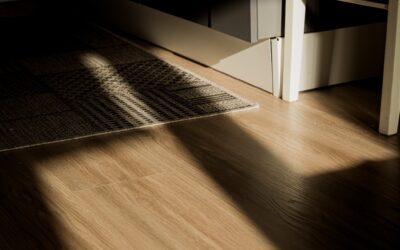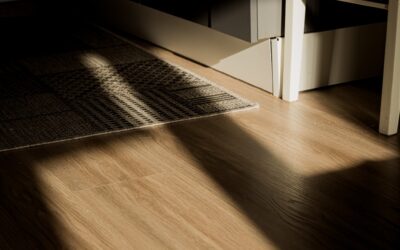
Peel and stick wood flooring gives you the warm, inviting appearance of hardwood floors without the high price tag or complex installation. These self-adhesive planks feature realistic wood grain patterns printed on durable vinyl, and they install in hours rather than days. For budget-conscious homeowners and renters who love the look of wood, this is one of the most accessible flooring upgrades available.
This guide covers how peel and stick wood flooring works, where it performs best, how to install it correctly, and what you can realistically expect in terms of durability and appearance.
What Is Peel and Stick Wood Flooring?
Peel and stick wood flooring consists of individual vinyl planks designed to replicate the look of real wood. Each plank has a printed design layer with wood grain imagery, a clear wear layer for protection, and a pressure-sensitive adhesive backing covered by a peel-off liner. Plank dimensions typically range from 6 to 9 inches wide and 36 to 48 inches long, mimicking the proportions of real hardwood planks.
These planks are part of the broader vinyl flooring family and should not be confused with click-lock luxury vinyl plank, which uses a mechanical locking system instead of adhesive. Peel and stick planks are thinner, more flexible, and less expensive than click-lock products, but they also have a shorter expected lifespan.
How Realistic Does It Look?
Modern peel and stick wood flooring has improved dramatically in appearance. High-definition printing technology creates detailed wood grain patterns with natural color variation, knots, and mineral streaks. Some products even feature embossed textures that you can feel when you run your hand across the surface.
That said, peel and stick wood flooring does not typically match the realism of thicker luxury vinyl plank products or engineered hardwood. The thinner construction limits the depth of embossing, and the edges do not have the beveled profiles that create shadow lines between planks. From normal standing height, good peel and stick products look convincing. Under close inspection, the difference from real wood becomes apparent.
Popular Wood-Look Styles
Oak
Oak is the most popular wood-look pattern for peel and stick flooring. Available in light, medium, and dark tones, oak patterns offer the familiar grain that most people associate with traditional hardwood. White oak and natural oak finishes are trending for their bright, modern appeal.
Hickory
Hickory patterns feature dramatic grain variation and rustic character marks. This style works well in farmhouse, cottage, and rustic interior designs. The bold grain pattern actually helps camouflage seams and imperfections in the peel and stick product.
Walnut
Walnut patterns bring rich, dark tones with flowing grain lines. They create a sophisticated, traditional look that pairs well with formal and contemporary interiors. Dark wood-look planks show dust more easily, so consider your maintenance tolerance before choosing dark tones.
Reclaimed and Weathered Wood
Reclaimed and weathered wood styles feature intentionally distressed patterns with grey, white-washed, and multi-tonal appearances. These designs are popular in coastal, bohemian, and industrial interiors and have the added benefit of masking wear and imperfections in the flooring over time.
Where to Use Peel and Stick Wood Flooring
Best Applications
Peel and stick wood flooring works best in bedrooms, living rooms, home offices, and dining rooms with low to moderate foot traffic. These spaces see less moisture and wear than kitchens and bathrooms, allowing the adhesive and surface to perform at their best. Guest rooms and seasonal spaces are excellent candidates.
Rental Properties
Renters who want to upgrade their flooring without making permanent changes find peel and stick wood flooring ideal. Many products can be removed cleanly when you move out, and the low cost makes it a practical investment even for a short-term lease. Test a sample piece first to ensure it removes cleanly from your specific existing floor.
Accent and Feature Areas
Peel and stick wood planks can be used creatively beyond floor applications. They make excellent accent walls, headboard backdrops, and ceiling treatments. The lightweight, thin construction makes them easy to apply to vertical and overhead surfaces where heavier materials would be impractical.
Areas to Avoid
Avoid installing peel and stick wood flooring in high-moisture areas like bathrooms and laundry rooms, or in entryways where dirt, moisture, and heavy traffic will quickly degrade the product. Kitchens are borderline and depend on the specific product quality and your willingness to replace planks as they wear. For wet areas, consider waterproof flooring alternatives.
Installation Guide
Surface Requirements
The existing floor must be smooth, clean, dry, and flat. Peel and stick planks adhere best to smooth surfaces like existing vinyl, plywood, or well-sealed concrete. Textured surfaces, rough concrete, and floors with raised grout lines will prevent proper adhesion. If your existing floor is not suitable, install a thin plywood or hardboard underlayment over it.
Acclimation
Store the planks in the installation room for 48 hours before installation. This allows them to reach room temperature and prevents post-installation expansion or contraction. Keep the room at a consistent temperature between 65 and 85 degrees Fahrenheit during installation and for 24 hours afterward.
Layout Planning
Dry-lay several rows of planks without removing the adhesive backing to plan your layout. Stagger end joints by at least 6 inches between rows for a natural appearance. Mix planks from different boxes to blend any color variation between production runs. Avoid having very short pieces at the ends of rows, which look unnatural and are more likely to lift.
Step-by-Step Process
Start at the longest, straightest wall in the room. Peel the backing from the first plank and press it firmly against the wall, leaving a 1/8-inch gap for expansion. Continue laying planks end to end across the first row, trimming the last plank to fit. Begin the second row with the cut-off piece from the first row, ensuring the end joints are staggered.
Press each plank firmly and use a hand roller to ensure full adhesive contact. Pay special attention to edges and ends where lifting is most likely to occur. Work row by row across the room, keeping seams tight between planks. For the last row, measure and cut planks to width, accounting for the expansion gap.
Cutting Tips
Peel and stick wood planks cut easily with a sharp utility knife and a straightedge. Score the surface along your cut line, then snap the plank along the score. For curved cuts around door frames or pipes, use scissors or tin snips. Warming the plank with a hair dryer makes it more flexible for fitting around obstacles.
Costs and Value
Peel and stick wood flooring ranges from $0.50 to $3 per square foot for materials. For a 200-square-foot room, expect to spend $100 to $600 on flooring. Since installation is DIY, there are no labor costs, which is where the real savings happen compared to hardwood at $8 to $15 per square foot installed or LVP at $4 to $10 per square foot installed.
Keep in mind that peel and stick wood flooring typically lasts 5 to 10 years, while hardwood can last 50-plus years and quality LVP 15 to 25 years. The lower upfront cost is offset by a shorter lifespan, so consider your timeframe when evaluating value.
Maintenance
Sweep or vacuum regularly with a hard-floor setting. Damp mop with warm water and a mild cleaner as needed. Avoid excess water, steam mops, and abrasive cleaners. Place felt pads under furniture legs and avoid dragging heavy items across the floor. Promptly repair any planks that begin to lift by pressing them back down or applying a small amount of construction adhesive.
Peel and Stick vs. Click-Lock Vinyl Plank
Click-lock luxury vinyl plank is thicker, more rigid, and more durable than peel and stick wood flooring. It provides better sound insulation, more realistic texture, and a longer lifespan. However, it also costs two to three times more and requires slightly more installation skill. For permanent installations in primary living spaces, click-lock LVP is the better investment. For budget makeovers, rentals, and temporary solutions, peel and stick delivers the most value per dollar.
Final Thoughts
Peel and stick wood flooring makes the warmth and beauty of wood-look floors accessible to virtually any budget and skill level. While it cannot match the longevity or realism of premium vinyl plank or real hardwood, it delivers impressive visual results for its price point and offers the easiest installation of any flooring product available.
Choose quality products with thick wear layers, prepare your surface meticulously, and maintain realistic expectations about lifespan. With these guidelines in mind, peel and stick wood flooring can provide years of attractive, functional service while keeping your renovation budget firmly under control.
Prefer to explore on your own?
See how new flooring looks in your actual room in seconds — free, no signup.
Try the free Floor Studio →