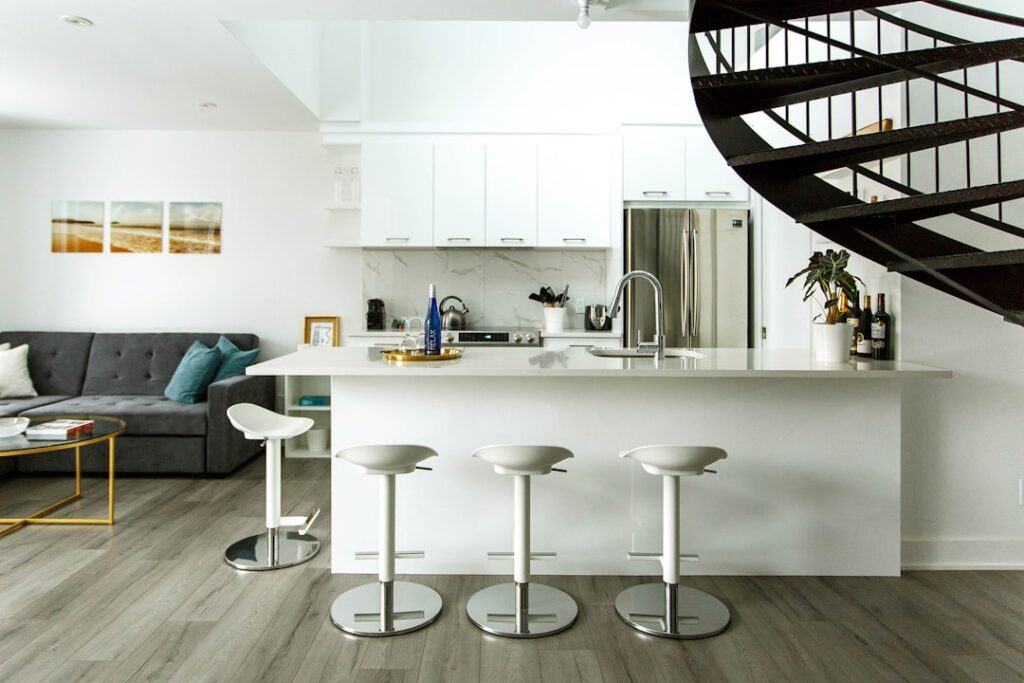
Scrolling through pictures of luxury vinyl flooring is how most people fall in love with it, but photos can be as misleading as a flattering real estate listing. A plank that looks like hand-scraped hickory in a bright studio shot can read flat and plastic in your own dim hallway. The good news is that today’s best luxury vinyl genuinely does look like the pictures, if you know how to read the images and what specs actually produce that realistic surface. This guide explains how to shop from photos wisely, covers the popular looks, and lays out the real pros, cons, and costs.
How to Read Flooring Photos Like a Pro
Marketing images are staged for a reason. Train your eye to look past the styling:
- Zoom in on the surface texture. Realistic vinyl has embossing that follows the printed grain, called embossed-in-register. If the photo shows depth and texture rather than a glossy flat print, that is a good sign.
- Check for pattern repeat. Cheap vinyl repeats the same few plank images over and over. Better products have dozens of unique plank faces, so a wide room shot with no obvious repeats signals quality.
- Note the lighting. Photos are shot in bright, even light. Order a physical sample and view it in your room’s actual lighting before deciding.
- Watch the sheen. A low-gloss matte finish reads as natural wood; high gloss often looks artificial.
Popular Styles You Will See
Certain looks dominate the galleries because they photograph and live well:
- Light and blonde oak: the current favorite, bright and airy, making rooms feel larger and more modern.
- Gray and greige tones: still popular for contemporary and coastal spaces, though trending slightly warmer.
- Wide, long planks: boards 7 inches or wider and up to 48 or 60 inches long look upscale and reduce the number of seams.
- Hand-scraped and wire-brushed textures: rustic, character-rich surfaces that hide scratches and foot traffic.
- Stone and tile looks: luxury vinyl tile (LVT) that mimics marble, slate, and concrete, popular in baths and laundries.
The Pros
Luxury vinyl earns its spot in so many photos because it performs as well as it looks:
- 100 percent waterproof in rigid-core and most modern products, so it works anywhere in the house.
- Durable wear layer that resists scratches, dents, and fading, ideal for pets and kids.
- Comfortable and quiet underfoot, warmer and softer than tile.
- DIY-friendly click-lock installation that floats over most existing floors.
- Affordable compared to the hardwood and stone it imitates.
The Cons
- Photos oversell some products. Budget vinyl can look convincing online and disappointing in person.
- Can dent under heavy point loads, such as a refrigerator or a piano leg, especially thinner products.
- Not refinishable. When the wear layer finally gives out, you replace rather than sand.
- Sun fading is possible in very bright rooms with lower-quality planks.
- Resale value is lower than genuine hardwood in higher-end homes.
What It Costs
Material typically runs $2 to $7 per square foot depending on the core, wear layer, and plank size, with premium designer lines reaching $9. Professional installation adds $1.50 to $4 per square foot, though the click-lock format makes DIY realistic. Most homeowners spend $4 to $10 per square foot installed. To match the look in those glossy pictures, prioritize a thick wear layer of 12 to 20 mil and a rigid SPC core.
From Photo to Floor: A Buying Checklist
Turn inspiration into a floor you will love with a few steps:
- Order physical samples of any plank you liked in a photo and lay several together to judge the pattern repeat.
- View those samples in the actual room, in daylight and at night, before ordering.
- Confirm the wear-layer thickness in mils; higher is more durable and looks better longer.
- Choose wider, longer planks and a matte finish for the most realistic, high-end appearance.
Making Your Own Floor Look as Good as the Photos
The showroom and catalog images that sell luxury vinyl are shot in bright, even, professional lighting over a dead-flat subfloor, and both of those conditions are within your control at home. Lighting is the first lever: the same plank looks rich and dimensional in a room with layered natural and warm artificial light, and flat or fake under a single cool-white ceiling fixture. If you love a floor in a photo, recreate some of that light in your space with a mix of sources before you judge the sample. The second lever is the subfloor, because the glossy magazine shot never shows a plank bridging a dip in the slab; a floor installed over high and low spots telegraphs every flaw and instantly looks cheaper than the picture that sold it.
Installation choices finish the job. Staggering the end joints randomly, rather than in a repeating step pattern, mimics how real wood is laid and hides the printed pattern repeat that gives budget vinyl away. Pulling planks from several boxes at once blends the printed faces so no two identical boards sit side by side. And keeping the recommended expansion gap hidden neatly under baseboard or quarter-round gives the clean, seamless edge you see in professional photos. Get the light, the subfloor, and the layout right, and an affordable mid-grade plank in your home will genuinely rival the styled image that inspired the purchase.
Keep in mind that on-screen color is never perfectly accurate, which is the single biggest reason a floor can disappoint in person even when the installation is flawless. Monitors and phone screens shift color temperature and saturation, so a plank that looks warm honey on your laptop may arrive noticeably grayer or pinker in daylight. This is exactly why every reputable retailer will send physical samples, and why you should never order a whole floor from a photo alone. Lay the real sample beside your cabinets, countertops, and wall color, and check it morning and night, before you commit to the quantity.
The Bottom Line
Pictures of luxury vinyl flooring are a great starting point, but they are the beginning of the decision, not the end. Read the photos for texture, pattern variety, and sheen, then confirm your choice with real samples in your own light and a close look at the wear-layer spec. Do that, and the floor that arrives will look every bit as good as the image that inspired it, while standing up to real life far better than the wood or stone it imitates.
Prefer to explore on your own?
See how new flooring looks in your actual room in seconds — free, no signup.
Try the free Floor Studio →