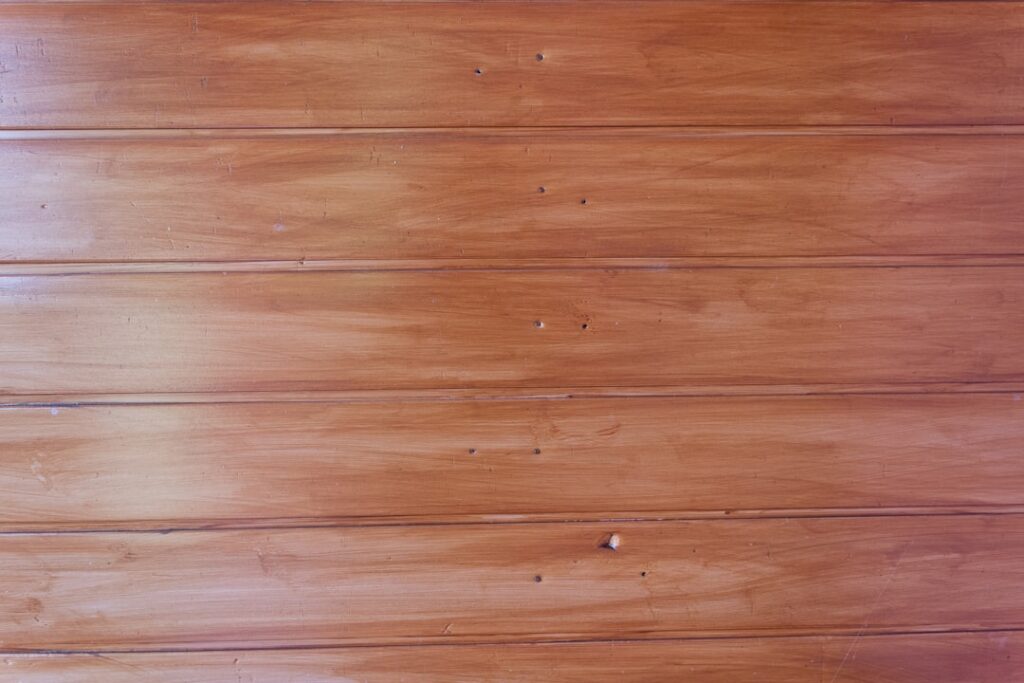
Plywood flooring is one of the most affordable and creative flooring options available — and it is gaining popularity among budget-conscious homeowners and DIY enthusiasts who want real wood floors without the $5 to $12 per square foot price tag of hardwood. At $1 to $3 per square foot for materials, plywood delivers a warm, natural wood look that can range from rustic farmhouse to modern Scandinavian depending on how you finish it.
This guide covers everything about using plywood flooring as a finished surface: the best plywood types, finishing techniques (stain, polyurethane, whitewash, paint), installation methods, cost breakdown, durability expectations, and honest pros and cons.
- What Is Plywood Flooring?
- Best Types of Plywood for Flooring
- Plywood Plank Flooring Method
- How to Finish Plywood Floors
- Installation Guide
- Cost Breakdown
- Durability and Lifespan
- Pros and Cons of Plywood Flooring
- Best Rooms for Plywood Flooring
- Plywood vs Other Budget Flooring
- Frequently Asked Questions
What Is Plywood Flooring?
Plywood flooring means using plywood sheets or plywood cut into planks as the finished floor surface rather than as a hidden subfloor layer. Instead of covering plywood with hardwood, laminate, or carpet, you sand it smooth, apply a finish (stain, polyurethane, paint, or whitewash), and leave it exposed as the final floor.
The concept is simple: plywood is already wood. High-quality plywood has an attractive face veneer of birch, maple, or oak that, when properly sanded and finished, looks surprisingly good. The layered cross-grain construction actually makes plywood more dimensionally stable than solid hardwood — it resists expansion and contraction from humidity changes better than most traditional wood floors.
Plywood flooring works best as a DIY project. The materials are inexpensive and available at any home improvement store, the tools required are basic, and the installation is straightforward. It is especially popular for guest rooms, studios, workshops, rental properties, and homeowners on tight budgets who prefer real wood over vinyl or laminate alternatives.
Best Types of Plywood for Flooring
Not all plywood is suitable for finished flooring. The key is the face veneer quality — you want a smooth, defect-free surface that takes stain and finish well.
| Plywood Type | Face Quality | Thickness | Cost (4×8 sheet) | Best For |
|---|---|---|---|---|
| Baltic Birch | Excellent — smooth, tight grain | 3/4 inch | $50 – $80 | Best overall choice |
| Sanded Pine (A/B grade) | Good — smooth face, minor patches | 3/4 inch | $35 – $55 | Budget-friendly option |
| Maple/Oak veneer | Excellent — hardwood appearance | 3/4 inch | $55 – $90 | Hardwood look on a budget |
| CDX | Rough — knots, voids visible | 3/4 inch | $25 – $40 | Ultra-rustic look only |
| Marine Plywood | Excellent — waterproof glue | 3/4 inch | $80 – $120 | Moisture-prone areas |
Our recommendation: Baltic Birch plywood is the best choice for most plywood flooring projects. It has a smooth, tight-grained birch face veneer with minimal defects, void-free inner plies, and consistent quality. Sanded pine plywood (A or B grade face) is the budget alternative — it takes stain well and has an appealing rustic character.
Avoid: CDX and construction-grade plywood have rough surfaces, visible knots, stamp marks, and voids. They can work for an intentionally rustic look but require significantly more sanding and patching.
Plywood Plank Flooring Method
The most popular approach to plywood flooring is cutting full sheets into planks that mimic the appearance of traditional hardwood flooring.
Standard plank dimensions:
- Width: 4 to 8 inches (6 inches is the most common and natural-looking)
- Length: 48 to 96 inches (cut from 4×8 sheets)
- Thickness: 3/4 inch (standard for direct subfloor application)
How to cut plywood into planks:
- Set your table saw fence to your desired plank width (e.g., 6 inches).
- Rip the 4×8 sheet lengthwise. A standard sheet yields eight 6-inch-wide planks, each 8 feet long.
- For a more natural look, vary the plank widths slightly — mix 5.5-inch, 6-inch, and 6.5-inch planks.
- Sand the cut edges lightly to remove splinters.
- Stagger the joints during installation like traditional hardwood for a realistic plank floor appearance.
Full-sheet method: For a faster but less traditional look, you can install full 4×8 sheets without cutting them into planks. This is quicker but the floor will look like plywood rather than planks. Some homeowners embrace this minimalist, industrial aesthetic.
How to Finish Plywood Floors
The finish transforms raw plywood into an attractive floor. Here are the four most popular finishing methods.
1. Stain + Polyurethane (Most Popular)
This is the classic approach that makes plywood look closest to traditional hardwood.
- Sand the plywood to 150-grit, then 220-grit.
- Apply wood conditioner (especially important for pine plywood to prevent blotchy stain absorption).
- Apply oil-based stain in your chosen color. Popular choices include Early American, Provincial, and Special Walnut.
- Allow stain to dry fully (24 hours).
- Apply 3 coats of oil-based polyurethane, sanding lightly (220-grit) between coats.
- Allow 72 hours for final cure before placing furniture.
2. Whitewash
Whitewashing creates a light, airy Scandinavian or coastal look.
- Sand to 150-grit.
- Mix white latex paint with water (1:1 ratio for light wash, 2:1 for heavier coverage).
- Brush on with the grain and wipe back immediately with a rag.
- Apply additional coats for a whiter appearance.
- Seal with 2-3 coats of water-based polyurethane (oil-based will yellow the whitewash).
3. Painted
Full paint coverage hides the plywood grain entirely and allows unlimited color options.
- Sand to 150-grit and clean thoroughly.
- Apply primer (shellac-based primer is best for plywood).
- Apply 2 coats of porch and floor paint or high-quality latex enamel.
- Topcoat with 2 coats of polyurethane for durability.
4. Clear Coat Only
For a natural wood look that showcases the plywood’s grain pattern.
- Sand to 220-grit.
- Apply 3-4 coats of oil-based or water-based polyurethane.
- Sand lightly between coats with 220-grit.
Finish comparison:
| Finish Method | Appearance | Difficulty | Cost | Durability |
|---|---|---|---|---|
| Stain + poly | Hardwood-like | Moderate | $0.50 – $1.00/sq ft | High |
| Whitewash + poly | Light, coastal | Easy | $0.40 – $0.80/sq ft | High |
| Painted + poly | Solid color | Easy | $0.50 – $1.00/sq ft | Moderate-high |
| Clear poly only | Natural plywood | Easy | $0.30 – $0.60/sq ft | High |
Installation Guide
Installing plywood flooring is a straightforward DIY project that requires basic tools.
Tools Needed
- Table saw or circular saw with a straightedge guide
- Brad nailer or finish nailer (18-gauge)
- Construction adhesive (optional, for extra holding power)
- Tape measure, chalk line, and pencil
- Orbital sander with 100, 150, and 220-grit sandpaper
- Spacers (1/4 inch for expansion gaps)
Step-by-Step Installation
- Prepare the subfloor. Ensure it is clean, level, dry, and structurally sound. Plywood flooring installs over existing plywood subfloor or concrete (with a moisture barrier).
- Cut planks to width using a table saw. Sand cut edges.
- Acclimate planks in the room for 48 to 72 hours.
- Snap a chalk line parallel to the longest wall to ensure your first row is straight.
- Install the first row along the chalk line with 1/4-inch spacers against the wall. Face-nail through the plank into the subfloor.
- Apply construction adhesive (optional) to the subfloor and nail each plank. Use 18-gauge brad nails every 8 to 10 inches along the length and 6 inches at the ends.
- Stagger joints by at least 12 inches between rows — just like hardwood installation.
- Continue row by row, maintaining the 1/4-inch expansion gap around all walls.
- Sand the entire floor once installed — start with 100-grit to level any slight height differences between planks, then 150-grit, then 220-grit.
- Apply your chosen finish (see finishing section above).
- Install baseboards or quarter-round to cover expansion gaps.
For more general installation guidance, see our flooring installation resource.
Cost Breakdown
Plywood flooring costs $1 to $3 per square foot all-in, making it one of the cheapest real-wood flooring options.
| Component | Cost per Sq Ft | Notes |
|---|---|---|
| Plywood material (3/4″ sanded) | $0.80 – $1.80 | Baltic birch at the higher end |
| Stain | $0.10 – $0.20 | One quart covers ~200 sq ft |
| Polyurethane (3 coats) | $0.20 – $0.40 | Oil-based or water-based |
| Sandpaper and supplies | $0.05 – $0.15 | Multiple grits needed |
| Nails and adhesive | $0.05 – $0.10 | Brad nails + construction adhesive |
| Total DIY cost | $1.20 – $2.65 | Labor is free (DIY) |
Comparison: Hardwood flooring runs $4 to $12 per square foot for materials alone, plus $3 to $8 for installation. Plywood flooring delivers a real wood floor at 20 to 30 percent of the cost of traditional hardwood. For more budget options, see our cheap flooring guide.
Durability and Lifespan
Properly finished plywood flooring is more durable than most people expect. Three coats of oil-based polyurethane create a hard, protective surface that resists daily wear. However, plywood is softer than most hardwood species — it will dent and scratch more easily than oak, maple, or hickory.
Expected lifespan: 10 to 20 years with normal residential traffic, depending on the finish quality and maintenance. Light sanding and recoating can extend the life significantly.
Refinishing: You can lightly sand and recoat plywood floors with additional polyurethane 2 to 3 times. Deep sanding (to bare wood) is limited because the face veneer on most plywood is only 1/8 to 1/4 inch thick.
Pros and Cons of Plywood Flooring
| Pros | Cons |
|---|---|
| Extremely affordable ($1-3/sq ft) | Softer than hardwood — dents and scratches more easily |
| Real wood appearance and warmth | Not moisture-resistant (without special sealing) |
| Highly customizable finishes | Edges can splinter during cutting |
| DIY-friendly installation | Limited refinishing potential (thin face veneer) |
| Dimensionally stable (resists warping) | May not appeal to buyers if selling your home |
| Available at every hardware store | Requires significant finish work (sanding, staining, sealing) |
| Can be installed over existing subfloor | Visible plywood edge layers at doorways |
Best Rooms for Plywood Flooring
- Bedrooms: Low traffic makes the softer surface less of a concern.
- Studios and workshops: The industrial aesthetic fits naturally.
- Guest rooms: A great place to install attractive flooring on a budget.
- Rental properties: Low cost and easy to replace if damaged.
- Kids’ rooms and playrooms: Budget-friendly and can be repainted or refinished as styles change.
- Cabins and vacation homes: The rustic look complements cabin aesthetics.
Avoid plywood flooring in: Bathrooms (moisture), basements (moisture), kitchens (heavy spill risk), and entryways (heavy traffic and wet shoes).
For a comparison with traditional wood, see our hardwood flooring guide.
Plywood vs Other Budget Flooring
| Feature | Plywood Flooring | Laminate | Sheet Vinyl | Peel-and-Stick Vinyl |
|---|---|---|---|---|
| Material cost | $0.80 – $1.80/sq ft | $0.70 – $3.00/sq ft | $0.50 – $2.00/sq ft | $0.50 – $1.50/sq ft |
| Material | Real wood | HDF + photo layer | PVC | PVC |
| DIY difficulty | Moderate | Easy | Moderate | Easy |
| Water resistance | Low | Low to moderate | High | High |
| Durability | Moderate | Moderate to high | Moderate | Low to moderate |
| Look and feel | Real wood | Simulated wood | Simulated | Simulated |
| Refinishable | Limited (2-3 times) | No | No | No |
Frequently Asked Questions
Can you use plywood as finished flooring?
Yes. When properly sanded and finished with stain and polyurethane, plywood makes an attractive, functional floor. High-quality plywood like Baltic Birch or sanded pine produces results that rival inexpensive hardwood at a fraction of the cost.
How much does plywood flooring cost?
Total DIY cost is $1 to $3 per square foot including plywood, stain, polyurethane, and supplies. This is significantly cheaper than hardwood ($4-12/sq ft for materials) or even most laminate flooring.
How long does plywood flooring last?
With 3 coats of polyurethane and normal residential traffic, plywood flooring lasts 10 to 20 years. It can be lightly sanded and recoated 2 to 3 times to extend its lifespan.
What thickness of plywood should I use for flooring?
Use 3/4-inch (19 mm) plywood for direct installation over subfloor. Thinner plywood (1/2 inch) can work over an existing solid subfloor but may feel flimsy and is harder to nail securely.
Does plywood flooring decrease home value?
Plywood flooring may not appeal to all home buyers. If you plan to sell soon, consider whether the budget savings outweigh potential buyer perception. That said, a well-finished plywood floor looks better than worn carpet or damaged laminate.
Can you waterproof plywood flooring?
You can make plywood water-resistant (not fully waterproof) by using marine-grade plywood, sealing all edges and surfaces with polyurethane, and applying a waterproofing primer to the underside. It is still not recommended for bathrooms or areas with standing water.
What is the best plywood for flooring?
Baltic Birch plywood is the best choice — it has a smooth, attractive face veneer, void-free inner plies, and consistent quality. Sanded pine plywood (A or B grade face) is the best budget alternative.
Prefer to explore on your own?
See how new flooring looks in your actual room in seconds — free, no signup.
Try the free Floor Studio →