A porcelain tile backsplash is one of the smartest upgrades you can make in a kitchen or bathroom, blending the durability of fired clay with nearly limitless design options. It shields your walls from grease, water, and steam while pulling the whole room together visually. Whether you want a sleek slab look behind the range or a classic subway pattern over the counter, porcelain delivers.
This guide covers why porcelain works so well for backsplashes, the styles available, what installation involves, and what you should budget.
Why Choose Porcelain for a Backsplash
Porcelain is a denser, more refined cousin of ceramic. It is fired at higher temperatures, which produces a tile that absorbs less than 0.5 percent water by weight. That low porosity is exactly what you want on a wall that faces splashing oil, simmering pots, and the occasional spray from a faucet.
The material resists staining, scratching, and heat with ease, so a hot pan splatter behind the cooktop will not etch or discolor the surface. It also wipes clean with a damp cloth, which matters in a zone that collects cooking residue. Compared to natural stone, porcelain needs no sealing and shrugs off acidic foods that would dull marble or travertine.
Popular Styles and Finishes
Modern manufacturing means porcelain can convincingly mimic almost any material while outperforming it. Your design choices are broad.
- Subway tiles: The timeless 3-by-6-inch rectangle, available in glossy, matte, or beveled versions for a traditional or transitional kitchen.
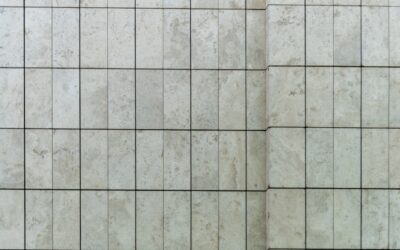
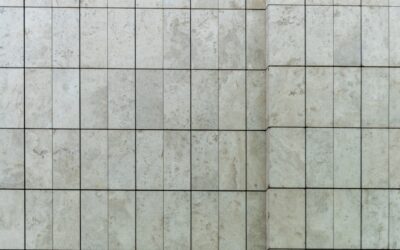
- Large-format panels: Big sheets, sometimes 24 by 48 inches or larger, that create a continuous, grout-minimal slab look behind the counter.
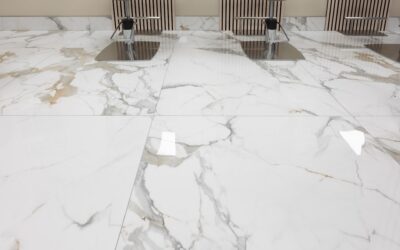
- Marble-look porcelain: The veining and depth of natural stone without the maintenance, ideal for a luxe but practical kitchen.
- Mosaic sheets: Small tiles mounted on mesh backing, great for adding texture or a feature strip.
- Wood-look and concrete-look planks: For rustic or industrial designs that resist moisture far better than the real thing.
Planning Your Layout
Good layout planning separates a professional-looking backsplash from an amateur one. Start by finding the center point of your most visible wall, often behind the sink or range, and balance your tile from there so you avoid skinny slivers in the corners.
Decide on a grout line width early; tighter lines around one-sixteenth of an inch read modern, while one-eighth or more suits classic patterns. Plan where the backsplash terminates, typically at the underside of upper cabinets or a clean edge trim where the wall is exposed. Dry-lay a row on the counter before committing so you can preview spacing and color flow.
Tools and Materials You Will Need
Gathering everything in advance keeps the project moving once the adhesive is open.
- Porcelain tile (order 10 to 15 percent extra for cuts and breakage)
- Polymer-modified thin-set mortar or premixed mastic rated for the location
- Notched trowel sized to your tile
- Tile spacers and leveling clips for large formats
- A wet saw with a diamond blade (porcelain is too hard for a snap cutter alone)
- Unsanded or sanded grout, depending on joint width
- Grout float, sponges, and a bucket
Installation Overview
Installing a backsplash is one of the more approachable tile projects because the area is small and vertical surfaces hide minor imperfections. Still, precision pays off.
- Prep the wall. Clean off grease, sand glossy paint for grip, and patch any holes. The surface must be flat and sound.
- Mark a level line. Counters are rarely perfectly level, so establish a guide line and work to it rather than to the countertop.
- Spread thin-set. Apply mortar with the flat side of the trowel, then comb it with the notched edge to create even ridges.
- Set the tile. Press each piece in with a slight twist, using spacers to keep joints uniform. Check frequently with a level.
- Cut around outlets. Mark and cut openings for switches and receptacles with the wet saw or a tile nipper.
- Grout and seal. After the mortar cures, usually 24 hours, pack grout into the joints, wipe the haze, and apply a grout sealer once dry.
Porcelain is hard and brittle, so cutting it produces fine dust. Wear safety glasses and a dust mask, work in a ventilated area, and follow the thin-set and grout manufacturers’ mixing and cure instructions. If your backsplash involves moving electrical outlets or you are uneasy working around them, hire a licensed electrician and a professional tile setter.
Porcelain Versus Other Backsplash Materials
It helps to see where porcelain lands against the alternatives. Glass tile is striking and reflective but more prone to chipping and shows installation imperfections behind its translucent body. Natural stone such as marble or travertine looks luxurious yet needs regular sealing and stains easily from oil and acidic splashes, a real drawback right behind a stove.
Peel-and-stick and laminate panels cost less upfront but cannot match porcelain for heat tolerance or longevity, and they often look exactly as inexpensive as they are. Ceramic is the closest competitor and a perfectly good choice, but porcelain’s denser body gives it the edge in moisture resistance and durability. For a surface you want to install once and forget about, porcelain offers the best balance of looks, toughness, and value.
Design Tips for a Standout Backsplash
Small choices have an outsized effect on the finished look. Carrying the backsplash all the way to the underside of the upper cabinets, rather than stopping at a short standard height, makes the kitchen feel more custom and intentional. A full-height slab behind the range becomes a built-in focal point.
- Match grout color to the tile for a seamless look, or contrast it to emphasize the pattern.
- Use a metal or bullnose edge trim where the tile meets a wall or window for a clean termination.
- Consider a vertical-stack or herringbone layout to add interest with a single tile shape.
- Coordinate the backsplash undertone with your countertop rather than trying to match it exactly.
What a Porcelain Backsplash Costs
Material pricing spans a wide range. Basic porcelain subway tile starts around $3 to $7 per square foot, while large-format marble-look panels and designer mosaics can run $15 to $30 or more per square foot. A typical kitchen backsplash covers roughly 30 to 40 square feet.
If you hire a pro, labor commonly adds $10 to $20 per square foot depending on tile size, pattern complexity, and your region. All in, a standard kitchen backsplash project tends to land between $600 and $2,500. Intricate patterns, herringbone layouts, and oversized slabs push toward the upper end because of the added cutting and handling.
Care and Maintenance
Daily upkeep is simple. Wipe the surface with a damp cloth and a mild dish soap solution to lift cooking grease. Avoid abrasive pads on glossy finishes, which can dull the glaze over time.
The grout, not the tile, is the part that needs attention. Reseal grout lines every year or two to keep them resisting stains and moisture, and address any cracked or crumbling joints promptly to prevent water from getting behind the tile. With that small amount of care, a porcelain tile backsplash will look sharp for decades, easily outlasting paint, wallpaper, or peel-and-stick alternatives, and it adds real resale appeal to your home.
Prefer to explore on your own?
See how new flooring looks in your actual room in seconds — free, no signup.
Try the free Floor Studio →