Where your new porcelain floor meets carpet, hardwood, or the bare concrete of the next room, something has to bridge the gap cleanly. That something is a transition strip. Porcelain tile transition strips protect the fragile cut edge of your tile, cover the height difference between two floors, and give the whole installation a finished look instead of a jagged seam collecting dirt. After years of running tile jobs, I can tell you the transition is where amateur work gets exposed. Get it right and nobody notices; get it wrong and it’s the first thing everyone trips on.
This guide walks through the types you’ll actually encounter at the store, how to pick the right profile for each situation, what the materials cost, and how to install one without cracking the tile you just spent a weekend setting.
Why Porcelain Tile Transition Strips Matter
Porcelain is dense and hard, roughly 7 on the Mohs scale, but a freshly cut edge is sharp and slightly brittle. Leave it exposed at a doorway and foot traffic, vacuum wheels, and dropped objects will eventually chip it. A transition strip caps that edge and takes the abuse instead.
There’s a height issue too. A typical porcelain tile plus thinset and backer board can sit 1/2 inch to 3/4 inch above a slab, while an adjacent carpet or vinyl floor might be much lower. A strip ramps that difference down so nobody catches a toe. Building codes generally want any abrupt vertical change over 1/4 inch beveled or ramped, and over 1/2 inch handled with a proper transition. So these little pieces are part safety, part protection, part looks.
The Main Types You’ll Choose From
Walk the flooring aisle and the sheer number of profiles is confusing. Here are the ones that matter for tile.
- T-molding: A T-shaped strip used when two hard floors of roughly equal height meet, like porcelain tile to a laminate or hardwood floor. The stem drops into the gap between them.
- Reducer: Ramps down from a taller tile floor to a lower one, such as vinyl plank or a thin engineered wood. One side sits high on the tile, the other tapers to the low floor.
- Carpet edge (Z-bar or tack strip): Grips carpet on one side and butts against the tile edge, tucking the raw carpet under a metal lip.
- End cap or threshold: A single-sided edge for where tile meets an exterior door, sliding door track, or an area with nothing to transition to.
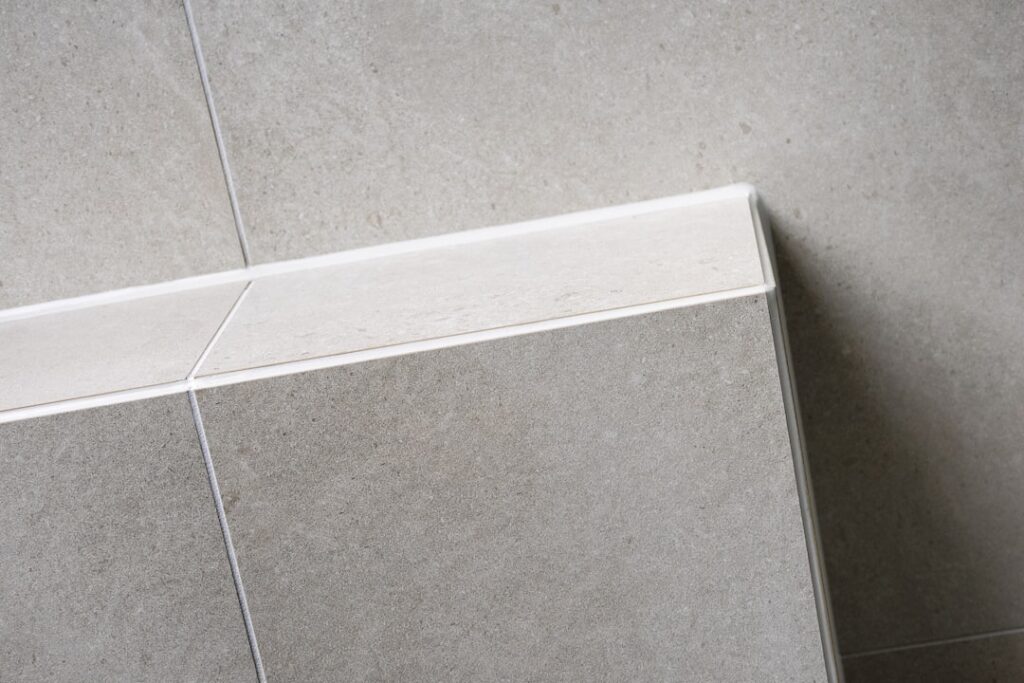
- Schluter-style metal profiles: Anodized aluminum, brass, or stainless L or T shapes set into the thinset while you tile. These give the cleanest, most permanent result.
Schluter and Tile-In Metal Profiles
If you want the professional look, tile-in metal edging is the answer. Brands like Schluter (the Jolly, Reno, and Schiene lines) make profiles you embed in the thinset with one leg under the tile and the visible edge flush with the surface. They come in heights from about 1/4 inch up to 5/8 inch to match your tile thickness exactly. The catch is you have to plan for them before the tile goes down, not after. Once the floor is set, you’re stuck with a surface-mounted strip.
Matching the Strip to the Height Difference
Measure the height of each floor with a straightedge and a ruler before you buy anything. This single step saves the most headaches.
- Both floors within about 1/8 inch of each other, both hard? Use a T-molding.
- Tile noticeably taller than the neighbor? Use a reducer sized to your tile thickness.
- Tile meeting carpet? Use a carpet transition or Z-bar.
- Tile ending at a doorway with nothing beyond? Use an end cap or a marble/stone threshold.
Standard porcelain floor tile runs 3/8 inch to 1/2 inch thick, and large-format pieces can hit 3/4 inch. Add roughly 3/32 inch to 1/8 inch of thinset and you see why height planning matters. A reducer rated for 1/2 inch tile will look wrong on a 3/4 inch installation.
Materials and What They Cost
Transition strips come in several materials, and price tracks durability and looks.
- Aluminum: The workhorse. Anodized or powder-coated, it runs about $8 to $20 for a standard 36-inch length. Holds up well and comes in satin nickel, bronze, and black.
- Brass and stainless steel: Premium metal profiles, often $20 to $45 per length, worth it for high-end or high-traffic spots.
- Vinyl or PVC: The cheapest at $4 to $12, fine for closets and low-traffic areas but they scuff and fade.
- Wood or wood-look: $10 to $30, used to blend into an adjacent hardwood floor.
- Natural stone thresholds (marble, travertine): $15 to $40 for a standard doorway width, common between a tiled bathroom and a hallway.
For a typical three-doorway house project you might spend $40 to $120 on strips. Compared to the cost of the tile itself, it’s minor, so don’t cheap out on the one piece everyone’s feet actually touch.
Installing Porcelain Tile Transition Strips
Surface-mounted strips are the most common retrofit, and most homeowners can handle them. Here’s the process for a metal or wood strip with a track.
- Measure the doorway or opening and cut the strip to length. Use a miter saw with a fine-tooth or metal-cutting blade for aluminum, or a hacksaw for short cuts. Wear eye protection.
- Dry-fit the piece to confirm the height and reveal look right on both floors.
- If it’s a track system, screw the metal channel to the subfloor first, keeping fasteners out of the tile itself. Never drill directly into the porcelain field tile; you’ll crack it. Anchor into the gap or the subfloor beneath.
- Snap or press the visible cap into the track. For glue-down strips, run a bead of construction adhesive or 100% silicone and weight it down.
- Wipe any squeeze-out immediately and let adhesive cure 24 hours before heavy traffic.
For tile-in Schluter profiles, you set them during tiling: comb thinset, press the perforated flange into it under the last row of tile, then set your tile tight against the vertical edge with a normal grout-line gap. Grout right up to the profile.
Tools You’ll Want
- Tape measure and a sharp pencil
- Miter saw or hacksaw with the right blade
- Drill and appropriate anchors for concrete or wood subfloor
- Rubber mallet to seat caps without denting them
- Silicone or construction adhesive
Common Mistakes to Avoid
The biggest error I see is drilling fasteners through the tile face. Porcelain will spider-crack around a screw even with a masonry bit. Always anchor into the subfloor or the joint. Second is buying the strip before measuring the finished floor heights, which leaves you with a reducer that ramps the wrong way. Third is skipping expansion room. Both floors move with temperature and humidity, so leave the recommended 1/8 inch gap under a T-molding rather than jamming it tight.
One more: color. A bright chrome strip against a matte, earth-toned porcelain floor screams retrofit. Take a tile sample to the store and match the finish, not just the shape.
Final Thoughts
Choosing the right porcelain tile transition strips comes down to three questions: what floors am I joining, how big is the height difference, and do I want the strip planned into the tile or added afterward. Answer those and the rest is straightforward. Metal tile-in profiles give the most permanent, upscale result if you plan ahead, while surface-mounted aluminum reducers and T-moldings are the practical retrofit that any homeowner can install in an afternoon for well under $50 a doorway. Measure twice, protect that cut porcelain edge, and your floor will look finished from the first room to the last.
Prefer to explore on your own?
See how new flooring looks in your actual room in seconds — free, no signup.
Try the free Floor Studio →