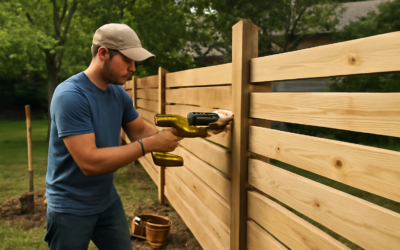
A privacy fence is only as strong as the posts holding it up, and a leaning, wobbling fence almost always traces back to posts that were set too shallow or spaced wrong. Getting every privacy fence post to the correct depth, spacing, and concrete footing is the single most important part of building a fence that stays straight and upright through decades of wind, frost, and soil movement. Everything else, the pickets and rails, is comparatively easy.
Part of our Decks & Outdoor guide — explore the full guide →
This guide covers material choices, spacing, hole depth, concrete quantities, and the setting technique that separates a fence that lasts 20 years from one that sags in five.
Choosing the Right Post Material
The post material determines both cost and lifespan. For a 6-foot privacy fence, your main options each have tradeoffs:
- Pressure-treated wood (4×4 or 6×6): the most common and affordable at $8 to $25 per post, but choose ground-contact-rated lumber and expect 15 to 20 years
- Steel posts: galvanized posts that resist rot and warping, often used as a hidden backbone inside wood fences, lasting 30-plus years
- Vinyl posts: maintenance-free and rot-proof, usually part of a matched vinyl fence system, $30 to $60 each
- Cedar or redwood: naturally rot-resistant and attractive but pricier, best paired with a concrete or metal base for longevity
For a tall privacy fence that catches a lot of wind, upgrade corner and gate posts to 6×6 lumber or steel even if the line posts are 4×4. Those high-stress points fail first.
How Deep to Set a Post
Depth is non-negotiable for a fence this tall. The rule of thumb is to bury one-third of the post’s total length, or a minimum of one-third of the above-ground height, whichever is deeper. For a 6-foot privacy fence, that means setting posts roughly 2 to 3 feet deep, which requires an 8-foot post to leave 6 feet standing.
Frost line matters just as much. In cold climates, dig below the local frost depth, which can reach 36 to 48 inches in northern states, or freeze-thaw cycles will heave the posts upward over winters. Check your regional frost depth before you dig; setting above it guarantees a leaning fence within a few seasons. Dig holes about three times the post width, so a 4×4 gets a 10- to 12-inch-diameter hole.
Getting the Spacing Right
Standard privacy fence post spacing is 6 to 8 feet on center. Six feet is the sweet spot for a solid privacy fence, because closer spacing means fewer, shorter rail spans that resist sagging and stand up to wind loads better. Eight feet works for lighter fences but pushes the limit for a full 6-foot privacy panel.
Match your spacing to your panels. Pre-built privacy panels typically come in 6- or 8-foot widths, so set posts to match the panel width exactly, measuring on center. If you are building picket-by-picket with 2×4 rails, 6-foot spacing keeps the rails from bowing over time. Run a mason’s string line between corner posts first so every intermediate post lands perfectly straight.
How Much Concrete Each Post Needs
Concrete anchors the post and is worth doing right. For a typical 4×4 post in a 10-inch-wide, 30-inch-deep hole, plan on one to two 50- or 60-pound bags of fast-setting concrete mix per post. Larger 6×6 posts or deeper holes may take three bags each.
You have two setting methods. Fast-setting concrete like Quikrete Fast-Setting mix is poured dry into the hole around a plumbed post, then water is added on top, setting in 20 to 40 minutes with no mixing. Traditional mixed concrete gives a stronger footing but requires a wheelbarrow and cures over days. For most homeowners, fast-setting mix is the practical choice. Always crown the concrete slightly above grade and slope it away from the post so water sheds rather than pooling against the wood.
Setting the Posts Step by Step
The setting process rewards patience. Rushing plumb or backfilling before the concrete grabs leads to leaning posts. Follow this order:
- Dig the hole to depth, then add 4 to 6 inches of gravel at the bottom for drainage under the post
- Set the post on the gravel and brace it with two stakes and scrap boards at 90 degrees
- Check plumb on two adjacent faces with a post level, adjusting the braces until dead vertical
- Pour in fast-setting concrete mix, add water per the bag instructions, and re-check plumb immediately
- Let it set undisturbed for at least 30 to 40 minutes before removing braces, and 24 hours before hanging panels
The gravel base is a step many skip, but it lets water drain away from the post bottom instead of trapping it against the wood, which is the main cause of rot in wood posts set in concrete.
Common Mistakes to Avoid
Setting posts too shallow tops the list, followed by ignoring the frost line and skipping the gravel drainage base. Another frequent error is backfilling wood posts entirely in concrete without any drainage, which traps moisture and accelerates rot at the ground line, the exact spot posts always fail first. Some builders now set the post on gravel and backfill with tamped gravel instead of concrete for wood, allowing drainage while still holding firm.
Forgetting to call 811 before digging is a costly one; hitting a buried gas, water, or electric line is dangerous and expensive. Always have utilities marked before the shovel goes in the ground. And never set an entire run of posts in one go without a string line, or you will end up with a fence that snakes noticeably down the property line.
Maintaining Posts for the Long Haul
Once set, a little upkeep extends post life significantly. Seal or stain wood posts every two to three years, paying special attention to the ground line and end grain on top. Add a post cap to shed water off the top end grain, the most vulnerable spot on a wood post. Inspect annually after winter for any heaving or lean, and address a shifting post early before it drags a whole section out of line.
Calculating How Many Posts You Need
Before buying materials, count your posts accurately so you neither run short nor overspend. Measure the total length of the fence line, then divide by your chosen spacing to find the number of sections; add one post to close the run, since a fence with five sections needs six posts. Always add a post at every corner and on both sides of each gate, and remember that gate posts should be the heaviest posts in the fence because they carry the swinging weight and daily use.
For example, a straight 60-foot fence at 6-foot spacing needs ten sections, so eleven line posts, plus extras for any corners or gates. Order a couple of spare posts, since a warped or damaged one is easy to set aside. While planning, also tally your concrete: at one to two bags per post, that same fence could need fifteen to twenty-plus bags of fast-setting mix. Buying it all at once saves repeat trips to the store mid-project.
Working With Slopes and Corners
Real yards are rarely flat, and how you handle a slope changes the look of the finished fence. You have two approaches: stepping and racking. With the stepped method, each fence panel stays level and drops down in steps as the ground falls, leaving triangular gaps beneath each panel that you can fill with a gap board or leave open. With racking, the rails follow the slope at an angle while the pickets stay vertical, giving a continuous line with no gaps but requiring panels built to rack or assembled on site.
Either way, the posts themselves must always be set perfectly plumb and vertical regardless of the ground angle, never leaned to match the slope. At corners, set the corner post first and run string lines out in both directions to establish the two fence runs, since the corner anchors the geometry of everything else. Take extra care to set corner and gate posts deep and solid, because they bear the most stress and are the hardest to fix once the fence is built around them. A little planning at the slopes and corners is what separates a fence that looks professionally installed from one that looks like a weekend guess.
A properly set privacy fence post is the foundation of a fence that stands straight for decades. Dig deep enough for your frost line, space posts at 6 feet on center for a solid privacy fence, add gravel for drainage, and set each one plumb in concrete. Nail those fundamentals and the fence you build this weekend will still be standing tall long after your neighbors have replaced theirs twice.