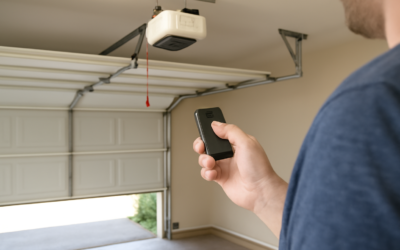
Nine times out of ten, a remote that suddenly stops working does not need a new opener at all, it just needs to be re-linked. Programming a garage door opener is a five-minute job once you know where the “Learn” button hides and how your system handles security codes. Whether you bought a replacement remote, added a wireless keypad, or want to sync the buttons in your car, the process for programming a garage door opener follows the same logic across Chamberlain, LiftMaster, Genie, and most other major brands. Here is exactly how to do it.
Part of our Garage Doors guide — explore the full guide →
- Find the Learn Button First
- Programming a Handheld Remote
- Programming a Wireless Keypad
- Syncing Your Car's Built-In Buttons
- Brand-Specific Quirks
- Troubleshooting When It Won't Learn
- Programming Multiple Devices and Zones
- Frequency, Range, and Interference
- Programming Smart and App-Based Openers
- Programming for Renters and New Homeowners
- When to Erase and Start Over
Find the Learn Button First
Every modern opener has a Learn button (sometimes labeled “Smart” or “Program”) on the motor unit itself, usually near where the antenna wire dangles. You will often need a step stool to reach it. The button color matters because it tells you which coding system you have:
- Yellow or purple: newer Security+ 2.0 rolling code (LiftMaster/Chamberlain, 2011 and later).
- Orange or red/green: older Security+ billion-code systems.
- Genie: a “Program Set” or “Learn Code” button, often blue or purple, on Intellicode models.
Note the color before you buy accessories, because a remote has to match the opener’s frequency and security protocol. A rolling-code opener will not learn a fixed-code remote from the 1990s.
Programming a Handheld Remote
The basic sequence is nearly universal. Work quickly, because the opener stays in learning mode for only about 30 seconds after you press the button.
- Place a step stool under the motor unit and locate the Learn button.
- Press and release it. An LED near the button will light up or begin blinking.
- Within 30 seconds, press the remote button you want to use. Hold it for one to two seconds.
- The opener lights will flash or you will hear a click, confirming the code was learned.
- Test the remote from inside the garage, then again from your driveway.
If nothing happens, the learning window likely expired. Press the Learn button again and repeat, holding the remote closer the second time. Do not hold the Learn button down for six seconds or longer, because on Chamberlain and LiftMaster units that erases all stored remotes.
Programming a Wireless Keypad
A keypad mounted outside the door lets family members and service people in without a remote. Programming adds one step: you choose the PIN.
- On the keypad, enter a four-digit PIN you will remember, then press and hold Enter (or the “*” and PIN together on Genie models) until the keypad light blinks.
- Go to the motor unit and press the Learn button.
- Return to the keypad within 30 seconds and enter your PIN followed by Enter.
- The opener lights flash to confirm. Test the door with the PIN.
Change the factory default PIN immediately. Leaving “0000” or the printed default is an open invitation, and reprogramming a new code takes under a minute.
Syncing Your Car’s Built-In Buttons
HomeLink and Car2U systems in the overhead console or rearview mirror can replace your visor remote entirely. Newer rolling-code openers need a specific handshake:
- Hold your existing remote one to three inches from the HomeLink button you want to train and press both simultaneously until the car’s indicator light changes from a slow to a rapid blink.
- For rolling-code openers, go to the motor unit and press the Learn button.
- Return to the car and press the trained HomeLink button firmly up to three times.
- The door should respond. If it does not, your car may need a compatibility bridge accessory sold by the opener manufacturer.
Some 2018-and-newer vehicles use HomeLink 5.0, which programs from the opener to the car rather than the car to the opener. Check your vehicle manual if the standard method fails.
Brand-Specific Quirks
The general steps hold, but a few details differ by manufacturer. Knowing them saves a frustrating afternoon.
Chamberlain and LiftMaster
These share the same MyQ platform and Security+ 2.0 protocol. A yellow Learn button means you need a yellow-labeled remote for guaranteed compatibility. The lights flashing once signals a successful learn.
Genie
Genie’s Intellicode uses a two-button sequence on some remotes. Press the Program Set button on the motor head, then press the remote twice, waiting for the round LED to glow steadily.
Older Fixed-Code Units
If your opener predates 1993, it may use DIP switches instead of a Learn button. Match the tiny switch positions inside the remote to those inside the receiver, and both will speak the same code.
Troubleshooting When It Won’t Learn
Before assuming the opener is faulty, rule out the simple culprits. A dead coin-cell battery in the remote is the number one cause; a fresh CR2032 costs about $2 and fixes most “dead” remotes. Weak range often points to a bent or shortened antenna wire hanging from the motor unit, so make sure it dangles straight down.
- Remote works up close but not in the driveway: antenna or nearby LED bulb interference. Swap to a garage-rated bulb.
- No LED on the Learn button: check that the opener has power at the outlet and the breaker is on.
- Learns then forgets overnight: the logic board memory may be failing, a repair worth pricing against a new opener.
Programming Multiple Devices and Zones
Most Chamberlain and LiftMaster openers store up to about 30 to 50 individual codes, which is plenty for a family. Each remote button, each keypad, and each car button counts as one stored code, so you can mix and match freely. If you own a two-car garage with two separate openers, program each remote’s button to its matching door so one remote controls both from a single visor unit.
When you add a new device, you do not need to erase anything first. Simply press the Learn button and add the new remote or keypad within the 30-second window; the existing devices stay put. Only erase everything when you want a clean slate for security reasons.
Frequency, Range, and Interference
Modern openers transmit around 300 to 390 MHz, and while the security code is what matters most for programming, radio interference can still cause range headaches after a perfect program job. LED and CFL bulbs are notorious offenders; the electronic noise they emit can cut a remote’s range from the whole driveway down to a few feet.
- Use garage-door-rated LED bulbs designed to minimize interference.
- Keep the antenna wire hanging straight down and undamaged.
- Nearby electronics, LED landscape lighting, or a neighbor’s equipment can occasionally interfere; test at different times if range is erratic.
If a freshly programmed remote works inside the garage but not from the street, interference is the prime suspect long before the opener itself.
Programming Smart and App-Based Openers
Newer openers increasingly pair with a smartphone app in addition to physical remotes, and the programming logic is a little different. LiftMaster and Chamberlain use the MyQ app, which connects the opener to your home Wi-Fi so you can open, close, and monitor the door from anywhere and receive alerts if it is left open.
To set this up, download the manufacturer’s app, create an account, and follow the in-app pairing steps, which usually involve pressing a Wi-Fi or gear button on the motor unit until an LED blinks, then selecting the opener in the app. This connection is separate from your handheld remotes, so pairing the app does not affect or replace your visor and keypad programming. If you ever change home routers, you re-pair only the Wi-Fi connection while leaving the physical remotes untouched.
Programming for Renters and New Homeowners
Moving into a new place is the most important time to take control of your opener’s programming. You have no way of knowing how many remotes the previous occupants kept, so the first step should always be to clear the opener’s memory entirely, then reprogram only the devices you personally hold.
- Erase all codes by holding the Learn button until the LED goes out.
- Reprogram your own remotes and keypad one at a time.
- Set a fresh keypad PIN that no prior resident knows.
- If you rent, check with your landlord before erasing, in case maintenance relies on a stored remote.
This ten-minute routine ensures that no old remote floating around in a stranger’s glovebox can still open your garage.
When to Erase and Start Over
If you buy a used home or a remote goes missing, wipe the memory for security. Hold the Learn button until the LED turns off, usually six to ten seconds, which clears every stored remote and keypad at once. Then reprogram only the devices you control. It is the smartest first step in any home you just moved into, and it takes less time than making a cup of coffee.
With the right matching remote and these steps, programming your opener is well within reach for any homeowner. Keep your model number handy, note the Learn button color, and you will never pay a technician for a job you can finish before dinner.