That neat curved strip tucked where your baseboard meets the floor does a bigger job than its size suggests. Quarter round molding is a trim piece shaped like exactly one quarter of a circle, and it covers the inevitable gap between the bottom of the baseboard and an uneven floor. It gives a room a clean, finished edge, hides the expansion gap that floating floors require, and blocks drafts and dust. Best of all, installing it is one of the most beginner-friendly trim projects in the house, needing just a few tools and an afternoon. Here is everything you need to know.
- What Quarter Round Is For
- Quarter Round vs Shoe Molding
- Material Options
- Tools You Will Need
- Cutting the Corners
- Installing Quarter Round Step by Step
- Finishing Touches
- What It Costs
- Common Mistakes to Avoid
- When to Use Quarter Round vs Skipping It
- Estimating Materials for a Room
- The Finishing Touch That Makes the Difference
What Quarter Round Is For
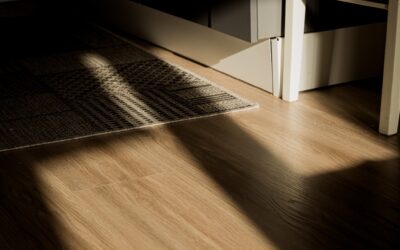
Floors are never perfectly flat, and baseboards are milled dead straight, so a wavy gap always appears where the two meet. Quarter round bridges that gap. Because it is small and slightly flexible, it presses down to follow the floor’s dips and rises while the rigid baseboard above stays straight.
It earns its keep after new flooring most of all. Laminate, engineered wood, and luxury vinyl are installed as floating floors that need a gap around the perimeter to expand; quarter round conceals that gap neatly without pinning the floor down. It also finishes the raw cut edge of tile or hardwood along the wall.
Quarter Round vs Shoe Molding
These two profiles get used interchangeably, but they are not identical. Knowing the difference helps you match existing trim and pick the look you want.
- Quarter round: A true quarter-circle with equal height and width, typically 3/4 by 3/4 inch. It projects farther into the room and casts a more pronounced shadow.
- Shoe molding: Taller than it is wide, around 1/2 inch wide by 3/4 inch tall, with a slimmer, more understated curve.
Both do the identical job of covering the floor-to-baseboard gap. Quarter round is the more traditional, chunkier look; shoe molding reads more refined. Match whichever your home already uses for a consistent feel throughout.
Material Options
Quarter round comes in several materials, and the right one depends on the room and how you will finish it.
- Solid wood (pine, oak): Takes stain well to match hardwood floors. The go-to for stained trim.
- MDF: Comes primed and paints to a smooth white finish, but swells if wet, so keep it out of bathrooms.
- PVC or polystyrene: Completely waterproof, ideal for bathrooms, laundry rooms, and basements.
- Prefinished: Factory-coated to match popular flooring colors, saving you the finishing step.
Tools You Will Need
This is a low-barrier project. A basic kit and some patience get professional results.
- Miter saw or a miter box with a fine-tooth saw
- Brad nailer with 1-inch to 1-1/4-inch 18-gauge brads, or hammer and finish nails
- Coping saw for tight inside corners (optional)
- Tape measure, pencil, and safety glasses
- Wood filler, paintable caulk, and touch-up finish
Cutting the Corners
Corners are where quarter round intimidates beginners, but the logic is simple once you see it. Outside corners, where the wall projects toward you, are cut with two opposing 45-degree miters so the pieces wrap the corner and meet in a clean point. Inside corners, the far more common ones along a room’s perimeter, can be handled two ways.
The quick method is a 45-degree inside miter on both pieces, which works when walls are square. The pro method is coping: cut the first piece square into the corner, then cut the second with a 45-degree miter to reveal its profile and follow that curved line with a coping saw, back-cutting slightly. The coped piece nests over the first for a gap-free joint that stays tight even when walls are out of square. Coping takes practice but forgives the imperfect corners every house has.
Installing Quarter Round Step by Step
The single most important rule governs everything: nail the molding into the baseboard, never into the floor. Angle your brads slightly upward into the baseboard so the trim holds firm while the floor beneath stays free to expand, contract, and be replaced someday without prying off your molding.
Finish the pieces before installing them; priming and painting or staining on sawhorses beats fighting a tight edge against fresh flooring. Then measure each wall, cut your pieces, and work around the room holding each length snug to the floor. Fire a brad every 12 to 16 inches. Where two straight pieces meet on a long wall, join them with a 45-degree scarf joint rather than a butt joint so the seam nearly vanishes. Test-fit each corner before nailing so you can shave a coped joint for a perfect fit.
Finishing Touches
Once everything is nailed, fill the brad holes with matching wood filler or putty, let it dry, and sand lightly. Run a thin bead of paintable caulk along the top seam where the quarter round meets the baseboard to make the two read as one continuous piece. Leave the bottom edge against the floor uncaulked if you have a floating floor, since that seam must stay free to move. Finish with paint or a stain touch-up over the filled holes, and the trim looks factory-installed.
What It Costs
Quarter round is among the cheapest upgrades you can make, especially as a DIY job.
- MDF or pine molding: $0.50 to $1.50 per linear foot.
- Solid oak molding: $1.50 to $4 per linear foot.
- PVC waterproof molding: $1 to $3 per linear foot.
- Prefinished to match flooring: $1.50 to $3.50 per linear foot.
- Average 12×12 room in materials: $30 to $80.
Common Mistakes to Avoid
The biggest error is nailing into the floor, which locks it down and defeats the purpose of concealing an expansion gap; always fasten to the baseboard. Another frequent slip is skipping the pre-installation finishing, then struggling to paint a crisp line in place. Finally, resist the urge to butt-join pieces on a long run, because that seam always shows. A scarf joint disappears.
When to Use Quarter Round vs Skipping It
Quarter round is not mandatory in every situation, and knowing when to use it produces a cleaner result. It is the right call whenever a baseboard leaves a visible gap above an uneven floor, and it is practically required over a floating laminate or vinyl floor that needs its perimeter expansion gap concealed. It is also the quickest way to freshen up a room after new flooring without removing and reinstalling the baseboards themselves.
There are cases to skip it, though. Some designers prefer a clean, modern look with the baseboard scribed tightly to the floor and no shoe or quarter round at all, which suits contemporary interiors and very flat floors. If your baseboards already sit flush to a level floor with no gap, adding quarter round only clutters the line. And in a full remodel where baseboards come off anyway, installing new baseboard tight to the finished floor can eliminate the need for it. Weigh the look you want against the practical need to hide a gap.
Estimating Materials for a Room
Figuring out how much molding to buy is simple once you measure the room’s perimeter. Add up the length of every wall that will receive molding, subtracting doorway openings and any run blocked by cabinetry or a fireplace hearth. That total is your linear footage of molding.
- Add 10% to 15% extra to cover miter cuts, coping waste, and the occasional split piece.
- Standard molding comes in 8-, 12-, and 16-foot lengths; buy longer pieces to minimize seams on long walls.
- Count your inside and outside corners so you can plan cuts before you start.
- Pick up matching wood filler, paintable caulk, and enough brads for a fastener every 12 to 16 inches.
A little overage is cheap insurance against a mid-project run to the store, and leftover pieces are handy for future repairs.
The Finishing Touch That Makes the Difference
For a small piece of trim, quarter round delivers an outsized payoff. It is the final detail that turns a good flooring job into a polished one, hiding gaps, blocking drafts, and giving every room a crisp, custom-built edge. Master the corners, nail to the baseboard, finish the seams with caulk, and your quarter round molding will make the whole floor look like it was done by a pro, all in a single afternoon of work.