A Schluter heated floor uses the company’s DITRA-HEAT system to combine two jobs in one layer: radiant electric floor warming and an uncoupling membrane that protects your tile from cracking. For anyone tiling a bathroom, kitchen, or entry and wanting warm floors underfoot, this is one of the most popular and well-engineered options on the market. It heats fast, installs without messy self-leveling cement over the wires, and lets you place the heating cable exactly where you want it. This guide explains how the system works, how it is installed, what it costs, and how to get the best results.
How DITRA-HEAT Works
Schluter’s DITRA-HEAT is a plastic uncoupling membrane with molded studs on its surface. The heating cable snaps down between those studs, so it is held in place without clips, staples, or a poured layer over the wire. Tile is then set directly on top with thinset mortar. This design does two important things at once:
- Uncoupling: The membrane separates the tile from the subfloor so that when the subfloor expands, contracts, or moves slightly, that stress is not transferred into the tile and grout. This is the single biggest defense against cracked tile and grout lines.
- Radiant heating: The heating cable warms the tile from below, delivering gentle, even floor warmth that also serves as a comfortable primary or supplemental heat source.
Because the wire sits in the membrane cavity and thinset fills around it, there is no separate self-leveling step, which speeds installation and keeps the total floor buildup thin—typically about a quarter inch for the membrane plus tile.
What You Need for a Schluter Heated Floor
A complete DITRA-HEAT installation uses several matched components:
- DITRA-HEAT membrane, sold in sheets or rolls, sized to your floor area.
- Heating cable, sized by the square footage you want heated (buy for the actual heated area, not the whole room).
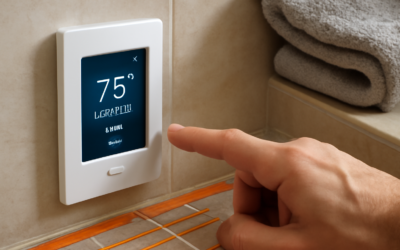
- A programmable thermostat, such as the DITRA-HEAT-E-WiFi or standard touchscreen model, which includes a floor temperature sensor.
- A floor temperature sensor that threads between the membrane studs to regulate the floor rather than the air.
- Unmodified thinset mortar to bond the membrane to the subfloor and to set the tile.
- Tile or stone as your finished surface.
Because the heating cable is 120V or 240V and hardwired to a thermostat, the electrical connection should be done by a licensed electrician on a dedicated GFCI-protected circuit.
Installation Steps
The general sequence for a DITRA-HEAT floor is straightforward but detail-sensitive:
- 1. Prep the subfloor. Make sure it is clean, flat, and structurally sound—plywood or concrete both work.
- 2. Plan the cable layout. Sketch where the cable runs, keeping it out of areas under vanities, tubs, and toilets where it is wasted or overheats.
- 3. Bond the membrane. Trowel unmodified thinset onto the subfloor and press the DITRA-HEAT membrane fleece-side down into it.
- 4. Snap in the cable. Press the heating cable into the stud cavities following your layout, spacing runs evenly.
- 5. Install the floor sensor between studs, away from the cable, so it reads floor temperature accurately.
- 6. Test the cable with a multimeter before and after tiling to confirm it was not damaged.
- 7. Set the tile in thinset directly over the membrane and cable, fully embedding the wire.
- 8. Wire the thermostat (electrician) and let the thinset cure fully—usually a few days—before powering the heat.
Schluter Heated Floor Cost
Cost depends on room size, since you pay for membrane, cable, and a thermostat. Rough ranges for materials:
- DITRA-HEAT membrane: roughly $2 to $4 per square foot.
- Heating cable: roughly $6 to $12 per square foot of heated area.
- Thermostat: $150 to $300 each.
- Total materials for a typical bathroom (about 40 to 60 square feet heated): $600 to $1,200.
- Professional installation (tile setter plus electrician) commonly adds $8 to $15 per square foot on top of materials.
An average heated bathroom floor, installed, often lands between $1,200 and $2,500 including tile. Doing the tile work yourself and hiring only the electrician can cut that substantially.
Benefits and Trade-Offs
The DITRA-HEAT system has clear advantages: warm floors, crack protection from the uncoupling membrane, a thin overall profile, fast heat-up, and no messy pour over the wires. Zoned placement means you only heat where people stand, saving energy. On the trade-off side, electric radiant is best as a comfort or supplemental heat rather than a whole-house solution because of running cost, and it works only under tile and stone—not floating vinyl or laminate. It also raises upfront cost versus plain tile. For a bathroom or kitchen where warm tile is a daily luxury, most homeowners find the investment well worth it.
Getting the Best Results
A few practices make a big difference. Always buy cable for the actual heated area and never cut the heating cable to length—you adjust coverage by spacing the runs, not by trimming. Test the cable’s resistance before, during, and after tiling so you catch damage while you can still fix it. Use a programmable or Wi-Fi thermostat and set a warm-up schedule so the floor is toasty when you wake up. And use unmodified thinset with the membrane as Schluter specifies, since modified thinset can be slow to cure in the enclosed membrane cavity.
DITRA-HEAT vs. Traditional Cable-in-Mortar Systems
Before DITRA-HEAT, most electric floor heating used loose heating cable stapled or clipped to the subfloor and then buried in a self-leveling cement or thick mortar bed, with a separate uncoupling or crack-isolation membrane if you wanted one at all. The Schluter approach combines those steps, and the differences are meaningful:
- No self-leveling pour: the cable snaps into the membrane studs and is embedded when you set the tile, eliminating a messy, time-consuming pour and its drying time.
- Uncoupling built in: traditional cable systems heat the floor but do nothing to protect tile from subfloor movement; DITRA-HEAT does both.
- Thin profile: the combined membrane keeps the total floor buildup low, which matters at doorways and transitions.
- Repositionable cable: you can adjust the cable spacing right up until you set tile, concentrating heat where you want it.
The trade-off is that DITRA-HEAT is a tile-only system, whereas some mat and cable products can go under other floors. For a tile floor, though, the integrated membrane is hard to beat.
Zoning and Thermostat Tips
Getting the most comfort and efficiency from a Schluter heated floor comes down to smart cable placement and thermostat use. Concentrate the heating cable in the areas where bare feet actually go—in front of the vanity, along the walk path, and by the shower—and leave it out from under the toilet, tub, and cabinets, where it is wasted or can overheat. Use a programmable or Wi-Fi thermostat to warm the floor on a schedule so it is toasty when you wake or come home, rather than running it constantly. Because the thermostat regulates the floor sensor rather than the room air, you get consistent warmth without overheating. Setting an early-morning warm-up and a nighttime setback captures most of the comfort for a fraction of the running cost.
Frequently Asked Questions
Can a Schluter heated floor be the only heat source? In a small, well-insulated room it can serve as primary heat, but in most homes electric radiant is used as comfort or supplemental heat because of running cost. Sizing and insulation determine how much it can carry.
Does DITRA-HEAT prevent cracked tile? The membrane’s uncoupling function is specifically designed to isolate tile from subfloor movement, which greatly reduces cracked tile and grout. It is one of the main reasons people choose the system.
Can I install it under any flooring? No—DITRA-HEAT is designed for tile and natural stone set in thinset. It is not intended for floating laminate, engineered wood, or click vinyl.
How much does it cost to run? A typical bathroom floor draws modest power and, used on a schedule, often costs only a few dollars a month. Larger heated areas and constant use cost more; a programmable thermostat keeps it efficient.
Do I need an electrician? Yes. The heating cable must connect to a dedicated, GFCI-protected circuit and thermostat, which should be wired by a licensed electrician even if you do the tile work yourself.
How long before I can turn on the heat? Wait until the thinset has fully cured—generally two to seven days depending on the product and conditions—before powering the floor, so you do not disturb the bond or trap moisture.
Prefer to explore on your own?
See how new flooring looks in your actual room in seconds — free, no signup.
Try the free Floor Studio →