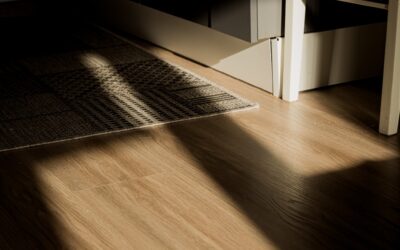
For weekend DIYers on a tight budget, few products are as tempting as peel-and-stick planks. Self adhesive vinyl plank flooring arrives with the glue already applied to the back, so you pull off a paper liner and press each plank straight onto the subfloor. There is no click mechanism, no wet adhesive to trowel, and no special tools beyond a utility knife and a straightedge. That simplicity is genuinely appealing, but it comes with honest limits that determine whether this floor lasts three years or fifteen.
How Peel-and-Stick Actually Works
Each plank has a pressure-sensitive adhesive backing protected by a peel-away film. You remove the film, position the plank, and roll or press it down to activate the bond. Unlike floating click floors, these planks glue directly to whatever is beneath them, which means they will not shift, bounce, or click. The adhesive relies entirely on the smoothness and cleanliness of the surface below, so the bond is only as good as your prep.
Most self-stick planks run thin, typically 1.2 to 2 mm, with a wear layer between 4 and 12 mil. They cost less per square foot than click LVP, often landing in the range of $0.70 to $2.50, which is a big part of the draw for landlords and flippers.
Subfloor Prep Is Everything
The single biggest reason these floors fail is poor preparation. Because the plank is thin and glued flat, every imperfection beneath it shows and every speck of grit weakens the bond. Your surface must be clean, dry, smooth, and firmly attached.
- Concrete: fully cured, moisture-tested, and skim-coated if rough or pitted
- Plywood: sanded smooth with filled seams and no flaking finish
- Existing vinyl: only if it is single-layer, well-bonded, and not cushioned
- Avoid: textured, waxed, painted, or dusty surfaces the glue cannot grip
Vacuum, then wipe with a damp cloth and let it dry completely. Any leftover dust acts like tiny ball bearings between the adhesive and the floor.
Honest Durability Compared to Click and Glue-Down
Here is where straight talk matters. Self adhesive vinyl plank flooring is the least durable of the three main vinyl formats. The factory adhesive is weaker than the professional-grade glue used in full spread-trowel installations, and the thin plank offers little dent resistance. Over time, edges can lift, especially near doorways, under rolling chairs, and anywhere sunlight heats the floor. Heavy furniture and temperature swings accelerate this.
Click SPC and glued-down LVT both outlast peel-and-stick in high-traffic homes. If you want a floor you install once and forget for a decade, self-stick is not the strongest choice. What it offers instead is low cost and reversibility.
Best Uses for Peel-and-Stick Planks
Matched to the right room, these planks perform admirably. Rentals top the list because a landlord can refresh a tired floor cheaply between tenants without a contractor. Low-traffic spaces like closets, guest bedrooms, home offices, and small laundry areas rarely stress the adhesive enough to cause failure. Temporary situations also make sense: staging a home for sale, updating a space you plan to renovate later, or covering an ugly-but-functional floor in a starter home.
Where they struggle is in busy kitchens, entryways, mudrooms, and any space with big temperature or humidity swings. Bathrooms are risky too, since standing water can creep under the seams and break the bond.
Installation Tips That Extend Its Life
A few habits noticeably improve results. Warm the room to at least 65°F before and during installation so the adhesive stays tacky and flexible. Roll every plank with a 100-pound floor roller, or press hard with a J-roller, to fully activate the bond; light foot pressure is not enough. Stagger the seams by at least 6 inches for strength and a natural look, and cut planks with a sharp knife scored along a straightedge rather than trying to snap them.
Use furniture pads under heavy pieces and avoid dragging appliances across the surface, which shears the planks loose. If a plank ever lifts, warm it with a hair dryer, add a bead of vinyl flooring adhesive, and re-roll.
How It Compares on Cost and Value
The economics are the whole reason peel-and-stick exists, so it is worth seeing the full picture. Material typically runs $0.70 to $2.50 per square foot, and because you install it yourself with a utility knife, you skip the $2 to $5 per square foot a pro charges to lay click or glue-down flooring. For a small room, the entire project can cost less than dinner out.
But value is longevity divided by cost, and this is where the math gets honest. If a peel-and-stick floor lasts five years and a mid-grade click floor lasts fifteen, the cheaper floor is not actually cheaper over time once you factor in redoing it twice. That is fine when you want a temporary or interim solution, and a poor trade when you intend to live with the floor for a decade. Buy it for what it is: an affordable, short-to-medium-term surface, not a lifetime investment.
Signs of Failure and How to Fix Them
Knowing the warning signs lets you catch problems before they spread across the room. The most common issue is edge lifting, where a corner or seam curls up, usually near a doorway, a sunny window, or a heat source. You may also see planks shifting or gapping as the adhesive gives, or bubbling where trapped air or a dusty spot prevented a full bond.
Most of these are repairable if you act early. For a lifted edge, warm the plank with a hair dryer to soften the adhesive, add a bead of vinyl flooring glue, press it flat, and weight it overnight. For a shifted plank, lift it, clean both surfaces, and re-set it. Address failures promptly, because one loose edge quickly catches feet and vacuum wheels, pulling neighboring planks loose too.
Is It Right for You?
Self adhesive vinyl plank flooring earns its place when budget, speed, and reversibility outrank maximum longevity. For a rental refresh, a closet, or a low-traffic room you want to update this weekend, it is hard to beat on cost and ease. For a high-use kitchen or a forever floor, spend a little more on click or glue-down vinyl. Match the product to the room’s demands and prep the surface properly, and even this humble format can look sharp for years. Set realistic expectations going in, keep a few spare planks from the same lot for quick repairs, and treat the floor gently with furniture pads and prompt spill cleanup. Do those small things and you will get the most out of the least expensive vinyl on the market, without the disappointment that comes from asking a budget floor to do a premium floor’s job.
Prefer to explore on your own?
See how new flooring looks in your actual room in seconds — free, no signup.
Try the free Floor Studio →