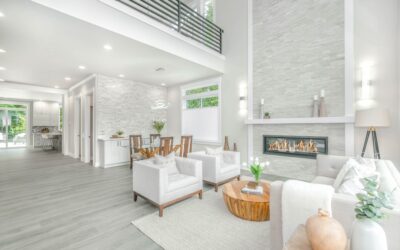
A blank wall behind a 65-inch flat screen begs for texture, and shiplap delivers without competing for attention. Shiplap TV wall ideas range from a $200 weekend DIY with primed MDF boards from Lowe’s to a $4,000 floor-to-ceiling installation in vertical-grain pine with custom millwork. The right approach depends on your budget, the wall’s height, and whether you’re hiding cables, mounting a fireplace insert, or framing built-in cabinetry.
This guide walks through proven layouts seen in countless real homes, exact material costs, board orientations, paint colors that flatter screens, and how to handle the cable mess most articles ignore. Whether you’re working with 8-foot ceilings or a 20-foot great room wall, there’s a shiplap pattern that fits.
Horizontal Shiplap: The Classic Look
Horizontal shiplap is the default for a reason — it visually widens narrow walls, photographs well, and installs faster than vertical runs. Use 6-inch or 8-inch boards depending on wall height. On an 8-foot ceiling, 8-inch boards give roughly 11 rows with a clean 3/4-inch reveal between them.
Material options: real pine shiplap from Home Depot’s UFP-Edge line runs $1.20 per linear foot, primed MDF shiplap from Metrie costs $1.50 per linear foot, and rough-sawn cedar for accent walls runs $3 per linear foot. For a 12×8-foot wall, plan on 130 linear feet of board — $160 to $400 in material.
Vertical Shiplap for Tall Spaces
Vertical shiplap draws the eye upward and works beautifully in great rooms with 12-foot or taller ceilings. It’s a tougher install because boards have to be perfectly plumb, and visible nail holes need filling and sanding before paint. Use 1×6 nickel-gap boards for the cleanest line.
Vertical orientation also lets you skip baseboard trim transitions — the boards run cleanly from floor to ceiling. Pair with a horizontal mantel for a fireplace-and-TV combo, and the contrast in board direction creates a focal point without adding more colors.
Floor-to-Ceiling Versus Half-Wall Treatments
Full floor-to-ceiling shiplap maximizes drama but doubles material cost. Half-wall (wainscoting height, typically 36 to 48 inches) with paint above is the budget-friendly path and lets you swap wall colors later without redoing the bottom. Three-quarter height (around 72 inches) with a picture-rail molding sits between the two and looks especially good with a 55-inch TV centered above.
For accent walls behind the TV only — running ceiling to floor in just the bay where the screen mounts — figure 48 to 80 sq ft of coverage. Material runs $90 to $250, and the labor’s about 6 hours for a competent DIYer.
Paint Colors That Flatter a TV Screen
Black televisions vanish against dark walls and pop against light walls. Both approaches work, but each has trade-offs. Dark walls hide screen edges and create a cinema feel — try Sherwin-Williams Iron Ore SW 7069, Benjamin Moore Hale Navy HC-154, or Behr Black Mocha PPU5-01. Light walls keep the room feeling open and bounce more natural light — Sherwin-Williams Alabaster SW 7008, Behr Swiss Coffee PPU7-12, or Benjamin Moore Simply White OC-117.
Skip pure white. It glares on camera, fingerprints fast, and competes with the screen at night. Off-whites with a hint of warmth read cleaner over the long haul. Use a Sherwin-Williams Emerald or Behr Marquee in eggshell or matte finish — flat sheens hide shiplap nail putty and trim seams better than satin.
Mounting the TV and Hiding Cables
Cables are the part most shiplap TV wall ideas skip. Plan them before nailing a single board. Run a recessed in-wall cable management kit (Sanus SA-IWMS, $50) so HDMI and power exit cleanly behind the TV bracket and re-enter behind a media console. Code per NEC requires power cables behind walls to be rated for in-wall use — UL-listed CL2 or CL3 power extension kits like the PowerBridge Two-CK ($90) are the right tool, never a regular extension cord.
Stud-mount the TV bracket directly to wall studs, not through the shiplap alone. Use a Sanus VLT6-B1 fixed mount for screens up to 90 inches ($150) or a Vogel’s MotionMount for full-motion needs ($350). For drywall behind shiplap, predrill through the board into the stud and use 3-inch lag bolts rated for the TV’s weight plus 50 percent safety margin.
Adding a Fireplace, Floating Shelves, or Built-Ins
Many homeowners combine shiplap with an electric fireplace insert (Touchstone Sideline 50-inch, $400) for a fireplace-and-TV feature wall. Frame the fireplace recess with 2×4 studs, sheath in cement board where heat-rated wall material is required by manufacturer instructions, and run shiplap right up to the firebox opening with a 1.5-inch trim reveal.
Floating walnut or oak shelves at $150 to $300 each break up large expanses of shiplap and give a place for speakers, plants, or photo frames. Mount them with hidden brackets like the Federal Brace Hartford ($65 per pair) rated for 75 pounds. Limit shelves to two flanking the TV — more becomes visually cluttered against textured walls.
DIY Versus Professional Install Costs
A confident DIYer can install a 12×8-foot shiplap accent wall in a weekend. Material costs: $250 for boards, $40 for finish nails, $15 for caulk and wood filler, $60 for primer and two coats of paint. Total around $365 plus tools — figure another $200 if you don’t own a brad nailer (Dewalt DWFP12231 at $99) and a miter saw.
Professional installs from a finish carpenter run $8 to $15 per sq ft of wall, including materials, trim, paint prep, and cleanup. A 96 sq ft wall lands at $800 to $1,400 — worth it if the wall is over 10 feet tall, includes mitered outside corners, or wraps an existing fireplace. For straightforward flat walls, the DIY savings are real, and shiplap is forgiving enough that small inconsistencies disappear under paint.