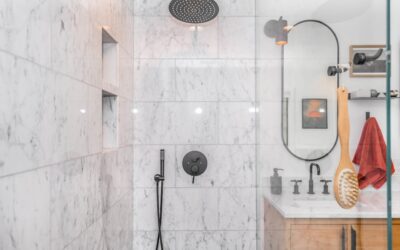
Balancing shampoo bottles on the edge of the tub or a suction-cup caddy that keeps falling is a daily annoyance in most bathrooms. A shower niche insert solves it permanently by building a recessed, waterproof shelf right into the wall, giving you clean storage that looks custom and never rusts, slips, or clutters the shower floor. Prefabricated inserts have made this once-tricky feature accessible to any homeowner tackling a shower remodel.
Part of our Bathroom Remodeling & Flooring guide — explore the full guide →
Instead of framing and waterproofing a niche from scratch, a preformed insert drops into the wall as a single leak-proof unit, ready to tile. This guide covers the types available, how to size and place one, and what installation actually involves.
What Is a Shower Niche Insert
A shower niche insert is a pre-manufactured recessed box designed to be mortared into a shower wall between the studs. Unlike a site-built niche, which requires you to frame an opening, install a shelf, and painstakingly waterproof every corner, an insert arrives as one seamless, already-waterproof shell. You set it in place, tile over its flanges, and finish the interior. That single-piece construction is exactly what prevents the leaks that plague poorly built custom niches.
Most inserts are made to bond directly to modern waterproofing systems and thin-set mortar, and many have tileable interiors so the niche matches or accents your shower walls. Some come pre-finished in solid surface or stone-look materials that need no tile at all.
Types and Materials
Inserts come in several materials, each with trade-offs in cost, weight, and finish options.
- Foam-core (polystyrene or XPS): The most popular type, used by brands like Schluter Kerdi-Board and similar systems. Lightweight, easy to cut, and designed to be tiled over inside and out. They integrate seamlessly with sheet or liquid waterproofing membranes.
- ABS or PVC plastic: A rigid molded plastic shell with a bonding flange. Affordable and fully waterproof out of the box, though the interior is usually tiled.
- Solid surface and stone: Pre-finished niches in materials like cultured marble or acrylic that install ready to use, no tiling of the interior required. Great when you want a contrasting finished look with less labor.
- Stainless steel: Sleek, modern, and completely maintenance-free, popular in contemporary and spa-style showers.
For a fully tiled shower where you want the niche to blend or feature an accent tile, a foam-core insert is the go-to. For speed and a clean finished interior, a solid surface or stainless unit wins.
Choosing the Right Size and Shape
Inserts come in standard footprints, and choosing well makes the niche genuinely useful rather than decorative. Common single-niche sizes run around 12 by 12 inches up to 16 by 20 inches, while taller vertical models reach 12 by 38 inches or more with multiple shelves. Consider what you actually store: a tall pump bottle of body wash needs at least 10 to 11 inches of clearance, and a double-shelf design keeps his-and-hers products separated.
Shape and orientation also matter. A horizontal niche spans wider for more items side by side, while a vertical niche stacks shelves and suits narrow wall sections. Popular styles include:
- Single rectangular niche for a compact, clean look
- Tall vertical niche with two or three shelves for maximum storage
- Double or side-by-side niches in larger showers
Where to Place a Shower Niche
Placement affects both function and looks. The ideal height centers the niche roughly 48 to 60 inches off the shower floor, at chest to eye level so you can reach items easily without bending. Position it on the wall opposite or adjacent to the showerhead rather than directly in the spray, which keeps water from constantly pooling on the shelf and washing product away.
Critically, the niche must fit within a single stud bay, typically the 14.5-inch clear space between studs on 16-inch centers, unless you cut and reframe a header and sill to span wider. Standard inserts are sized to fit that bay. Avoid placing a niche on an exterior wall in cold climates where insulation space is at a premium, and never locate one where it would interfere with plumbing inside the wall.
How a Shower Niche Insert Is Installed
The general process is straightforward, though it must be done during the waterproofing stage of a shower build, not after tiling. Here is the sequence:
- Frame the opening: Cut into the wall between studs and add horizontal blocking for the top and bottom of the niche.
- Dry-fit the insert: Confirm it sits flush and level within the opening.
- Set in mortar: Butter the back and flanges with thin-set and press the insert into place, checking for level.
- Waterproof the flanges: Integrate the insert’s flanges with your waterproofing membrane, sealing every seam so the whole assembly is continuous with the shower wall’s waterproof layer. This is the step that prevents leaks.
- Tile: Tile the shower wall over the flanges and, for foam-core units, tile the interior of the niche. Finish the front edges with bullnose tile, a metal profile like Schluter trim, or a mitered tile edge.
The waterproofing integration is where DIYers most often go wrong. Follow the insert manufacturer’s instructions for bonding to your specific membrane, and do not rush the sealing of corners and flange overlaps.
Prefab Insert vs. Building One From Scratch
It is worth understanding exactly why the prefab insert has largely replaced the old approach of framing and waterproofing a niche by hand. A site-built niche requires you to frame the opening, install a sloped shelf so water drains rather than pools, and then meticulously waterproof every inside corner and seam with membrane and sealant. Each of those inside corners is a place where a tiny gap can let water into the wall cavity, and because the failure happens behind the tile, you often do not discover it until there is rot or a leak into the room below. Building one well demands real tile and waterproofing experience.
A prefab insert eliminates almost all of that risk because the shell arrives as a single continuous waterproof unit with no internal seams to fail. You are no longer relying on your own ability to seal five separate corners perfectly; the manufacturer has already done it. The only critical waterproofing left to you is bonding the perimeter flange to the surrounding wall membrane. For the vast majority of homeowners, that trade, a modest product cost in exchange for dramatically lower leak risk, is well worth it. The main reason to build a custom niche today is when you need an unusual size or shape that no stock insert offers.
Finishing the Front Edge
How you finish the front edge of the niche has an outsized effect on whether the result looks custom or amateur. There are three common approaches, and each suits a different style. A metal edge profile, such as a Schluter Rondec or Jolly trim in brushed nickel, chrome, brass, or matte black, gives a crisp, modern border and is the most forgiving to install because it hides the cut tile edges cleanly. Choosing a profile that matches your shower fixtures pulls the whole design together.
The second option is a mitered tile edge, where the wall tile and the niche tile are cut at 45-degree angles and joined at the corner so no raw edge shows and no metal trim interrupts the tile. It looks seamless and high-end but demands precise cuts and is less forgiving of error. The third is bullnose tile, a tile with one finished rounded edge, which offers a softer, traditional look. Whichever you choose, plan the front edge before you start tiling, because it affects how you lay out and cut the surrounding field tile.
Cost and DIY Considerations
Prefab inserts themselves run roughly $40 to $200 depending on material and size, a fraction of what a custom-built waterproofed niche costs in labor. Add tile, thin-set, and finishing trim, and a DIY niche stays well under a few hundred dollars in materials. Professional installation as part of a shower remodel typically adds $150 to $400 for the niche work alone.
A confident DIYer comfortable with tile and waterproofing can absolutely install a shower niche insert, and doing so during a remodel is far easier than retrofitting later. If you are already gutting a shower to the studs, adding a niche is the perfect time. Just remember that the entire value of an insert lies in maintaining a continuous waterproof envelope, so give the sealing steps the care they deserve and enjoy clutter-free, custom-looking storage for the life of the shower.