Pull tile off any failed shower and the cause is usually one of three things: bad waterproofing, bad backer board prep, or the wrong mortar. The third is the most preventable. The aisle at Home Depot stocks twenty different bags of thinset, and the right shower tile mortar for your installation depends on the tile type, the substrate, and the waterproofing membrane underneath. Pick wrong and you’ll be re-doing the shower in three to five years. Pick right and the installation outlasts the grout, the fixtures, and arguably the bathroom remodel itself.
Part of our Bathroom Remodeling & Flooring guide — explore the full guide →
Modified Versus Unmodified Mortar
The first decision is modified versus unmodified. Modified thinset contains latex polymers (or dry polymer powder) that improve bond strength and flexibility. Unmodified is essentially Portland cement and sand. The packaging will say “Modified” or “Polymer-Modified” prominently, or list the ANSI standard.
- ANSI A118.1: Unmodified, lowest spec, rarely the right call for showers
- ANSI A118.4: Modified, standard for most residential tile
- ANSI A118.11: Modified, EGP (Exterior Glue Plywood) rated — for plywood substrates
- ANSI A118.15: Improved modified, best for large-format tile and high-performance applications
For a typical shower over cement backer board, ANSI A118.4 modified is the workhorse. Brands like Mapei Kerabond/Keralastic system ($30-$45 per bag plus liquid latex), Custom Building Products VersaBond ($16-$22), and Laticrete 254 Platinum ($35-$50) all meet or exceed this spec.
When Unmodified Is Actually Required
Here’s the catch most DIYers miss: sheet waterproofing membranes like Schluter Kerdi and Wedi systems require unmodified thinset between the membrane and the tile. The polymer in modified thinset can’t cure properly because it needs to dry through the substrate, and a waterproof membrane blocks that drying path. The result is unset latex that softens and fails under shower humidity.
Schluter spells this out in their installation handbook: Kerabond, Custom CustomBlend, and similar unmodified thinsets are the only correct choice over Kerdi. Use them for the tile-to-membrane bond. Modified thinset is still fine for bonding the Kerdi to the substrate underneath.
Get this wrong and the shower fails within a year or two. The number of YouTube videos with “I followed the tutorial and it failed” comments traces back to this mismatch.
Tile Type Drives Mortar Choice
The tile material and size also affect your mortar selection:
- Standard ceramic and porcelain under 15 inches: Standard modified thinset (Custom VersaBond, Mapei Ultraflex 2)
- Large-format porcelain (15×30, 24×48): Large-format / medium-bed mortar like Mapei Ultraflex LFT ($25-$35) or Laticrete 257 Titanium ($40-$55). These have higher polymer content and non-sag properties for thicker bond lines
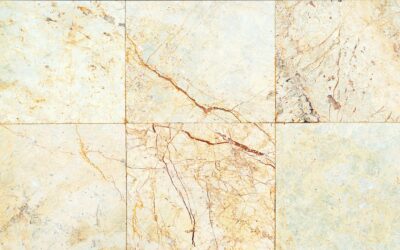
- Natural stone (marble, travertine, slate): White thinset specifically — colored mortar telegraphs through translucent stone. Mapei Granirapid or Laticrete 254 White
- Glass mosaic and glass tile: White, ANSI A118.4 or A118.11, specifically labeled for glass. Mapei Adesilex P10 is the standard pick
- Pebble and stone mosaic: Higher build modified mortar for irregular tile bottoms
The wear-layer logic of LVP doesn’t apply to tile, but Janka-equivalent measures for tile come from the PEI (Porcelain Enamel Institute) rating for ceramic durability and the DCOF (Dynamic Coefficient of Friction) for wet area slip resistance. Shower floor tile should be PEI 3+ and DCOF 0.42 or higher per ANSI A137.1.
Mixing Thinset Correctly
Most installation failures trace back to wrong mixing. The bag instructions matter, and so does the technique:
- Add water (or liquid latex for two-component systems) to the bucket first, then pour in the powder
- Mix with a low-speed drill (300-500 RPM) and a mortar paddle for 3-5 minutes
- Slake for 10 minutes — let the mortar rest so the polymers fully hydrate
- Remix for 60-90 seconds before use, without adding more water
- Discard any mortar that has started to skin over or stiffen — don’t re-temper
The consistency test: a properly mixed batch holds a ridge from a notched trowel without slumping, and a small ball squeezed in your hand holds shape without dripping. Too wet and the tile sinks unevenly. Too dry and the bond is compromised.
Trowel Size and Coverage
The notched trowel size determines how much mortar transfers to the tile back. For a shower:
- 2×2 mosaics: 3/16″ V-notch trowel
- 4×4 to 6×6 wall tile: 1/4″ x 1/4″ U-notch or square-notch
- 8×10 to 12×12 wall tile: 1/4″ x 3/8″ square-notch
- Large format 12×24+: 1/2″ x 1/2″ square-notch, plus back-buttering
Back-buttering — applying a skim coat of mortar to the back of each tile in addition to the trowel ridges on the substrate — is non-negotiable for large-format tile and recommended for any wet area. TCNA guidelines call for 95% mortar coverage on shower floors and 85% on walls. Pull a tile after installing to verify before you do the whole wall.
Substrate Compatibility
The substrate matters as much as the mortar. Cement backer board (HardieBacker, Durock, WonderBoard) is the gold standard for shower walls. Foam backer board (Schluter Kerdi-Board, Wedi) and dimpled membrane substrates (Schluter Kerdi over drywall) each have their own mortar requirements — read the installation manual for the specific system.
Never tile directly to drywall in a shower, even with modified mortar. Drywall absorbs moisture, the gypsum core fails, and the tile pulls off the wall as a sheet within years. Greenboard is barely better and isn’t current code (IRC R702.4) for tub or shower surrounds.
Cure Time Before Grouting and Use
Standard modified thinset reaches full bond strength in 24-72 hours. Rapid-set products like Mapei Granirapid cure to grout-ready in 4-6 hours, useful for tight remodel schedules but pricier ($35-$50 per bag versus $16-$22 for standard).
Wait 14 days before exposing the shower to water — full cure of cement-based products requires moisture and time. Skipping this window risks efflorescence, mortar leaching through grout joints, and reduced long-term bond strength. The temptation to use a brand-new shower at day 7 is real; the cost of waiting one more week is zero, so wait.
Cost and Quantity for a Typical Shower
A standard 3-foot by 5-foot shower (60 sq ft of wall plus 15 sq ft of floor = 75 sq ft of tile coverage) needs about 1.5-2 bags of standard thinset for medium tile, 2.5-3 bags for large format with back-buttering. Material cost runs $40-$100 for the mortar plus another $15-$30 for grout. Compared to the $1,500-$4,500 you’ll spend on tile, fixtures, and labor, picking the right shower tile mortar is the cheapest part of the project and the highest leverage on long-term durability.
Prefer to explore on your own?
See how new flooring looks in your actual room in seconds — free, no signup.
Try the free Floor Studio →