After twenty-odd years of hanging window treatments in everything from 1920s bungalows to new-build tract homes, I still think shutter window blinds are the most underrated upgrade a homeowner can make. Unlike fabric shades or aluminum mini-blinds that sag, fade, and end up in a landfill after five years, a good set of shutter window blinds can outlive the roof over your head. They add real resale value, tighten up your light control, and frankly, they just look permanent in a way nothing hanging from a cord ever will.
- What Exactly Are Shutter Blinds?
- Material Options and What They Cost
- Mounting: Inside vs. Outside
- Getting the Measurements Right
- Light, Privacy, and Energy Performance
- Common Mistakes I See Homeowners Make
- Frame Styles You Should Know
- Cleaning and Long-Term Maintenance
- Installation: DIY or Hire a Pro?
- Are Shutter Blinds Worth It?
But “shutter blinds” is a catch-all term that covers a lot of ground, and the wrong choice for your climate, window, or budget will cost you. Let me walk you through what I tell my own clients before I ever pull out the tape measure.
What Exactly Are Shutter Blinds?
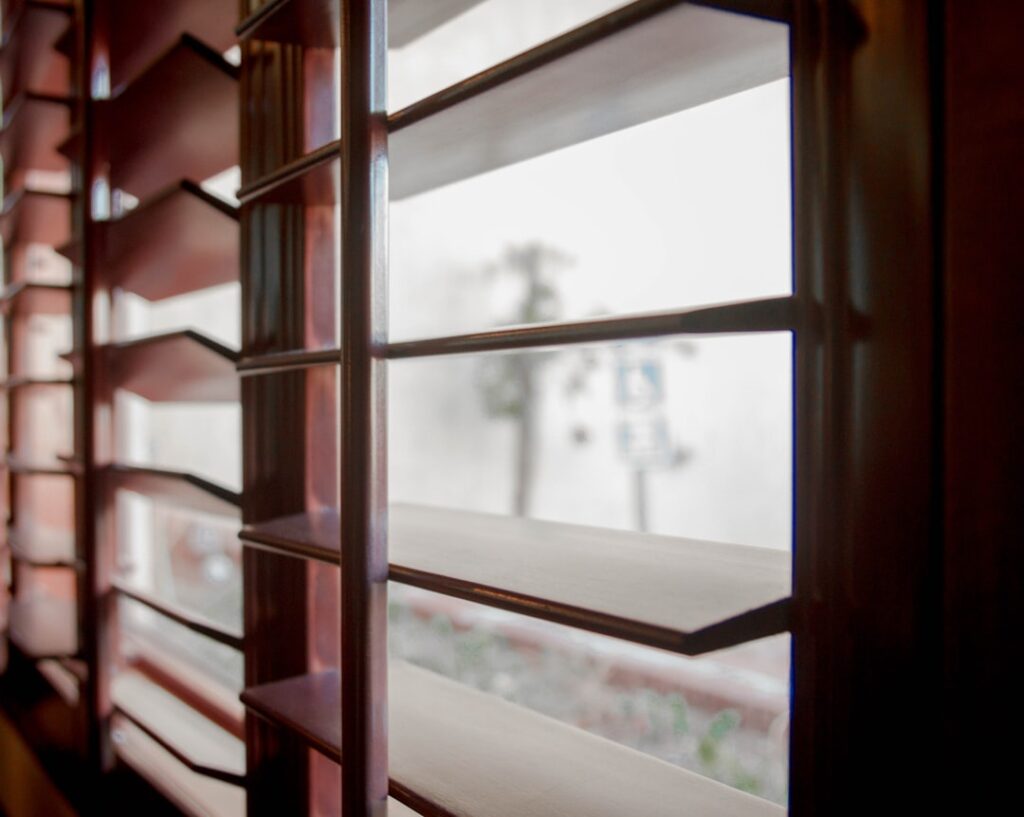
Here’s where people get confused. Traditional blinds are slats of wood, faux wood, or aluminum strung together on a cord that raises and lowers. Shutters, by contrast, are rigid panels with horizontal louvers set into a solid frame. They swing open on hinges and the louvers tilt with a tilt rod or a hidden mechanism.
When someone says “shutter window blinds,” they usually mean interior plantation shutters, so named because they were common on Southern plantation homes and feature wide louvers, typically 2.5, 3.5, or 4.5 inches. The wider the louver, the more unobstructed your outside view and the more light floods in when they’re open. My rule of thumb: 3.5-inch louvers are the sweet spot for most standard windows, while 4.5-inch works beautifully on tall windows and sliders.
Material Options and What They Cost
Material is the single biggest driver of price and longevity. Here’s the honest breakdown I give homeowners:
- Basswood (real hardwood): The premium choice. Lightweight, paintable, stainable, and holds up for decades in dry rooms. Expect $200 to $350 per window installed. Avoid it in bathrooms and over kitchen sinks where humidity warps the panels.
- Faux wood / engineered polymer: A composite core wrapped in vinyl or PVC. Nearly indestructible, moisture-proof, and my go-to for bathrooms, laundry rooms, and coastal homes. Runs $150 to $275 per window. Slightly heavier, so oversized panels need sturdier hinges.
- Vinyl (solid or hollow): Budget-friendly at $80 to $180 per window. Hollow vinyl can bow on wide spans over 36 inches, so I add a divider rail or reinforced center stile.
- Composite (MDF core with polymer coating): A middle ground at $130 to $240. Heavier than wood but very stable.
For a typical 2,000-square-foot home with roughly 15 windows, budgeting $2,500 to $4,500 for quality shutter blinds is realistic. That is more than blinds off the shelf, but you are buying a fixture, not a disposable.
Mounting: Inside vs. Outside
How your shutters mount changes the whole look. An inside mount sits within the window opening for a clean, built-in appearance and shows off the trim. It demands a window depth of at least 2.5 to 3 inches for the frame to sit flush; anything shallower and the louvers hit the glass. An outside mount attaches to the wall or trim around the window, hiding an out-of-square opening and making a small window look larger.
Measure the depth first. In older homes I constantly run into windows only 1.75 inches deep, which forces a Z-frame or L-frame build-out. Nine times out of ten I recommend inside mount when depth allows, because it is the reason these things look custom.
Getting the Measurements Right
Bad measurements are the number one reason a DIY shutter job fails. Follow this sequence and you’ll be fine:
- Measure the width at the top, middle, and bottom of the opening. Use the smallest number for inside mounts.
- Measure the height at the left, center, and right. Again, use the smallest.
- Check for square by measuring both diagonals. If they differ by more than a quarter inch, plan on a filler strip or an outside mount.
- Confirm depth in all four corners, not just one.
- Note any obstructions: cranks, locks, alarm sensors, or deep sills.
Manufacturers like Norman, Hunter Douglas (NewStyle line), and Graber build to a sixteenth of an inch, so a sloppy measurement can leave you with a permanent gap or panels that won’t close.
Light, Privacy, and Energy Performance
This is where shutters earn their keep. Because the panels seat into a solid frame, they block far more light gap than a standard blind, which always leaks around the edges. Tilt the louvers down and you get privacy while still letting a sliver of daylight in. Close them fully for near-blackout in a bedroom.
On the energy side, shutters create an insulating air pocket between the glass and the room. Independent testing has shown well-fitted interior shutters can cut heat loss through a window by roughly 40 to 60 percent compared to bare glass. In an old house with single-pane windows, that is a noticeable dent in your winter heating bill. In the summer, closing south- and west-facing shutters during peak afternoon sun keeps rooms measurably cooler and takes load off the AC.
Common Mistakes I See Homeowners Make
A few pitfalls come up again and again:
- Putting real wood in wet rooms. I’ve replaced countless warped basswood panels in bathrooms. Use faux wood there, full stop.
- Skimping on louver size. People pick narrow 2.5-inch louvers to save a few dollars, then complain the view is chopped up. Go wider when the window can take it.
- Ignoring the tilt-rod choice. A traditional front tilt rod is classic but blocks the view. A hidden or clearview tilt (a rod tucked into the side of the panel) looks cleaner and is what I install most often now.
- Forgetting swing clearance. Panels need room to open. Near a door, a bed, or a countertop, a bypass or bi-fold configuration may be necessary.
Frame Styles You Should Know
The frame is the part that mounts to your window, and choosing the right one is half the battle on a clean install. Manufacturers offer a handful of standard profiles, and the terminology trips up a lot of first-time buyers:
- L-frame (also called a deco frame): An L-shaped molding for inside mounts that gives a simple, flush trim. My most-used frame on square, well-built openings.
- Z-frame: Wraps the window opening with a small return, ideal for shallow windows or to hide an out-of-square jamb. Common in older homes.
- Bullnose or cafe frame: A rounded profile that suits traditional trim and softens the look.
- Hangstrip: A frameless option where the panels hinge directly off a thin mounting strip. Cleanest look but demands a perfectly square opening.
If you’re ordering online, the manufacturer’s measuring guide will steer you to the right frame based on your depth and squareness numbers. When in doubt, a Z-frame is the most forgiving choice for imperfect openings.
Cleaning and Long-Term Maintenance
One of the quiet joys of shutter blinds is how little upkeep they demand compared to fabric treatments that trap dust and need laundering. For routine care, run a microfiber cloth or a soft duster along the louvers once a week, tilting them flat to reach the top surfaces. Every few months, wipe them down with a barely damp cloth and a drop of mild dish soap, then dry immediately, especially on real wood.
Watch the tilt-rod mechanism and the hinges over the years. A hidden tilt can develop a little play after a decade of use; a drop of silicone lubricant on the hinge pins keeps everything swinging smoothly. If a louver ever loosens, most reputable brands sell replacement louver pins for a few dollars rather than forcing you to replace the whole panel. Treat them right and a set of quality shutters genuinely looks new after fifteen years.
Installation: DIY or Hire a Pro?
A handy homeowner with a drill, a level, and patience can install a set of shutter blinds on a standard window in about 45 minutes to an hour once they get the hang of it. The frame screws to the window jamb, you shim it plumb and square, then hang the panels on their hinges and adjust. Most quality shutters ship pre-assembled or as a snap-together frame kit.
That said, if your windows are out of square, oversized, arched, or you’re doing a whole house, hiring a pro is money well spent. Installation typically adds $50 to $100 per window in labor, and a good installer will catch depth and square issues before they become expensive mistakes. For a bay window or a specialty arch, I’d never recommend a first-timer go it alone.
Are Shutter Blinds Worth It?
If you plan to stay in your home more than a few years, yes. The upfront cost stings compared to a big-box blind, but you amortize it over 20-plus years of service, lower energy bills, and a bump in resale appeal that real estate agents consistently flag. Buyers see plantation shutters and read “well-maintained, higher-end home.”
My advice: start with the rooms that matter most, usually the front-facing living areas and the master bedroom, in real basswood or premium faux wood. Then work your way through the rest of the house in phases. Done right, these are the last window treatments you’ll ever buy for that opening.