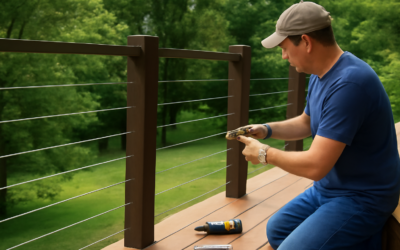
For decks where the view is the whole point, few railing systems disappear as gracefully as tensioned stainless cable. A steel cable deck railing uses thin horizontal runs of stainless steel cable stretched tight between sturdy posts, creating a nearly invisible barrier that preserves sightlines while still meeting code for fall protection. The look is clean, modern, and durable, and the cables shrug off weather for decades without rusting. But cable railing has strict spacing and tensioning requirements, and getting them wrong means either a code failure or sagging lines, so the details deserve real attention before you start.
Part of our Decks & Outdoor guide — explore the full guide →
- Why Cable Railing Appeals
- What Steel Cable Railing Costs
- Code Rules You Must Follow
- Post Spacing and the Tension Challenge
- Step-by-Step Installation Overview
- Maintenance and Longevity
- Choosing Cable Diameter and Fitting Types
- Wood, Aluminum, and Steel Post Options
- Avoiding Common Cable Railing Mistakes
- Is Cable Railing Right for Your Deck?
Why Cable Railing Appeals
The main draw is the view. Quarter-inch or 3/16-inch stainless cables spaced a few inches apart barely register to the eye compared to bulky wood or metal balusters, so a lake, canyon, or garden reads clearly from the deck. Cable also suits contemporary and mid-century architecture, pairing beautifully with wood, aluminum, or steel posts.
Durability seals the deal. Type 316 stainless steel, the marine grade, resists corrosion even in coastal salt air, and the cables need almost no maintenance beyond an occasional wipe-down. Unlike wood balusters that split and need repainting, a properly tensioned cable system can look sharp for 20 to 30 years.
What Steel Cable Railing Costs
Cable railing sits at the premium end, driven by the cost of stainless hardware and the labor of tensioning each run. Pricing depends heavily on whether you supply your own posts and do the work yourself.
- Cable and fittings only: $20 to $40 per linear foot
- Complete DIY system with posts: $60 to $100 per linear foot
- Professionally installed: $100 to $180 per linear foot
For a 40-foot deck run, a DIY system might total $2,500 to $4,000, while professional installation could reach $5,000 or more. The stainless fittings, two per cable per section, are the hidden cost; a single run of railing can use dozens of tensioners and end fittings that add up fast.
Code Rules You Must Follow
Cable railing lives or dies by code compliance, and inspectors scrutinize it closely. The guardrail must stand at least 36 inches tall for residential decks, often 42 inches for decks more than a story up, and resist a 200-pound load at the top rail.
The critical rule is the 4-inch sphere: no gap in the infill may allow a 4-inch ball to pass, which prevents a small child from slipping through. For horizontal cables, this means spacing them no more than 3 inches apart vertically to account for cable deflection when pushed, and tensioning them tight enough that they do not spread. Many jurisdictions also discourage horizontal cables on the theory that children can climb them like a ladder, so confirm your local code before committing.
Post Spacing and the Tension Challenge
Here is where cable railing differs most from other systems. Tensioned cables exert enormous pull on the end posts, so those posts must be exceptionally rigid. Intermediate posts and the tension itself keep the cables from sagging, and the spacing math is unforgiving.
End and corner posts, which anchor the cable tension, must be beefy and firmly bolted to solid deck framing, often reinforced with blocking. Intermediate posts should sit no more than 3 to 4 feet apart, closer than you would space wood-baluster posts, because the cables need frequent support to resist deflection. Every intermediate post gets drilled with precisely aligned holes and fitted with plastic or metal grommets so the cables glide through without wearing.
- End posts: heavily anchored, hold the tensioning hardware
- Intermediate posts: spaced 3 to 4 feet apart, drilled for cable pass-through
- Top rail: ties the posts together and resists the load, often wood or metal
Step-by-Step Installation Overview
Building a cable railing follows a clear sequence, though precision matters at every stage.
- Mount the posts securely, anchoring end and corner posts with heavy stainless lag bolts into reinforced framing, checking each for plumb.
- Install the top rail to lock the posts together and carry the load.
- Drill aligned cable holes through the intermediate posts and fit protective grommets.
- Run each cable from an end fitting on one post, through the intermediate posts, to a tensioner on the opposite end post.
- Tension each cable in turn using the threaded fittings, working from the middle outward for even tension.
- Trim excess cable and cap the fittings.
Tensioning is the trickiest part. Pull each cable snug but not so tight that you bow the posts inward, and check the 4-inch sphere gap at the midpoint of each span where deflection is greatest. A cable tension gauge helps you hit consistent tightness across all the runs.
Maintenance and Longevity
A steel cable deck railing asks for very little. Wipe the cables and fittings a couple of times a year with a damp cloth, and in coastal areas rinse off salt to keep the stainless bright. Over time, cables can loosen slightly as posts and framing settle, so check the tension each season and give the tensioners a quarter turn if any run feels slack.
Choose type 316 stainless everywhere near salt water; the cheaper 304 grade can develop surface rust, called tea staining, in marine environments. With the right grade and a yearly tension check, the system stays taut and rust-free for decades, easily outlasting a wood railing that would need refinishing every few years.
Choosing Cable Diameter and Fitting Types
Cable comes in a few standard diameters, and the choice balances visibility against strength. The two most common sizes for residential railing are 1/8 inch and 3/16 inch, with 1/4 inch reserved for very long spans or commercial jobs. Thinner cable disappears more completely for the cleanest view, while thicker cable resists deflection better between posts, letting you stretch spacing slightly. Most homeowners settle on 3/16 inch as the sweet spot of near-invisibility and stiffness.
Fittings are where the money and the labor concentrate. Each cable run needs a way to anchor one end and tension the other, and several systems exist. Threaded stud tensioners hidden inside the posts give the cleanest look but cost more, while swageless fittings you assemble by hand with a wrench save on special tools. Some fittings tension from the accessible face of an end post; others require access behind the post. Pick a system before you drill, because the fitting type determines how you bore and prepare the end posts.
Wood, Aluminum, and Steel Post Options
The posts carry all the tension, so their material and rigidity matter enormously. Wood posts, usually 4×4 or larger, look warm and cost the least, but they can flex or check over time, and the cable holes must be lined with grommets so the cable does not saw into the wood. Powder-coated aluminum posts are lightweight, never rust, and come pre-drilled from railing manufacturers for a precise, professional result.
Stainless or galvanized steel posts offer the ultimate rigidity, ideal for long runs where cable tension would bow a weaker post, and they suit an industrial aesthetic. Whatever the material, the end and corner posts that anchor the tension must be beefier and more securely fastened than the intermediate posts, since they resist the combined pull of every cable. Many failures trace back to an end post that was not stiff enough or not bolted firmly into reinforced framing, so never skimp there.
Avoiding Common Cable Railing Mistakes
Several errors turn a sleek cable railing into a saggy disappointment. Spacing intermediate posts too far apart is the biggest one; without frequent support, the cables deflect when leaned on and open gaps wider than code allows. Under-tensioning leaves the cables droopy, while over-tensioning bows the posts inward and can even pull them loose. The fix is measured, even tension checked with a gauge and posts stiff enough to take it.
Skipping the protective grommets in pass-through holes lets the cable abrade the post over time, and using the cheaper 304-grade stainless near salt water invites rust staining. Finally, forgetting to verify the 4-inch sphere gap at mid-span, where deflection is worst, is a common inspection failure. Build rigid posts, space them tight, tension evenly, and check that gap, and your railing passes the first time and stays taut for decades.
Is Cable Railing Right for Your Deck?
If you have a view worth preserving, appreciate a modern aesthetic, and are willing to pay a premium and build rigid posts, cable railing is one of the most striking upgrades you can make to a deck. If your budget is tight or local code frowns on horizontal cables, aluminum balusters or glass may serve better. Verify your code, over-build the end posts, space intermediate posts tightly, and tension carefully. Do that, and your steel cable deck railing will frame your view invisibly and stand strong for a generation.