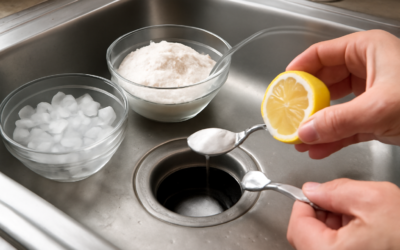
That sour, funky odor drifting out of your sink almost never comes from the drain itself. A stinky garbage disposal is usually the result of food particles clinging to the underside of the rubber splash guard, the grinding chamber walls, and the impellers where you can’t see them. Left alone, those scraps turn into a bacterial buffet, and the smell only gets worse. The good news: fixing it takes about 20 minutes and a few things you already have under the sink or in the pantry.
- Why Your Disposal Smells in the First Place
- Step One: Flush and Inspect Before You Scrub
- The Ice and Salt Scour
- Baking Soda and Vinegar for Odor Neutralizing
- Don’t Skip the Splash Guard
- Citrus and Enzyme Finishers
- Habits That Keep the Smell From Returning
- When the Smell Won’t Go Away
- A Quick Maintenance Schedule
- Natural Cleaners Versus Store-Bought Products
- Odor Troubleshooting at a Glance
Why Your Disposal Smells in the First Place
Grease is the usual culprit. When you rinse oily pans or pour bacon fat down the drain, it coats the chamber and traps starchy debris from pasta, rice, and potatoes. Add a warm, damp environment and you have ideal conditions for odor-causing bacteria and even mold. Coffee grounds and eggshells add grit that packs into the seams around the impellers.
The rubber baffle, or splash guard, is the single most overlooked offender. Flip one of the flaps up with a flashlight in hand and you will often find a black, slimy film on the hidden side. Because water rinses right past it, this ledge collects gunk for months. Any deodorizing effort that skips the splash guard is only treating half the problem.
Step One: Flush and Inspect Before You Scrub
Start by running cold water and turning the unit on for 10 to 15 seconds to clear anything loose. Never reach into the chamber while the disposal has power. If you plan to clean the impellers by hand, unplug the unit under the sink or shut off its breaker first. A common mistake is trusting the wall switch alone, which can be bumped back on.
With the power off, grab a flashlight and look for a lodged bone fragment, fruit pit, or twist tie. Removing a single trapped scrap sometimes solves the whole problem. Use tongs or needle-nose pliers, never your fingers, even with the power disconnected.
The Ice and Salt Scour
The fastest deep clean uses two cups of ice cubes and a half cup of coarse rock salt or kosher salt. Drop them into the chamber, run cold water, and switch the disposal on for about 30 seconds. The ice scours the grinding surfaces while the salt acts as a mild abrasive, knocking loose the sticky film without dulling the blunt impellers. You will hear a loud clatter, which is normal. This method physically removes buildup that liquid cleaners simply rinse over.
For extra scrubbing power, freeze white vinegar in an ice cube tray ahead of time and use those vinegar cubes in place of plain ice. You get the abrasion of the ice plus the deodorizing acid in one pass.
Baking Soda and Vinegar for Odor Neutralizing
Once the chamber is physically clean, tackle lingering smells chemically. Pour a half cup of baking soda into the disposal, then follow with one cup of white vinegar. The mixture will foam and fizz for a few minutes, which lifts residue and neutralizes acidic odors. Let it sit for 5 to 10 minutes, then flush with hot tap water for 30 seconds while running the disposal.
Hot water helps here because it melts thin grease that cold water leaves behind. Do not use boiling water on a running disposal, though, since sudden heat can soften and warp the plastic components in some units. Hot tap water, around 120°F, is plenty.
Don’t Skip the Splash Guard
To clean the splash guard, dip an old toothbrush or a bottle brush in warm soapy water and scrub both the top and the underside of each rubber flap. This is where most of the odor hides. If the guard is removable, and many are, pop it out entirely and scrub it in the sink, then let it dry before reinstalling. A few minutes here often does more for a stinky garbage disposal than any amount of pouring cleaners down the drain.
Citrus and Enzyme Finishers
After the deep clean, grind a few strips of lemon, lime, or orange peel with cold water running. The peels release fragrant oils and the citric acid provides a light final deodorizing. This is a maintenance trick, not a cleaning method, so use it after you have already scrubbed. Frozen citrus peels combined with ice give you scouring and scent at once.
For homes with recurring odor problems, an enzyme-based drain cleaner or dedicated disposal deodorizer packet works well every couple of weeks. Enzymes digest organic buildup over several hours, reaching biofilm in the drain line below the unit that mechanical cleaning cannot touch. Avoid harsh chemical drain openers like sodium hydroxide products, which can damage seals and are not designed for disposals.
Habits That Keep the Smell From Returning
Prevention is far easier than repeat cleaning. Build a few simple habits into your kitchen routine:
- Run cold water before, during, and for 15 seconds after every use so debris flushes fully through the trap.
- Keep grease, oil, and fat out of the disposal entirely; pour cooled grease into a can and throw it in the trash.
- Feed food scraps in small batches rather than cramming the chamber full at once.
- Avoid fibrous items like celery, corn husks, and onion skins that wrap around the impellers.
- Grind a handful of ice weekly as light preventive maintenance.
These steps address the root causes rather than masking the symptom. A disposal that gets cold water and stays free of grease rarely develops a serious odor.
When the Smell Won’t Go Away
If you have scrubbed the chamber, cleaned the splash guard, and deodorized, yet the smell persists, the odor may be coming from the P-trap or the dishwasher connection rather than the disposal. A partially clogged trap holds standing water and rotting debris. Remove the trap, empty it into a bucket, and clean it with a bottle brush. Check the dishwasher drain hose too, since a low loop or kinked line can let stagnant water sit against the disposal inlet.
Persistent sewer-gas smells, as opposed to sour food smells, point to a dry or failing plumbing vent, which is a job for a plumber. If your disposal is more than 10 to 12 years old, leaks at the bottom seam, or has rust flaking into the chamber, replacement is usually smarter than repeated cleaning. A mid-range 3/4 horsepower unit runs about $90 to $200, and swapping one out is a manageable afternoon project for a confident DIYer.
A Quick Maintenance Schedule
To keep things fresh with minimal effort, follow a simple rhythm. Grind ice and salt once a week. Run the baking soda and vinegar treatment every two weeks. Do a full splash-guard scrub once a month. Finish with citrus peels whenever the kitchen needs a lift. Stick to that schedule and a stinky garbage disposal becomes a problem you fix once and rarely think about again. Clean surfaces, cold water, and no grease are the whole formula, and none of it requires special tools or a service call.
Treat your disposal like the small appliance it is rather than a bottomless trash can, and it will run quietly and odor-free for well over a decade. The few minutes you spend on maintenance each week save you from the far less pleasant job of chasing down a mystery smell later.
Natural Cleaners Versus Store-Bought Products
Homeowners often ask whether the pantry approach really beats a commercial disposal cleaner. The honest answer is that both have a place. Baking soda, vinegar, ice, salt, and citrus cost pennies and handle routine odors well, and they are gentle on your plumbing and septic system. Commercial foaming cleaner packets, sold in most grocery stores for a few dollars, are convenient and formulated to cling to the chamber walls and splash guard longer than a quick vinegar rinse. They can be worth keeping on hand for the occasional deep refresh.
What matters most is avoiding the harshest options. Chlorine bleach can be used sparingly, a tablespoon diluted in a sink of water, but it degrades the rubber splash guard over time and should never be mixed with vinegar or ammonia, since that combination releases toxic fumes. Skip the caustic drain openers entirely. For most people, a rotation of baking soda and vinegar plus a monthly foaming packet keeps a disposal fresh without any risk to the components.
Odor Troubleshooting at a Glance
When you are trying to track down a stubborn smell, match the clue to the likely source. A sour, food-like odor almost always means buildup in the chamber or on the splash guard, so scrub those first. A musty, mildew smell suggests a damp, poorly draining trap that needs cleaning. A rotten-egg or sewer odor points to the plumbing vent or a dry trap rather than the disposal itself. And a smell that returns within a day of cleaning usually means you missed the underside of the splash guard, the single most overlooked spot.
Keeping a simple mental map like this saves you from throwing cleaners at the wrong problem. Nine times out of ten a stinky garbage disposal traces back to hidden food film, cold water and grease control fix the root cause, and a five-minute weekly habit keeps the smell from ever coming back. Treat the appliance with a little consistent care and it stays fresh, quiet, and reliable for well over a decade of daily use.