A full clay brick is about 2.25 inches thick, which is far too tall to drop onto an existing floor without ripping out doors, raising thresholds, and rebuilding transitions. That is exactly the problem thin brick pavers for flooring were invented to solve. At roughly half an inch to three-quarters of an inch thick, they give you the color, texture, and character of genuine kiln-fired brick while adding almost nothing to your floor height. For anyone who wants a warm, old-world brick floor in a kitchen, mudroom, or sunroom, they are the practical answer.
I have installed thin brick over concrete slabs and over plywood subfloors, and when it is done right it is nearly indistinguishable from a full masonry floor. Done wrong, it cracks and lifts. The difference is all in the substrate and the setting materials.
What Thin Brick Pavers Actually Are
Thin brick pavers are real fired-clay bricks sliced down to a tile-like thickness, typically 1/2 inch to 3/4 inch, though some run up to an inch. They come in the same standard face dimensions as full brick, most commonly a 2.25-by-8-inch modular face, plus square and larger formats. Because they are cut from actual brick, the color runs all the way through and the surface has the same fired texture, chips, and tonal variation you get from full masonry.
You will also see clay-look concrete “brick pavers” sold for floors. Those are cast concrete, cheaper, and more uniform, but they lack the depth of color and the durability of true fired clay. If you want the authentic look, confirm you are buying kiln-fired clay thin brick, not a concrete imitation.
The Pros of Thin Brick Floors
The appeal goes well beyond looks. Here is what actually makes them worth considering:
- Minimal height gain: at 1/2 to 3/4 inch plus thinset, you add roughly 3/4 to 1 inch total, similar to a tile floor, so doors and appliances usually still fit.
- Extreme durability: fired clay is dense and hard, shrugging off dropped pans, pet claws, and decades of foot traffic.
- Slip resistance: the naturally textured surface grips well, even in a wet mudroom or entry.
- Timeless character: brick reads as warm and established, and it hides dirt, crumbs, and pet hair between cleanings better than almost any other floor.
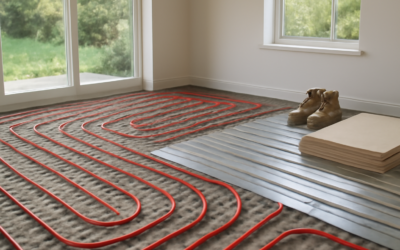
- Great over radiant heat: clay is a good thermal mass, so it stores and radiates warmth efficiently over in-floor heating.
The Cons You Should Know
No floor is perfect, and thin brick has real drawbacks. It is hard and cold underfoot, so a dropped glass shatters and standing for long stretches feels less comfortable than vinyl or cork. The porous clay and, more importantly, the grout lines need sealing, or they will stain from grease, wine, and mud.
The surface is also uneven by nature. Those charming ridges and tumbled edges trap grit, so sweeping takes more effort than a smooth tile. And while the material itself is affordable, a proper installation is labor-intensive, which pushes the installed cost up. Finally, brick’s rustic look does not suit every home; in a crisp modern kitchen it can feel out of place.
Thin Brick Paver Flooring Cost
Budget in two parts, material and labor. For the brick itself, expect these ranges in 2024:
- Material only: $4 to $9 per square foot for genuine clay thin brick; concrete look-alikes run $2 to $5.
- Thinset, grout, and sealer: roughly $1 to $2 per square foot in supplies.
- Professional installation: $8 to $15 per square foot in labor because of the tight joints and detailed grouting.
All in, a professionally installed thin brick floor lands around $14 to $25 per square foot. A DIYer who owns a wet saw can cut that to the material and supply cost, roughly $6 to $11 per square foot, plus a weekend or two of work. For a 150-square-foot mudroom, that is a $900 to $1,650 DIY project or $2,100 to $3,750 installed.
How to Install Thin Brick Pavers
The process mirrors tile setting, with a few brick-specific steps. The critical rule is that your substrate has to be flat, clean, and rigid, because brick will not tolerate deflection.
Step 1: Prep the Substrate
Over concrete, grind or fill any high and low spots to within 1/8 inch over 10 feet, then clean off dust and sealer. Over a wood subfloor, install a cement backer board such as 1/4-inch HardieBacker set in thinset and screwed on a 8-inch grid, then tape and mud the seams. Never set brick directly on bare plywood; it will crack.
Step 2: Dry-Lay and Plan
Snap chalk lines to find your center and dry-lay a row of brick with 3/8-inch spacers to check the pattern and joint width. Running bond, herringbone, and basketweave are the classic layouts. Plan cuts so you are not left with slivers along the most visible wall.
Step 3: Set the Brick
Spread a polymer-modified thinset with a 1/4-by-3/8-inch notched trowel, working small sections so it does not skin over. Press each brick with a slight twist to collapse the ridges and get full contact. Keep joints consistent with spacers and check flatness with a straightedge as you go. Let it cure 24 hours before grouting.
Step 4: Grout and Seal
Use a sanded grout for the wide brick joints, packing it fully with a grout bag or float. Because brick is porous and will absorb grout haze, pre-seal the faces or work in small areas and wipe promptly. After the grout cures for 48 to 72 hours, apply a penetrating masonry sealer to both the brick and the joints, then reseal every one to three years in high-traffic zones.
Where Thin Brick Floors Work Best
Some rooms are made for brick and some fight it. Entryways and mudrooms are the classic winners: they take the worst of the weather, mud, and grit, and brick’s texture and durability turn that abuse into character. Kitchens are the second great fit, especially farmhouse and transitional styles, where a brick floor grounds the space and hides the daily mess of cooking.
Sunrooms, three-season porches, and any space over radiant heat also shine, because brick stores warmth and reads as an indoor-outdoor material. Where I steer people away is bedrooms and living rooms, where the hardness and coldness underfoot become a daily annoyance, and sleek contemporary spaces, where the rustic look clashes. If you spend hours standing at the sink or stove, plan on an anti-fatigue mat, because even brick lovers admit the surface is unforgiving on the feet and lower back.
Caring for a Thin Brick Floor
Maintenance is straightforward but ongoing. Sweep or vacuum regularly with a hard-floor setting to keep grit out of the textured surface, since embedded sand acts like sandpaper over time. For a deeper clean, mop with a pH-neutral stone and tile cleaner rather than vinegar or harsh acids, which can etch the grout and strip the sealer.
The sealer is your insurance policy. In a kitchen or entry, plan to reseal every one to three years; you will know it is time when water stops beading and starts darkening the brick. A quick test: drop a tablespoon of water on a joint, and if it soaks in within a minute, reseal. Keep a little extra brick from your original order, because a cracked unit is easy to chisel out and replace when you have a color match on hand.
Is a Thin Brick Floor Right for You?
Thin brick pavers reward the homeowner who wants authentic material and is willing to trade a little comfort and maintenance for a floor that will outlast the house. They shine in kitchens, entries, mudrooms, sunrooms, and over radiant heat, and they are one of the few genuinely upgradeable floors that will not raise your thresholds by much.
If you value softness, silence, and low upkeep, look at luxury vinyl plank in a brick pattern instead. But if you want the real thing and the slab or backer board to support it, thin brick pavers for flooring deliver a hardworking, character-rich surface at a cost most homeowners can plan around, especially if you are comfortable doing the setting work yourself.
Prefer to explore on your own?
See how new flooring looks in your actual room in seconds — free, no signup.
Try the free Floor Studio →