Choosing the right tile glue is one of the most important decisions in any tiling project, because the adhesive is what keeps your tile bonded to the wall or floor for decades. The wrong product in the wrong spot leads to loose tiles, cracked grout, and water damage. This guide breaks down the two main types of tile adhesive, where each one belongs, how to apply it, and the safety steps that matter.
What Tile Glue Actually Does
Tile adhesive bonds the back of a tile to the substrate beneath it, whether that is cement board, drywall, or a concrete floor. A good bond carries the weight of the tile, resists movement and moisture, and prevents the hollow spots that lead to cracking. Picking the correct adhesive for your tile size, location, and exposure to water is the foundation of a lasting job.
The term tile glue is used loosely, but in practice it covers two very different products: organic mastic and cement-based thinset mortar. Understanding the difference is essential.
Mastic Versus Thinset
These two adhesives serve different purposes, and using the wrong one is a common DIY mistake:
- Mastic — a premixed, ready-to-use organic adhesive that comes in a tub. It is sticky, convenient, and grabs tiles quickly, which makes it popular for walls. However, it is not suitable for wet areas like shower floors or for large or heavy tiles, because it can soften with prolonged moisture.
- Thinset mortar — a cement-based powder you mix with water (or sometimes a latex additive). It is stronger, water-resistant, and the correct choice for floors, showers, large-format tiles, and any high-moisture area.
As a general rule, use mastic only for dry walls and smaller tiles, and use thinset for floors, wet areas, and anything heavy. When in doubt, thinset is the safer, more durable choice.
Choosing the Right Product
Match the adhesive to the job. For a kitchen backsplash with small ceramic tiles, premixed mastic is fast and convenient. For a shower wall or floor, a quality thinset, ideally a polymer-modified version, gives the moisture resistance you need. For large-format porcelain or natural stone, choose a thinset rated for large and heavy tile, since these formulas resist sagging and slumping.
Always read the product label to confirm it is approved for your tile type, location, and substrate. Natural stone, glass, and porcelain sometimes require specific adhesives, so do not assume one product fits every situation.
Coverage and Drying Times
Coverage depends on tile size and trowel notch, but a bag of thinset or a tub of mastic lists approximate square footage on the label to help you estimate quantity. Use the trowel size the tile manufacturer recommends to ensure full contact under the tile.
Drying and cure times vary. Mastic can take longer to fully cure behind non-porous tile, while thinset typically needs about 24 hours before you grout and several days to reach full strength. Resist the urge to grout or use the surface too soon, since rushing weakens the bond.
Ventilation and Safety
Safety deserves real attention with tile adhesives. Work in a well-ventilated space, since both mastic and the additives in some thinsets can release fumes, and open windows or run a fan to keep air moving. Wear gloves to protect your skin, and wear a dust mask when mixing cement-based thinset, because the dry powder contains silica that is harmful to breathe.
Keep adhesives away from children and pets, follow the cleanup instructions on the label, and let the room air out after the job. These simple precautions protect you while the adhesive does its work.
Application Tips
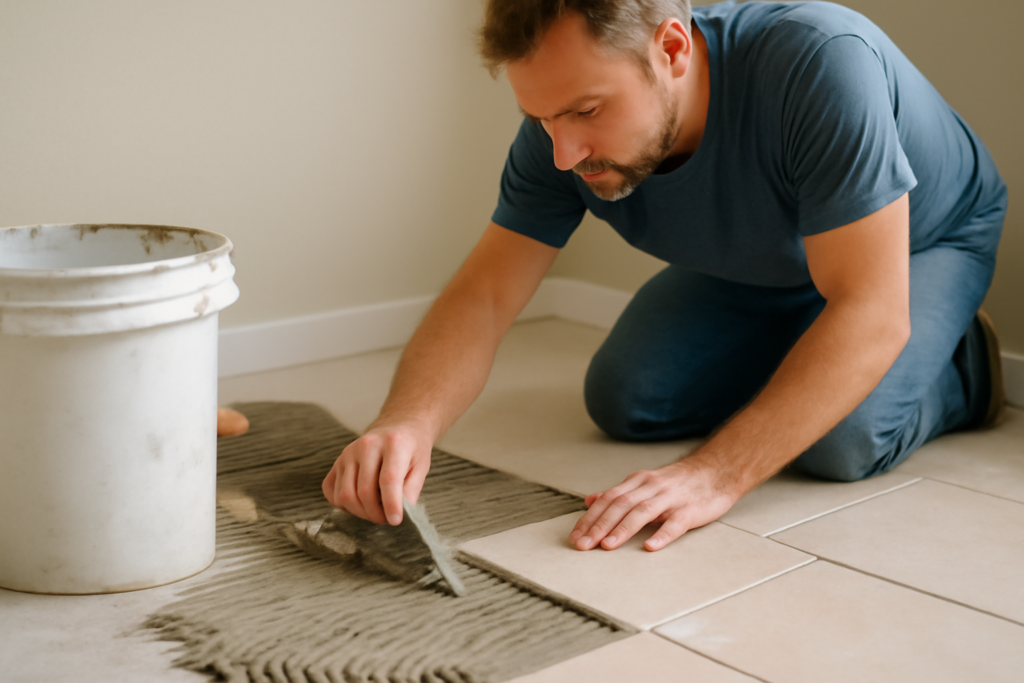
For a clean result, spread the adhesive with the flat side of the trowel first, then comb it into even ridges with the notched edge held at a consistent angle. Press each tile firmly with a slight twist to collapse the ridges and maximize contact, and check coverage periodically by lifting a tile to confirm the back is fully buttered. Work in small sections so the adhesive does not skin over before you set the tile.
Common Tiling Mistakes to Avoid
Adhesive problems cause many failed tile jobs, and most are preventable. The biggest mistake is using mastic in a wet area like a shower, where moisture eventually softens the bond. Another frequent error is skimping on coverage by using too small a trowel or failing to back-butter large tiles, which leaves hollow spots prone to cracking. Mixing thinset too thin or too thick weakens it, so follow the water ratio on the bag. Finally, walking on or grouting a floor before the adhesive has cured can break the bond, so respect the cure times.
Substrate Preparation
No adhesive performs well over a poor surface. The substrate must be clean, flat, dry, and structurally sound before you spread any glue. In wet areas, install cement backer board and a waterproofing membrane rather than tiling over drywall, which fails when it gets wet. On floors, fill low spots and confirm the surface is rigid enough that it will not flex underfoot, since movement cracks both adhesive and grout. A few minutes of prep prevents the most expensive tiling failures.
How Long Tile Glue Stays Workable
One detail that catches DIYers off guard is open time, the window during which the adhesive stays wet enough to bond a tile. Thinset typically gives you 20 to 30 minutes of open time once combed onto the substrate, though heat, low humidity, and porous tile shorten it considerably. If the thinset develops a dry skin before you press the tile in, it loses its grab and you must scrape it off and re-comb fresh adhesive.
Mastic behaves differently. Because it cures by air-drying rather than a chemical reaction, it skins over faster on the surface, which is why it suits small wall tiles you can set quickly. Work in sections no larger than you can tile in about 15 minutes, and never spread adhesive across a whole wall at once. In warm rooms, mist the substrate lightly or mix smaller batches to keep pace, and always confirm the tile transfers adhesive onto its back when you lift one to check coverage.
Cost Ranges to Expect
Tile adhesive is one of the more affordable parts of a project. A tub of premixed mastic typically runs $15 to $40, and a 50-pound bag of thinset usually costs $15 to $35 depending on the formula. Premium large-tile and rapid-set products cost more. Buying the correct adhesive for the job is cheap insurance against the far higher cost of a failed tile installation.
Prefer to explore on your own?
See how new flooring looks in your actual room in seconds — free, no signup.
Try the free Floor Studio →