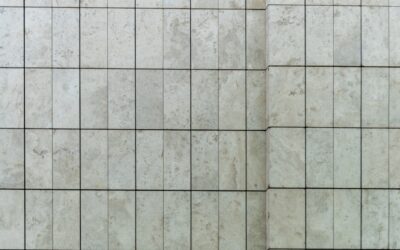
Wall tiles transform kitchens, bathrooms, and living spaces with durable, easy-to-clean surfaces that double as design statements. From classic subway tile in a kitchen backsplash to dramatic marble accent walls in a bathroom, the right wall tile elevates any room. This guide covers materials, sizes, patterns, and installation essentials.
Wall Tile Materials
Ceramic
Ceramic tiles are made from clay fired at moderate temperatures. They’re the most affordable wall tile option and come in virtually unlimited colors, sizes, and designs. Ceramic is easy to cut and install, making it a popular DIY choice. Since wall tiles don’t face foot traffic, ceramic’s lower density compared to porcelain isn’t a disadvantage on vertical surfaces.
Porcelain
Porcelain is denser and less porous than ceramic, making it ideal for shower walls and other wet areas. It absorbs less than 0.5% moisture, so it resists staining and water damage better than standard ceramic. Porcelain is harder to cut but offers superior durability and is available in large-format sizes that minimize grout lines.
Glass
Glass tiles reflect light beautifully, making them excellent for brightening small spaces like kitchen backsplashes and shower niches. Available as individual tiles, mosaics on mesh sheets, and subway formats, glass creates a luminous, modern aesthetic. Glass is non-porous and stain-proof, though it shows water spots more readily than matte materials.
Natural Stone
Natural stone tiles — marble, travertine, slate, limestone, and granite — bring unique character to walls. Every piece is different, creating one-of-a-kind installations. Stone requires sealing to prevent staining and is more expensive than ceramic or porcelain, but the visual impact is unmatched.
Subway Tile
Subway tile refers to the rectangular shape (traditionally 3×6 inches) rather than a material. Available in ceramic, porcelain, glass, and even natural stone, subway tile remains one of the most popular wall tile formats due to its clean lines, versatile style, and timeless appeal.
Mosaic
Mosaic tiles are small tiles (typically 1×1 or 2×2 inches) mounted on mesh sheets for easy installation. They come in ceramic, porcelain, glass, stone, and metal options. Mosaics are ideal for curved surfaces, niches, accent bands, and decorative focal points.
Popular Wall Tile Sizes
- 3×6 inches: Classic subway tile. Timeless and versatile.
- 4×12 inches: Elongated subway. Modern take on the classic format.
- 4×16 inches: Extra-long subway. Creates a sleek, horizontal emphasis.
- 6×6 inches: Square format popular for bathrooms and vintage-inspired designs.
- 12×24 inches: Large format. Reduces grout lines and creates a clean, contemporary look.
- 24×48 inches: Extra-large format. Dramatic, minimal-grout installations for accent walls.
- 1×1 to 2×2 inch mosaics: Detail work, niches, and accent borders.
Larger tiles create a more open, modern feel and require less grouting. Smaller tiles offer more design flexibility and work better on curved or irregular surfaces.
Wall Tile Patterns
Running Bond (Offset)
Each row is offset by half a tile width from the row above. This is the classic subway tile pattern — simple, clean, and appropriate for any style from traditional to modern.
Stack Bond
Tiles are stacked directly on top of each other with aligned grout lines creating a grid. This contemporary pattern works well with square tiles and rectangular formats for a modern, minimalist look.
Herringbone
Rectangular tiles are set at 45-degree angles to create a V-shaped zigzag pattern. Herringbone adds visual energy and movement to walls. It requires more cuts and precision but creates a stunning result.
Chevron
Similar to herringbone but using tiles cut at angles so the ends form a clean point rather than a staggered edge. Chevron creates a more directional, streamlined pattern.
Basketweave
Pairs of rectangular tiles alternate between horizontal and vertical orientation, creating a woven appearance. This pattern works well in traditional and transitional bathrooms.
Vertical Stack
Subway tiles installed vertically rather than horizontally. This unexpected orientation draws the eye upward and makes ceilings appear taller. Increasingly popular in modern bathroom and kitchen designs.
Grout Options
Grout impacts both the appearance and longevity of your wall tile installation:
- Sanded grout: Best for joints wider than 1/8 inch. The sand provides structural strength to fill wider gaps. Standard for most wall tile installations.
- Unsanded grout: Best for joints 1/8 inch or narrower. Smoother texture and easier to apply in tight spaces. Recommended for glass tiles to avoid scratching.
- Epoxy grout: Waterproof, stain-proof, and extremely durable. More expensive and harder to apply but virtually maintenance-free. Ideal for shower walls and kitchen backsplashes.
Grout Color
Matching grout color to tile color creates a seamless, monolithic look. Contrasting grout (white grout with dark tile or dark grout with white tile) highlights the tile pattern and shape. Choose your grout color carefully — it dramatically changes the final appearance.
Best Rooms for Wall Tiles
Kitchen Backsplash
The area between countertops and upper cabinets is the most common wall tile application. Tiles protect the wall from cooking splashes, grease, and moisture while adding color and personality to the kitchen.
Bathroom Walls
Shower surrounds, tub surrounds, and bathroom accent walls are natural fits for tile. Use porcelain or glazed ceramic in wet areas, and consider decorative options for dry walls.
Fireplace Surrounds
Heat-resistant ceramic, porcelain, and natural stone tiles can transform a plain fireplace into a focal point. Subway tile, herringbone patterns, and stacked stone are popular fireplace tile choices.
Accent Walls
A single tiled accent wall in a living room, bedroom, or entryway creates visual interest without overwhelming the space. Large-format tiles, 3D textured panels, and natural stone mosaics work well as accent features.
Wall Tile Installation Basics
- Plan the layout: Measure the wall and plan tile placement so cut tiles are equal on both sides and partial tiles aren’t less than half width.
- Prepare the surface: Walls must be clean, flat, and structurally sound. In wet areas, install cement board or waterproof membrane before tiling.
- Apply thin-set mortar: Use a notched trowel to spread mortar on the wall in small sections (about 3 square feet at a time). Use white thin-set for glass and light-colored tiles.
- Set tiles: Press tiles firmly into the mortar with a slight twist. Use spacers to maintain consistent grout joints.
- Allow mortar to cure: Wait 24 hours before grouting.
- Apply grout: Press grout into joints with a rubber float at a 45-degree angle. Wipe excess with a damp sponge before it dries.
- Seal (if needed): Natural stone and non-epoxy grout should be sealed after full curing (typically 48 to 72 hours).
Cost of Wall Tiles
- Ceramic: $0.50 to $5.00 per square foot
- Porcelain: $2.00 to $8.00 per square foot
- Glass: $5.00 to $30.00 per square foot
- Natural stone: $5.00 to $40.00+ per square foot
- Installation labor: $5.00 to $15.00 per square foot
A typical kitchen backsplash (30 square feet) costs $300 to $1,500 installed with ceramic or porcelain, or $500 to $2,500 with glass or stone.
Wall tiles combine practical water protection with unlimited design possibilities. Whether you’re tiling a small backsplash or an entire bathroom, choosing the right material, size, and pattern creates a surface that’s beautiful, durable, and easy to maintain for decades.
Prefer to explore on your own?
See how new flooring looks in your actual room in seconds — free, no signup.
Try the free Floor Studio →