Black streaks in shower grout, pink slime around the tub edge, and dark spots on white silicone caulk are the visible signs of bacterial and mold colonies that have moved beyond simple soap-scum buildup. Clorox Tilex Mold and Mildew Remover has been the dominant US product for these problems since 1986 because it pairs sodium hypochlorite (chlorine bleach) with surfactants formulated to cling to vertical surfaces. The combination kills mold and mildew on contact and bleaches the staining left behind in a single application. Used correctly on the right surfaces, it solves grout and caulk discoloration that scrubbing alone cannot touch.
The product works dramatically well on ceramic and porcelain tile, but improper use damages natural stone, metal trim, and colored grout. Knowing where to apply it matters as much as how.
What Tilex Actually Contains
The original Clorox Tilex formula contains approximately 2.4 percent sodium hypochlorite — the same active ingredient as household bleach but at a lower concentration. The remaining ingredients are sodium hydroxide for pH adjustment, surfactants for cling and spreading, and stabilizers. The clinging surfactant base is the key differentiator from straight bleach in a spray bottle; it keeps the active ingredient on vertical grout lines and shower walls for the 30 to 60 seconds needed for the chlorine to penetrate biofilm.
The chlorine attacks mold cell walls and protein structures, killing the colony and breaking down the pigments (mostly melanin and porphyrins) that cause the visible black or pink staining. Surface-level cleanup happens in under five minutes; deep grout penetration may take a second or third application.
Where It Works Best
Tilex Mold and Mildew is formulated specifically for ceramic and porcelain tile, sanded and unsanded white grout, white silicone caulk, fiberglass and acrylic tub surrounds, and shower doors. On these surfaces, application is straightforward and results are typically dramatic within one cleaning session.
- Ceramic and porcelain wall tile
- White grout, both sanded and unsanded
- White silicone or latex caulk
- Fiberglass tub surrounds (CULTURED MARBLE, not real marble)
- Acrylic shower walls
- Glass shower doors
- Plastic shower curtains
- Vinyl shower mats
- Tile floor grout in showers
The product is also effective on most plastic outdoor furniture, vinyl siding, and exterior masonry where mold growth is similar. Test a small area first on any non-bathroom application.
Where Not to Use It
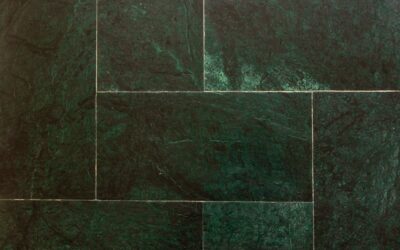
Natural stone is the most expensive mistake. Marble, travertine, limestone, and slate all react with sodium hypochlorite — the acid-sensitive minerals etch, the colored portions bleach, and sealers strip away. A single Tilex application can permanently scar a $80-per-square-foot marble shower wall.
Avoid these surfaces entirely: marble and other natural stone, colored grout (will fade unevenly), brass or copper fixtures (will tarnish), older galvanized fittings (will corrode), aluminum trim, untreated wood, fabric shower curtains, painted surfaces, and clothing. Spilled Tilex on a bath mat or a shirt creates permanent bleach marks within seconds.
How to Apply Correctly
Ventilation matters more than people assume. Chlorine bleach fumes accumulate fast in a small bathroom, especially in a steam-warmed shower. Open windows and run the bath fan for the entire cleaning session and for thirty minutes afterward.
Spray a light, even coat over the moldy surface — overspraying wastes product and increases fume exposure without improving results. Let the product sit for 5 minutes (or up to 10 minutes for stubborn black mold), then scrub lightly with a stiff-bristle grout brush if needed. Rinse thoroughly with cool water and dry with a clean towel. For pink slime (Serratia marcescens) along the tub edge, a single application usually does the job; black mold in grout may need a second or third pass on consecutive days.
Safety Equipment and Mistakes to Avoid
Wear nitrile gloves and safety glasses every time. Bleach contact dries skin and damages cuticles within a single session, and a splash to the eyes is a genuine emergency. An N95 or better respirator is worth the $4 cost in a small unventilated bathroom; chlorine vapors at sustained exposure trigger headaches, respiratory irritation, and asthma symptoms.
The most dangerous mistake is mixing Tilex with any acid-based or ammonia-based cleaner. Combining sodium hypochlorite with vinegar releases chlorine gas; combining with ammonia (common in glass cleaners and some bathroom products) produces chloramine gas. Both are toxic and have hospitalized people in residential settings. Rinse a surface thoroughly with water before using any other cleaner on it, and never combine in a single bottle.
Tile-Safe Alternatives
For natural stone showers or homes that avoid bleach products, several effective alternatives exist. Granite Gold Mold and Mildew Remover ($12 for 32 ounces) uses citric acid and hydrogen peroxide and is safe on natural stone, marble, and granite. Method Bathroom Cleaner with eucalyptus mint is plant-based and adequate for light mildew.
Hydrogen peroxide at 3 percent concentration sprayed undiluted kills approximately 90 percent of mold species and bleaches stains over multiple applications. Less harsh than chlorine but slower; expect to apply daily for a week to match what Tilex does in one session. Vinegar at full strength kills about 82 percent of common molds and works well for prevention but struggles with established black mold colonies.
Grout and Caulk Replacement When Cleaning Fails
Grout that has absorbed mold deep into its porous structure may not respond fully to Tilex, even after multiple applications. The chlorine penetrates the surface layer and stops; mycelium living deeper continues to recolonize. At that point, regrouting is the actual fix.
Remove old grout with a Dremel Multi-Max oscillating tool ($90) and a grout removal blade, then reapply with mold-resistant grout like Custom Building Products Polyblend Plus ($16 per 7-pound bag). For silicone caulk, scrape out completely with a caulk removal tool, clean the joint with rubbing alcohol, and apply DAP Kwik Seal Plus Premium Kitchen and Bath Sealant ($7 per tube) which contains mildewcide additives. A full shower regrout runs $300 to $800 if hired out, or one Saturday and $40 in materials as a DIY project.
Prevention Keeps Tile Looking Right
Squeegee shower walls after each use, run the bath fan for 30 minutes after every shower, and wipe down silicone joints weekly. These three habits reduce shower mildew problems to almost nothing. Sealed grout (Aqua Mix Sealer’s Choice Gold at $35 per quart) lasts 2 to 3 years and dramatically slows water absorption.
Keep a small spray bottle of diluted Tilex (1 part Tilex, 3 parts water) for weekly maintenance sprays rather than waiting for visible mold to develop. The lower concentration handles new spore germination before it becomes a colony and extends the time between deep cleaning sessions to months instead of weeks.
Prefer to explore on your own?
See how new flooring looks in your actual room in seconds — free, no signup.
Try the free Floor Studio →