Nearly every laminate floor sold today locks together without a drop of glue, and the joint that makes that possible is the same one carpenters have used for centuries. Tongue and groove laminate flooring uses a milled ridge on one plank edge that fits into a channel on the next, and modern “click-lock” versions add an angled locking profile that snaps the joint tight. Understanding how these joints work — and how they differ between budget and premium products — tells you more about a laminate floor’s long-term performance than almost any other spec on the box.
What Tongue and Groove Means on a Laminate Plank
Look at the edge of any laminate plank and you will see the profile: one long side and one short end carry a protruding tongue, while the opposite sides carry a matching groove. Traditional tongue and groove joints in solid wood were glued or nailed. Laminate evolved the concept into mechanical click systems — Unilin and Välinge patents cover most of them — where the tongue has a curved locking lip that rotates into the groove and resists pulling apart.
That mechanical lock is what makes laminate a floating floor. Planks connect to each other, not to the subfloor, so the whole surface can expand and contract with humidity as one unit. It is also why installation is realistic for a first-time DIYer: no nailer, no trowel, no adhesive open-time to race against.
Click Systems Are Not All Equal
Manufacturers use several locking geometries, and the differences show up during installation and years later at the seams.
- Angle-angle systems: Both the long edge and end joint engage by tilting the plank at roughly 20 to 30 degrees and rotating it down. Strong joints, but you work row by row.
- Angle-tap systems: Long edges angle in; end joints tap together horizontally with a tapping block. Faster in tight spots like under door casings.
- Drop-lock (fold-down) ends: The end joint locks by pressing straight down, often with a separate plastic or fiberboard insert. Quickest to install, though cheap versions can feel less secure.
Premium brands mill their profiles from the plank’s HDF core with tight tolerances. Bargain laminate sometimes ships with chipped tongues, inconsistent milling, and joints that gap within a year. When comparing products in the store, click two sample planks together and try to slide them apart — a quality joint feels solid with zero vertical play.
The Advantages
Tongue and groove laminate earns its popularity honestly. Installation speed is the headline: a competent DIYer can lay 300 to 500 sq ft in a weekend over a prepared subfloor. Because the floor floats, it goes over concrete, plywood, existing vinyl, and even old tile with the right underlayment, and no acclimated-glue mess or nail holes are involved.
Repairability is a quieter benefit. A damaged plank near a wall can be unclicked and swapped by disassembling back to it — try that with glued-down vinyl. Cost is the other draw: quality laminate runs $1.50 to $4.50 per sq ft for materials, with premium water-resistant lines reaching $5 to $6. Professional installation adds $2 to $5 per sq ft, but the click joint is precisely what makes skipping that labor cost realistic.
The Drawbacks
Water remains laminate’s weak point, and the joints are where it gets in. A standard HDF core swells permanently when moisture penetrates a seam — a swollen edge does not shrink back when it dries. Water-resistant lines with tighter joints and hydrophobic edge coatings have improved things dramatically, with many brands now rating planks for 24 to 72 hours of surface water exposure, but no laminate matches fully waterproof vinyl in a flood.
Floating floors also sound different underfoot. Without a quality underlayment, click-together laminate can sound hollow or clicky, especially over concrete. And the joints demand a flat subfloor — most manufacturers specify flatness within 3/16 inch over 10 feet. Lay click planks over a wavy slab and the joints flex every time you step on them, which eventually breaks the locking lips.
What to Look for When Buying
Specs on the carton tell most of the story if you know which ones matter:
- Thickness: 8mm is the practical minimum; 10mm to 12mm planks feel more solid, bridge minor subfloor flaws better, and carry deeper embossing.
- AC rating: AC3 handles normal residential traffic; AC4 suits busy households with kids and dogs.
- Water resistance rating: Look for a stated surface-water warranty in hours, not just the word “water-resistant” on the front of the box.
- Attached pad: Convenient, but a separate quality underlayment (2mm to 3mm foam or cork, with a vapor barrier over concrete) often performs better for the money.
- Locking system brand: Licensed Unilin or Välinge profiles are a good sign; unbranded systems are a gamble.
Budget roughly 10 percent extra material for cuts and waste, and keep a spare box in a closet for future repairs, since colors get discontinued.
Installation Tips That Protect the Joints
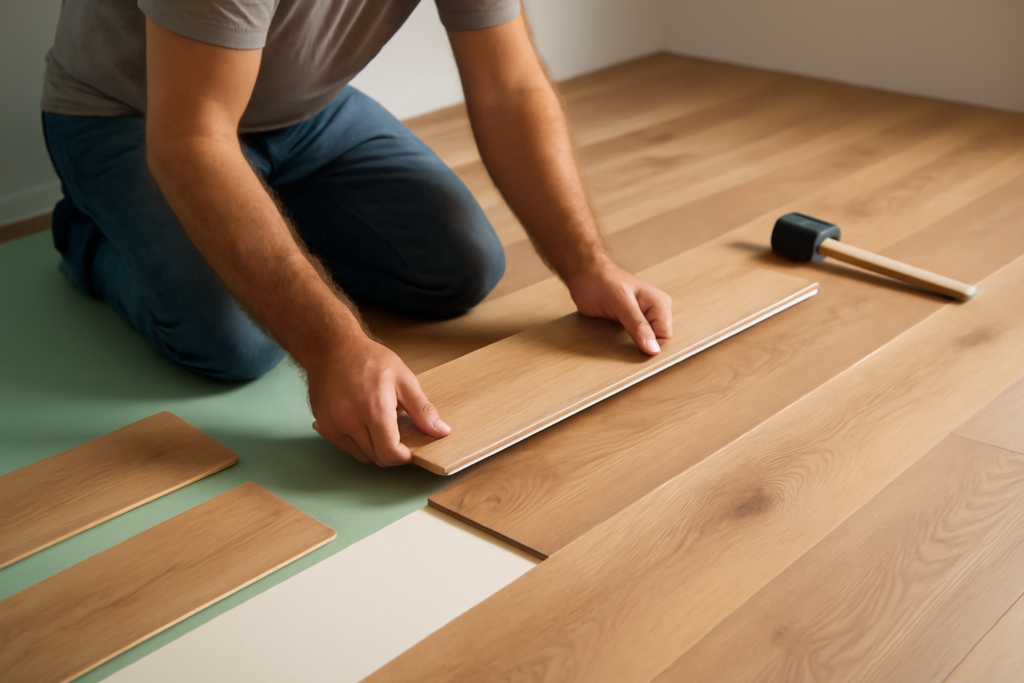
Most click-joint failures trace back to installation shortcuts rather than the product. Acclimate cartons flat in the room for 48 hours before laying. Leave a 1/4 to 3/8 inch expansion gap at every wall and fixed object — a floor with nowhere to expand will buckle at the joints in summer humidity. Stagger end seams at least 8 to 12 inches between rows so the joints do not line up and telegraph.
Use a tapping block and pull bar rather than hammering plank edges directly; a bare hammer blow crushes the tongue and ruins the lock. Check each row is fully seated before starting the next, because a hairline gap on row three becomes a visible wedge by row ten. Undercut door jambs with a jamb saw so planks slide beneath them instead of being scribed around them.
How It Compares to the Alternatives
Against glue-down or peel-and-stick products, tongue and groove laminate flooring wins on speed, cleanliness, and reversibility. Against click-lock luxury vinyl plank — its closest rival, which uses nearly identical joint technology — laminate offers better scratch resistance, a harder feel, and often better realism in wood visuals at the same price, while vinyl wins decisively in wet rooms. For bedrooms, living areas, hallways, and dry basements over a vapor barrier, laminate remains one of the best value floors you can install yourself. Buy a mid-tier product with a proven locking system, prepare the subfloor flat, and the joints will stay tight for 15 to 25 years.
Caring for the Joints After Installation
Maintenance is simple but specific. Sweep or vacuum with a hard-floor setting regularly, because grit ground into seams abrades the locking edges over time. Damp-mop with a barely wet microfiber pad and a laminate-specific cleaner — never a soaking string mop, and never steam. Steam mops force hot moisture directly into the seams and are the fastest way to void a warranty and swell an edge, water-resistant rating or not.
Wipe spills within the product’s rated exposure window, use felt pads under furniture legs, and keep indoor humidity between roughly 35 and 60 percent so the floating floor stays dimensionally happy. Treat the seams well and a mid-grade click floor will still look tight and flat when you are ready to sell the house.
Prefer to explore on your own?
See how new flooring looks in your actual room in seconds — free, no signup.
Try the free Floor Studio →