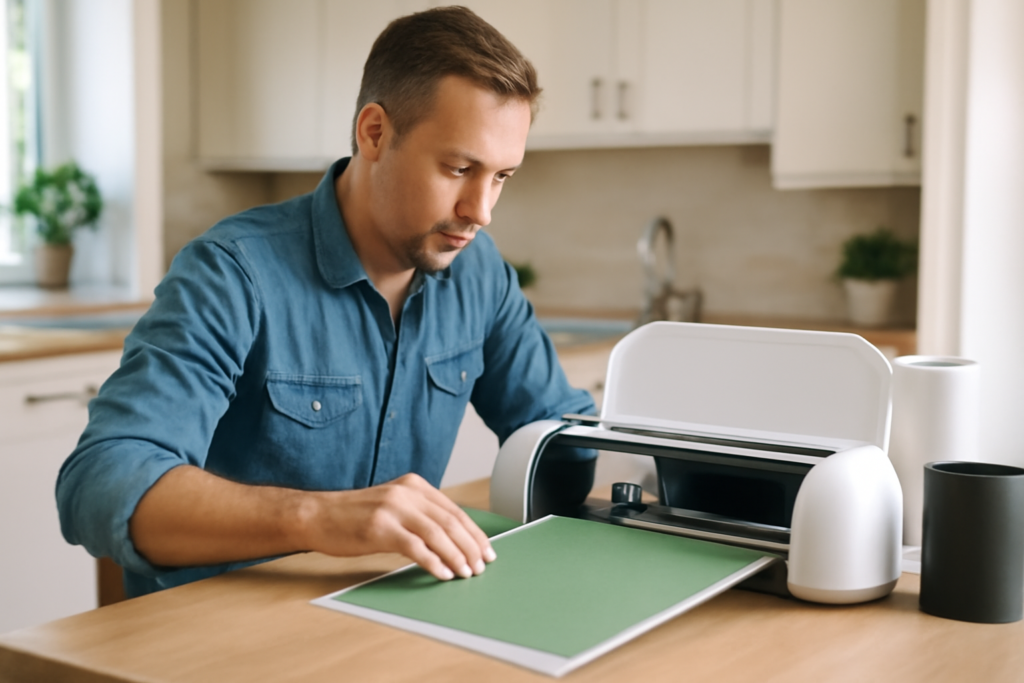
Walk into any craft room these days and you will likely find a small desktop device that has quietly replaced scissors, stencils, and a lot of frustration. A vinyl machine, more precisely a vinyl cutting machine, uses a fine blade to cut precise shapes, letters, and designs out of adhesive vinyl, heat-transfer vinyl, paper, and other thin materials. Hobbyists and small-business owners use them to make custom decals, personalized shirts, mugs, wall art, signs, and gifts. If you have ever admired a perfectly cut monogram on a tumbler or a custom decal on a car window, a vinyl machine is almost certainly how it was made. Understanding how these machines work and what materials they use turns a daunting purchase into a clear decision.
How a Vinyl Cutting Machine Works
At its core, a vinyl machine is a small computer-controlled cutter. You design or import a shape using software on a computer or phone, then send the design to the machine. A sharp blade, guided by precise motors, traces the design and cuts through the top layer of vinyl while leaving the backing paper intact, a technique called kiss-cutting. You then weed away the excess material, leaving just your design ready to apply.
Most home models hold the material on a sticky cutting mat that feeds through rollers, though some newer machines cut certain materials without a mat. The blade pressure and speed adjust automatically or by setting, depending on whether you are cutting thin vinyl or thicker cardstock.
Types of Vinyl and Materials
Knowing your materials is half the battle, because the two main types of craft vinyl behave very differently.
- Adhesive vinyl: sticky-backed vinyl for hard surfaces like mugs, laptops, windows, and walls. It comes in permanent (outdoor, dishwasher-tough) and removable (indoor, repositionable) grades.
- Heat-transfer vinyl (HTV): also called iron-on, this applies to fabric using heat and pressure from an iron or heat press, perfect for shirts and tote bags.
- Specialty materials: glitter, holographic, foil, cardstock, sticker paper, and even thin wood veneer or fabric on more capable machines.
A common beginner mistake is buying HTV for a water bottle or adhesive vinyl for a shirt. Match the vinyl to the surface: adhesive for hard goods, HTV for fabric.
Transfer Tape and Application
For adhesive vinyl projects, transfer tape is the unsung hero. After weeding your design, you press a sheet of transfer tape over the top, lift the design off its backing, position it on your surface, and burnish it down before peeling the tape away. This keeps multi-piece designs aligned exactly as you cut them. HTV skips transfer tape entirely, applying with heat through its clear carrier sheet.
A weeding tool, a scraper, and a roll of transfer tape are essential accessories beyond the machine itself, and most starter bundles include them.
Software and Design
Every vinyl machine pairs with design software, usually free or subscription-based, that runs on a computer, tablet, or phone. The software lets you type text, choose fonts, import shapes, and arrange your design before cutting. Beginners start with the built-in shapes and fonts, then graduate to importing their own SVG files and designing from scratch. The learning curve is the real investment, not the machine, so plan to spend your first few projects getting comfortable with the software.
Choosing the Right Machine
Vinyl machines vary in cutting force, width, and the range of materials they handle. Entry-level machines cut vinyl, HTV, and paper, which covers the vast majority of crafting projects and is the right starting point for most people. Mid-range and pro machines add more cutting force for thicker materials like leather, balsa wood, and chipboard, plus features like dual tool holders that draw and cut in one pass. Consider the maximum material width too, since wider machines handle larger signs and decals.
For a beginner making shirts, decals, and gifts, an entry-level machine is plenty. Only step up to a heavy-duty model if you specifically plan to cut thick materials or run a small business with volume.
Essential Accessories and Supplies
The machine is only the start; a handful of supplies turn it into a working craft station. Beyond rolls of adhesive vinyl and HTV, you will want transfer tape for moving designs onto hard surfaces, a weeding tool to pick away excess vinyl, and a scraper to burnish designs down smoothly. Replacement blades wear out over time and dull blades tear vinyl instead of cutting it cleanly, so keep spares on hand. Cutting mats lose their stickiness with use and need occasional replacement or cleaning to keep material from shifting mid-cut.
For HTV projects, a heat source is required. A household iron works for beginners, but a dedicated heat press or a small handheld press delivers more even heat and pressure, which means designs that stay put through many washes. Investing in the right pressing tool makes the difference between shirts that last and ones that peel after a few laundry cycles.
Common Beginner Mistakes
New users tend to trip on the same handful of issues. Choosing the wrong material for the surface tops the list, like using iron-on vinyl on a mug or permanent adhesive vinyl where removable was needed. Forgetting to mirror a design before cutting HTV is another classic error, since iron-on cuts face-down and prints backward if not flipped. Setting the blade pressure wrong either fails to cut through the vinyl or slices into the backing and the mat. Going slow on your first few projects, double-checking the material setting, and running a test cut on a scrap all save wasted vinyl and frustration as you learn.
Project Ideas and Cost
The projects are nearly endless: personalized tumblers and mugs, custom t-shirts and tote bags, wall quotes and decals, layered greeting cards, address signs, labels for pantry jars, and seasonal decor. Many crafters turn the hobby into a side income selling custom items online or at markets.
Entry-level vinyl machines run roughly $180 to $250, mid-range models land around $300 to $400, and pro machines with extra cutting force cost more. Budget for ongoing supplies, since rolls of vinyl, HTV, transfer tape, blades, and mats add up over time. Start with a basic machine and a starter material pack, learn the software on simple projects, and you will be turning out professional-looking custom pieces sooner than you expect.
Prefer to explore on your own?
See how new flooring looks in your actual room in seconds — free, no signup.
Try the free Floor Studio →