Shiplap’s clean horizontal lines have become a design staple, but real wood shiplap fights a losing battle in wet or humid rooms. That is where vinyl shiplap earns its place. Made from solid PVC or cellular vinyl, these tongue-and-groove boards deliver the same crisp shadow lines as painted wood while being completely waterproof, rot-proof, and free of the annual repainting that wood demands. For bathrooms, laundry rooms, porch ceilings, and exterior soffits, it is often the smarter material.
I have hung vinyl shiplap in a shower surround alcove and across a covered porch ceiling, and both still look factory-fresh years later with nothing more than an occasional wipe-down. The tradeoffs are real, though: it costs more than a sheet of MDF, it can look slightly less warm than natural wood up close, and it needs the right fasteners and expansion allowance. This guide covers the pros, the cons, real pricing, and exactly how the boards go up.
What Vinyl Shiplap Is
Vinyl shiplap is a wall and ceiling paneling made from polyvinyl chloride, either as solid extruded PVC or lighter cellular vinyl. The boards are milled with the same overlapping rabbet joint or a tongue-and-groove profile that creates shiplap’s signature even gap between planks. Widths commonly run 6 to 8 inches with lengths of 8 to 12 feet, and the face comes pre-finished in white or a woodgrain-printed color, so there is no priming or painting.
The key difference from wood is what the material does around moisture. PVC does not absorb water, so it cannot swell, warp, rot, or grow mold the way real wood or MDF will. That single property is why vinyl shiplap has taken over in bathrooms, mudrooms, pool houses, and any exterior application under a roofline. It behaves more like siding than like trim, which is exactly what you want in a splash zone.
The Pros of Vinyl Shiplap
Waterproofing is the headline benefit. You can install vinyl shiplap in a steamy bathroom, a laundry room, or a covered outdoor ceiling and never worry about moisture damage. Wipe-clean maintenance is a close second; a damp cloth handles splashes, and the pre-finished surface never needs repainting, which alone can save hours and repeated cost over the years compared to wood that must be recoated.
Durability and pest resistance round out the case. PVC will not be eaten by termites, will not rot at the bottom edge of a porch wall, and shrugs off the humidity swings that crack painted wood. The boards are lightweight, which makes overhead ceiling work far easier on your arms, and many profiles snap or lock together for faster, cleaner installs. For a low-maintenance, moisture-proof accent, it is hard to beat.
The Cons to Weigh
Vinyl shiplap is not perfect. Up close, some pre-finished vinyl reads as slightly plasticky next to genuine painted wood, and the woodgrain-printed versions can look repetitive if you study them. Purists who want the authentic texture and warmth of real lumber will notice the difference, especially in a formal living space where the paneling is at eye level and under good light.
Thermal movement is the other consideration. PVC expands and contracts with temperature more than wood, so exterior installs must allow for movement or the boards can buckle in summer heat. It is also not structural and can dent under a hard impact, and cut edges may need sealing on some products. Finally, the upfront material cost is higher than a sheet of plywood or MDF, though the zero-maintenance lifespan usually offsets that over time.
Cost Per Square Foot
Expect to pay more than wood up front. Vinyl shiplap material typically runs $2.50 to $6 per square foot depending on brand, profile, and whether it is solid PVC or cellular vinyl. Woodgrain-printed and premium exterior-rated boards sit at the top of that range, while plain white cellular vinyl for interior walls lands near the bottom. A modest bathroom accent wall of 60 square feet might use $200 to $360 in material.
Add fasteners, trim pieces, adhesive, and sealant, which bring another $30 to $80 to a small project. If you hire an installer, labor commonly adds $2 to $5 per square foot, so a professionally installed accent wall can double the material cost. Because the panels are pre-finished, you save the paint and labor that wood requires, and there are no future repainting costs, which factors into the true lifetime price.
How Vinyl Shiplap Installs
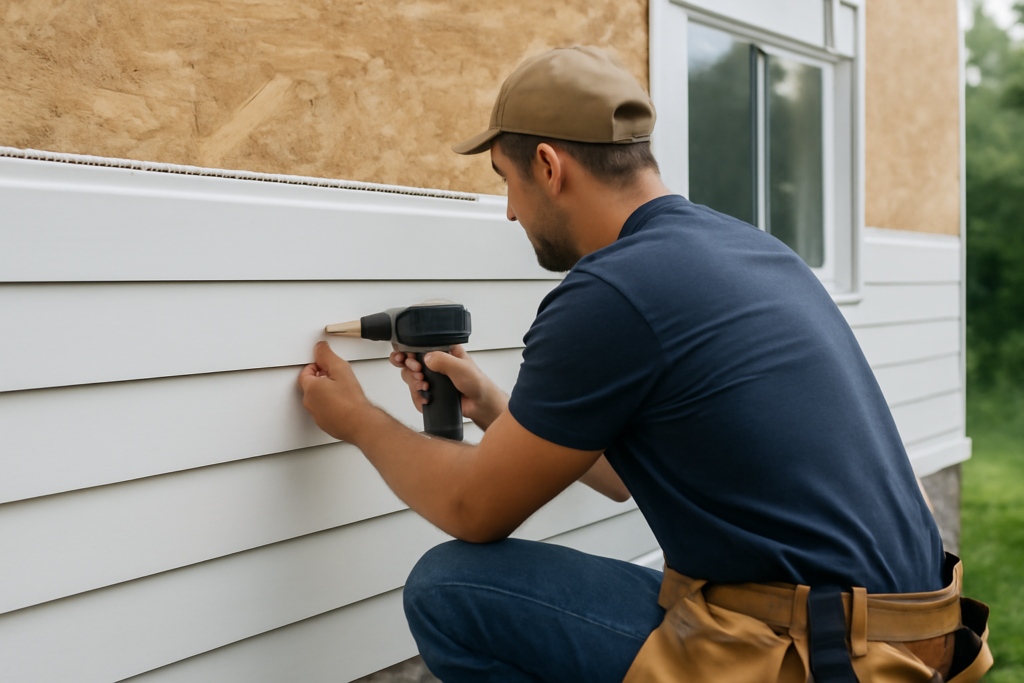
Installation is straightforward and well within DIY reach. Start with a flat, clean substrate; most installers fasten over drywall or directly to studs and furring strips. Locate and mark the studs, then establish a level starting line with a laser or a 4-foot level, because the first board sets the alignment for every course above it. On an exterior or ceiling install, add furring strips to create a flat, ventilated plane.
Set the first board with the tongue up or the groove aligned per the manufacturer, and fasten through the nailing flange with stainless or coated finish nails, or use construction adhesive rated for PVC on a solid backing. Each subsequent board’s tongue slips into the previous groove, self-spacing the shiplap gap. Cut boards with a fine-tooth blade to avoid chipping, leave a small expansion gap at the ends, and stagger seams. Finish with matching PVC trim and a bead of paintable sealant at the perimeter.
Best Rooms and Applications
Vinyl shiplap shines anywhere moisture, humidity, or weather would punish wood. Bathrooms are the classic use, whether as a full accent wall, a wainscot below a chair rail, or a ceiling that must survive shower steam. Laundry rooms, mudrooms, and pool houses share the same wet-duty logic. In each case the waterproof panel gives you the shiplap look without the mildew and peeling paint that plague wood in those spaces.
Outdoors, it is a natural for covered porch ceilings, soffits, and the protected walls of a screened room, where it holds up to humidity and the occasional wind-driven splash. It is also popular on garage interiors and utility spaces that need an easy-clean, durable surface. For a formal dining room or a dry living-room feature wall, real wood may still be worth the upkeep, but for anything that gets damp, vinyl shiplap is the practical choice.
Vinyl vs Real Wood Shiplap
The decision comes down to environment and maintenance tolerance. Real wood shiplap offers unmatched authenticity, warmth, and the ability to refinish or repaint in any color, and it is the right pick for dry interior feature walls where appearance is everything and moisture is not a concern. Its downsides are the ongoing painting, its vulnerability to water and pests, and the swelling and warping that ruin it in wet rooms.
Vinyl shiplap trades a bit of natural character for total waterproofing and near-zero upkeep. In a bathroom, porch, or laundry room, that trade is easy to make; the panels look sharp, install fast, and never rot or need repainting. Choose wood when you are decorating a dry space and want authenticity, and choose vinyl shiplap when moisture, exterior exposure, or a hands-off lifespan are your priorities. Matching the material to the room is the whole game.
Maintenance and Longevity
Care is genuinely minimal, which is much of the appeal. Routine cleaning is nothing more than a damp microfiber cloth and mild soap for the occasional splash or dust film; the pre-finished surface does not hold grime the way porous wood can. There is no repainting cycle, no sanding, and no sealing on most products. For an exterior porch ceiling, an annual rinse to clear pollen and cobwebs keeps it looking new, and that is essentially the whole maintenance program.
Longevity is where the higher upfront cost pays back. Quality PVC and cellular vinyl panels routinely last 20 years or more without degrading, since they cannot rot, and UV-stabilized exterior grades resist fading. To get that lifespan, respect the expansion gaps during installation and use fasteners and adhesives rated for PVC. Handle the boards carefully on install day, since a deep gouge in a pre-finished panel cannot be sanded out the way wood can. Treated properly, vinyl shiplap is close to a one-and-done surface.
Design Tips for a Convincing Look
A few choices separate vinyl shiplap that looks intentional from paneling that looks cheap. Orientation matters: horizontal runs are the traditional shiplap look and visually widen a room, while a vertical install can raise the perceived ceiling height in a small bath. Running the boards all the way to the ceiling rather than stopping at a random height gives a built-in, architectural feel, and wrapping a single accent wall reads more deliberately than paneling every surface.
Trim and lighting do the rest of the work. Finish the perimeter and any inside corners with matching PVC trim so no raw edges show, and caulk the joint where the paneling meets adjacent surfaces for a seamless line. Choosing a low-sheen white keeps the plasticky look at bay, since high gloss exaggerates the synthetic surface under bright light. Pair the paneling with warm fixtures and natural materials elsewhere in the room, and the vinyl reads simply as clean, crisp shiplap.
Prefer to explore on your own?
See how new flooring looks in your actual room in seconds — free, no signup.
Try the free Floor Studio →