Not all drywall is finished to the same standard, and asking for the wrong level can leave you with visible seams under bright light or paying for polish a closet will never need. The different levels of drywall finish are a six-tier system, from Level 0 to Level 5, defined by the drywall industry to spell out exactly how much taping, mudding, and sanding a wall receives. Knowing these levels lets you specify the right finish for each room and avoid both under-finished eyesores and over-finished waste.
Part of our Paint & Walls guide — explore the full guide →
Where the Levels Come From
The six levels are an official standard published jointly by the major drywall and painting trade associations, so a Level 4 finish means the same thing to any contractor in the country. Each level builds on the one below it, adding another coat of joint compound or a further step of smoothing.
The higher the number, the more labor and material go into the wall, and the smoother and more uniform the result. Choosing a level is really choosing how much you want to pay for surface perfection, balanced against how the room is lit and used.
Level 0 and Level 1
The lowest tiers involve little or no finishing and are reserved for temporary or hidden areas. They are not meant to be seen or painted.
- Level 0: no taping, mudding, or finishing at all. Used for temporary construction or where the final finish is undecided.
- Level 1: tape embedded in joint compound over seams, with no further coats. Common in attics, above ceilings, and in service corridors where appearance does not matter.
Level 1 provides some smoke and fire resistance at wall joints, which is why it appears in plenum spaces and other concealed areas. Tool marks and ridges of compound are perfectly acceptable at this level.
Level 2
Level 2 adds a coat of joint compound over the embedded tape and covers the drywall screw heads. The surface is wiped down to remove excess mud, but tool marks and ridges are still allowed.
This finish suits garages, warehouses, and areas that will receive tile, since a tiled surface hides the wall entirely. If a garage is getting a coat of utilitarian paint and appearance is a low priority, Level 2 is often enough. It is a working finish, not a showcase one.
Level 3
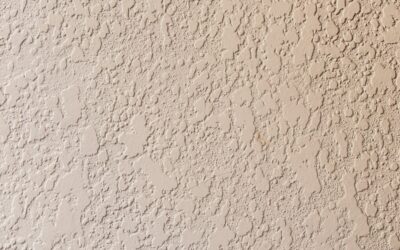
Level 3 applies a second coat of joint compound over the tape and screws, producing a smoother surface with no tool marks or ridges. It is intended for walls that will get a heavy texture, such as a knockdown or orange-peel spray finish.
Because a medium or heavy texture hides minor imperfections, the extra smoothing of higher levels would be wasted here. Level 3 is common in commercial spaces and in homes where textured walls are the norm. It should not be used under flat paint or smooth walls, where its remaining slight imperfections would show.
Level 4: The Residential Standard
Level 4 is the most common finish in homes and the default for most interior walls and ceilings. It adds a third coat of joint compound over the tape and fasteners, followed by sanding to a smooth, uniform surface.
This level is designed for flat paints, light textures, and most wallpapers. It looks clean and smooth under normal room lighting and everyday viewing angles. Level 4 is the sweet spot for value, giving you a genuinely smooth wall without the added cost of the top tier. For the vast majority of living rooms, bedrooms, and hallways, Level 4 is exactly right.
Level 5: The Highest Finish
Level 5 is the premium finish and adds one more step to Level 4: a thin skim coat of joint compound or a high-build primer applied over the entire surface, not just the seams and screws. This creates a perfectly uniform, monolithic wall with no variation in texture or porosity anywhere.
You need Level 5 in demanding conditions where any flaw would show: walls with glossy or semi-gloss paint, dark or deep colors, and surfaces washed by strong side lighting from large windows or wall sconces. That raking light exposes every seam and screw dimple that a lesser finish would hide. Level 5 costs the most in labor and material, but for a feature wall under critical light, it is the only finish that delivers a flawless result.
How the Levels Affect Cost
Each step up the scale adds labor and material, so the finish level has a direct impact on your drywall budget. Understanding roughly where the money goes helps you spend it only where it improves the result you will actually see.
- Levels 0 to 2 are the cheapest, since they skip the extra coats and most of the sanding.
- Level 3 adds a coat and some smoothing, a modest step up in cost.
- Level 4 is the residential baseline that most quotes assume by default.
- Level 5 can add 30 to 50 percent to the finishing labor because of the full skim coat over every square foot.
The jump from Level 4 to Level 5 is the most significant cost increase, which is exactly why it should be reserved for the walls that genuinely need it rather than applied throughout the whole house out of habit.
Why Lighting Changes Everything
The single biggest factor in whether a finish looks flawless is not the paint but the light hitting the wall. Light that strikes a surface at a low, grazing angle, called raking light, exaggerates every tiny bump, seam, and screw dimple.
A wall that looks perfect under soft overhead light can reveal every flaw when morning sun rakes across it from a nearby window, or when a wall sconce washes light down its face. That is why Level 5 exists: the full skim coat erases the subtle variations that raking light would otherwise expose. When deciding on a finish level, walk the room at different times of day and note where strong side light falls. Those are the walls that justify the higher finish, while walls lit softly and evenly are perfectly served by Level 4.
Primer and the Level 5 Alternative
There is more than one way to achieve a Level 5 result, and knowing the options can save money without sacrificing the finish. The traditional method is a thin skim coat of joint compound troweled over the entire wall, which fills every pore and pinhole for a perfectly uniform surface but is labor-intensive.
A widely accepted alternative uses a high-build drywall primer, a thick specialized primer applied by roller or spray that fills minor imperfections and evens out the difference in porosity between the paper face and the joint compound. This so-called spray-applied Level 5 costs less in labor than hand-skimming and, on a well-executed Level 4 base, produces a comparable result under most lighting. For a truly demanding wall in strong raking light, the full skim coat is still the gold standard, but for many homeowners the high-build primer bridges the gap between Level 4 and Level 5 at a friendlier price.
Choosing the Right Level for Your Project
Match the finish to how the wall is lit, painted, and used, and you avoid both wasted money and disappointing results.
- Hidden or temporary areas: Level 0 or 1.
- Garages, storage, or walls getting tile: Level 2.
- Walls getting heavy texture: Level 3.
- Standard painted rooms: Level 4.
- Glossy paint, dark colors, or strong side lighting: Level 5.
When you hire a drywall contractor, specify the level in writing so expectations are clear. A common mistake is assuming a smooth painted wall automatically gets Level 5; most homes are finished to Level 4, and that is usually the right call. Reserve the top level for the walls that truly demand it, and you get the perfect finish exactly where it counts without overpaying everywhere else.