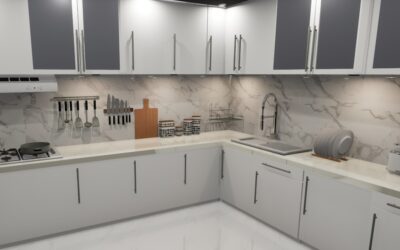
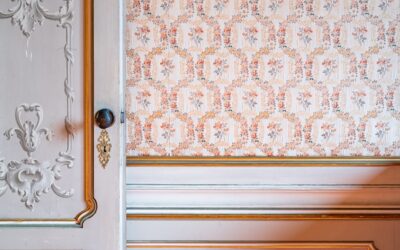
There is a reason art galleries and high-end homes glow the way they do, and it is not accident lighting. Wall wash recessed lighting uses angled trims to spread an even sheet of light down a vertical surface, making walls feel taller, brightening a room without glare, and turning art, stone, and textured finishes into focal points. Done right, wall wash recessed lighting transforms a flat, shadowy wall into a soft luminous plane. This guide covers the trims, the critical spacing math, and the placement rules that separate a professional wash from a series of ugly hot spots.
Wall Wash Versus Wall Grazing
First, know which effect you actually want, because the two are often confused. Wall washing places the fixture farther from the wall and aims light to spread evenly across the whole surface, minimizing texture and creating a smooth, flat glow. It is ideal for flat walls, artwork, and photographs where you want even illumination.
Wall grazing, by contrast, places the fixture close to the wall, within about 6 to 12 inches, and aims light nearly parallel to the surface to exaggerate texture. Grazing is what you use to dramatize a stone fireplace, brick, or a fluted wood panel. The same recessed housing can do either job depending on how far from the wall you place it and how you aim the trim.
Choosing the Right Trim
The trim is what makes a recessed can into a wall washer. A standard downlight trim throws light straight down and would just create a bright puddle on the floor. Wall wash trims redirect and shape the beam:
- Wall wash trim: Has a curved reflective scoop or a directional shield on one side that pushes light toward the wall.
- Adjustable eyeball or gimbal trim: Tilts up to 35 or 40 degrees so you can aim the beam precisely at the wall or a piece of art.
- Lensed wall wash: Uses a spread lens to smooth the beam and eliminate scallops for the most even wash.
For an even, gallery-quality wash on a flat wall, a dedicated lensed wall wash trim gives the smoothest result. Adjustable gimbals are more flexible for spotlighting individual artworks.
How Far From the Wall to Place Fixtures
This is the number that makes or breaks the effect. Place wall wash fixtures too close and you get harsh scallops; too far and the light lands on the floor instead of the wall. The reliable rule for washing an 8 to 9-foot wall is to set the fixture center 18 to 30 inches out from the wall.
A common starting point is to space the fixtures from the wall at roughly one-quarter to one-third of the wall height. For a standard 9-foot ceiling, mounting the cans about 24 to 30 inches from the wall produces an even wash from ceiling to about eye level. Higher ceilings need the fixtures pulled farther out to reach the full height of the wall.
Spacing Fixtures Along the Wall
Even spacing between fixtures is just as important as the offset from the wall. Space them too far apart and you see distinct pools of light with dark gaps between; too close and you waste fixtures and energy.
- General rule: Space wall wash fixtures the same distance apart as they are from the wall, or slightly less, for overlapping even coverage. Roughly 24 to 36 inches on center is typical.
- Overlap the beams: The light cones should overlap where they meet the wall so no dark scallops appear between them.
- End fixtures: Place the outermost fixtures about half the standard spacing from the ends of the wall, so the corners are not left dark.
For a smooth continuous wash, err toward closer spacing. A wall lit with fixtures 24 inches apart and 24 inches off the wall reads as one glowing plane rather than a row of spotlights.
Beam Angle and Bulb Choice
Beam spread determines how the light lands. For wall washing you generally want a wider beam, around 40 to 60 degrees, so each fixture covers a broad swath and blends with its neighbors. Narrow spot beams of 15 to 25 degrees are for accenting a single object, not washing a whole wall.
Color temperature matters too. For living spaces and warm interiors, choose 2700K to 3000K LED lamps for an inviting glow. For displaying art accurately or in modern kitchens, 3500K reads cleaner. Whatever you pick, keep every fixture on the wall at the same color temperature, because even a slight mismatch shows up glaringly on a large lit surface. Also choose lamps with a high color rendering index, CRI 90 or above, so artwork and finishes show true color.
Common Applications
Wall washing shines in specific situations. It is the go-to technique for a gallery wall of framed art, spreading even light so no single piece is over or under-lit. It makes a long hallway feel wider and less tunnel-like by brightening the walls rather than just the floor. In a living room, washing an accent wall or a fireplace surround adds depth and draws the eye.
It also works beautifully to highlight a bookcase, a curtain wall of windows at night, or a feature wall of wallpaper or paneling. Anywhere you want to add perceived height and remove the cave-like feeling of ceiling-only downlights, a row of wall washers does the job.
Ceiling Height and Fixture Selection
Ceiling height changes both the offset and the fixture you should choose. On a standard 8 to 9-foot ceiling, a 3 or 4-inch aperture wall wash trim delivers a tight, controlled result and looks proportionate to the room. Taller 10 to 12-foot ceilings call for pulling the fixtures farther off the wall, often 30 to 40 inches, so the beam reaches the full height, and they benefit from a slightly larger aperture and higher lumen output to cover the greater distance.
Smaller aperture housings, the 2 and 3-inch trims that have become popular, give a cleaner, more minimal ceiling with less visual clutter, which matters when you have a row of them marching down a wall. Larger 4 to 6-inch cans push more light and suit higher ceilings or spaces where you need serious brightness. Whatever aperture you choose, keep every fixture on a given wall identical in size, output, and color temperature so the wash reads as one continuous plane rather than a patchwork.
Retrofit Versus New Construction
How you install depends heavily on whether the ceiling is open or already finished. In new construction or a gut remodel, you have the luxury of placing new-construction housings exactly on the ceiling plan with the correct offset and spacing worked out in advance, wired before the drywall goes up. This yields the cleanest, most precise wash because nothing is a compromise.
In a finished ceiling, remodel or retrofit housings clip into a hole cut with a hole saw and clamp against the back of the drywall, no attic access required for many models. The catch is that your fixture placement is constrained by joist locations and existing wiring, so the ideal offset from the wall may not be achievable. Slim canless LED wafer lights are especially handy for retrofits because they fit shallow ceilings, but for true wall washing you still want an adjustable or dedicated wall wash trim rather than a plain downlight wafer. Plan the layout around the joists you can actually reach, and use adjustable gimbals to aim the light where fixed placement falls short.
Installation Tips and Dimming
Run wall wash fixtures on their own dimmer circuit, separate from the general downlights, so you can balance the wash against the ambient light and set a mood. A wall that is washed too brightly compared to the rest of the room looks unnatural, so dimming lets you dial it in.
If you are retrofitting, adjustable gimbal trims in existing cans let you create a wash without moving housings, though the offset from the wall may not be ideal. For new construction, plan the housing locations on the ceiling plan with the offset and spacing worked out in advance. Rough in the cans, aim and lock the trims once the walls and art are in place, and set the dimmer to taste. Get the offset, spacing, and beam angle right, and wall wash recessed lighting delivers that soft, expensive, gallery glow that makes a whole room feel elevated.