Every house is a collection of parts that do not quite touch. Tub meets tile, window frame meets siding, baseboard meets wall, counter meets backsplash — and at every one of those meetings there is a gap, because different materials can never be joined perfectly and would not stay joined if they were. So what does caulk do? In one sentence: caulk fills the gaps between building materials with a flexible, adhesive seal that keeps out water, air, insects, and dirt while stretching and compressing as those materials move. That last clause is the part beginners miss and the part that explains almost everything about how caulk works, why it fails, and why the stuff in the tube is engineered the way it is. Let me walk through it properly, because twenty minutes of understanding here saves years of redoing bathrooms.
Part of our Paint & Walls guide — explore the full guide →
The Four Jobs Caulk Does
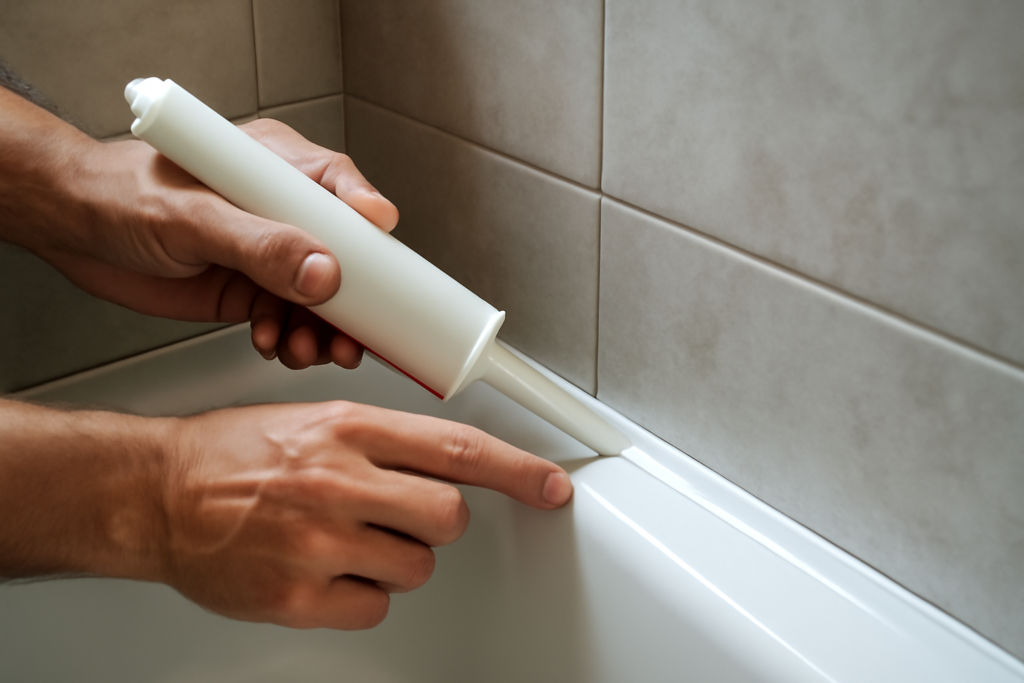
Job one: keeping water out. This is the job most people know. Water is relentless and gaps are invitations — the joint where your tub meets the tile wall sees gallons of splash per week, and without a seal that water wicks into the wall cavity, where it feeds mold and rots framing invisibly. The same story plays out where the kitchen faucet meets the sink deck, where siding meets a window, and where a pool deck meets coping. A bead of caulk turns each of those gaps into a gasket. The stakes are not cosmetic: remediation for hidden water damage behind a shower routinely runs $2,000 to $10,000, versus eight dollars of sealant applied on schedule.
Job two: sealing air leaks. Less visible, more constant. The dozens of small gaps around window trim, baseboards on exterior walls, sill plates, and pipe or wire penetrations add up — the EPA and Department of Energy estimate that sealing air leaks (caulking plus weatherstripping) trims typical heating and cooling costs by around 10 to 15 percent. In winter, warm air escaping through unsealed gaps also carries moisture into wall and attic cavities where it condenses, so air sealing quietly protects the structure as well as the utility bill. This is the highest-return caulking a homeowner can do: a $4 tube of acrylic latex and an afternoon pays for itself within the season.
Job three: keeping pests and debris out. Mice pass through gaps the width of a dime; ants, roaches, and wasps need far less. Sealing exterior penetrations — hose bibs, AC line sets, dryer vents, cable entries — closes the front doors pests actually use. Indoors, caulked baseboards and counter joints also mean crumbs and mop water stop disappearing into uncleanable crevices.
Job four: finishing the look. A shadow-line gap between crown molding and ceiling, or a cracked seam where door casing meets the wall, makes a paint job look amateur. Painter’s caulk exists mostly for this — it turns joints into smooth, paintable transitions. Half of what separates professional paintwork from DIY is nothing more than disciplined caulking before the topcoat.
The Key Idea: Gaps Move
Here is the concept that turns a beginner into someone who caulks like they know why. Building materials move constantly. Wood swells and shrinks with humidity; a tub flexes downward under 40 gallons of water and a human body; framing lumber expands in summer and contracts in January; concrete slabs creep with temperature. The gap you caulk in June is not the same width in December — joints commonly cycle by five to twenty-five percent of their width, and more where dissimilar materials meet.
A rigid filler in a moving joint cracks on the first cycle, which is exactly why grout, spackle, and mortar fail when people use them where caulk belongs. Caulk is engineered to be an elastomer — it cures into a flexible rubber-like solid that bonds to both sides of the joint and then stretches and compresses like a tiny accordion, over and over, for years. Every caulk has a movement rating (good sealants handle plus-or-minus 25 percent or more of the joint width), and every caulk failure you have ever seen — the cracked line around the tub, the peeled bead on the siding — is a story about movement exceeding either the material’s flexibility or its grip on the surfaces. This is also why the pros’ rule of thumb exists: caulk the corners and changes of plane, grout the field. Wherever two different surfaces or directions meet, movement lives there, and only an elastomer survives it.
What Is Actually in the Tube
All caulks share an anatomy: a polymer that becomes the flexible body, fillers that give it bulk, and a carrier or curing system that keeps it a paste until you dispense it. What changes between products is the polymer, and that choice sets the personality:
| Type | Typical Price | Best At | Paintable? |
|---|---|---|---|
| Acrylic latex (“painter’s caulk”) | $3–$6 | Interior trim, baseboards, drywall joints | Yes |
| Siliconized acrylic | $4–$8 | Light-duty kitchen and bath seams | Yes |
| 100% silicone | $7–$14 | Tubs, showers, sinks, glass, wet zones | No |
| Polyurethane | $8–$15 | Exterior joints, concrete, high movement | Yes, cured |
| Hybrid / SMP | $9–$16 | Exterior all-rounder, cold-weather, wet-tolerant | Yes |
The beginner’s translation: acrylic latex cures by drying (water evaporates), cleans up with a damp rag, takes paint beautifully, and belongs on interior joints that stay dry. Silicone cures by reacting with moisture in the air into a true rubber that water and mildew cannot beat — it owns the bathroom — but paint will not stick to it, ever, so never use silicone on a joint you plan to paint. Polyurethanes and modern hybrids are the heavy-duty outdoor class, gripping concrete and wood through weather that would strip lesser beads. Matching the tube to the joint is ninety percent of caulk wisdom; the label tells you the rest.
Caulk Is Not the Same As…
A quick disambiguation, because the hardware aisle is confusing. Grout is rigid cement for the joints between tiles in the field of a wall or floor — it is not flexible and does not seal moving corners. Spackle and joint compound are rigid fillers for holes in drywall — paint-ready but zero flexibility. Expanding foam fills big voids and insulates, but is not a finished, water-shedding seal. Construction adhesive comes in the same cartridge and the same gun but is glue, not a sealant. And “sealant” versus “caulk” is mostly a marketing spectrum — pros use “sealant” for the higher-flexibility products — a distinction we cover separately and one you can ignore while learning. If the joint moves or gets wet, you want something from the caulk aisle rated for it; if it is a static hole in drywall, you want spackle.
How a Bead Actually Works (and Fails)
Understanding the mechanics improves your very first job. A caulk bead grips the two joint faces (adhesion) and stretches within itself (cohesion). Good technique maximizes both: clean, dry, dust-free surfaces so the adhesive grip is real; a bead sized to the gap (about twice as wide as deep is the ideal profile); and tooling — dragging a finger or tool along the fresh bead — to press the material into full contact with both faces. Failure comes in two flavors you can read like a mechanic: adhesive failure, where the bead pulls cleanly off one surface (the surface was dirty, damp, or unprimed), and cohesive failure, where the bead itself splits down the middle (the joint moved more than the product could stretch, often because the bead was too thin or the wrong chemistry). Old caulk also simply ages — UV and cleaning chemicals stiffen it until it cracks — which is why exterior beads want checking every couple of years and a tub surround wants recaulking roughly every five.
One more habit separates good work from bad: never caulk over failed caulk. New material bonded to a loose old bead inherits the failure. Cut out the old bead, clean, dry, then seal.
Where to Start in Your Own House
If you have never held a caulk gun, here is the sensible on-ramp. Start indoors with painter’s caulk on trim gaps — cheap, forgiving, water cleanup, and the results are instantly satisfying. Graduate to the weatherization pass: acrylic or siliconized acrylic around interior window and door trim, baseboards on exterior walls, and anywhere pipes and wires pierce walls, ideally before winter. Then take on the bathroom with 100 percent silicone at the tub-to-tile joint, having cut out the old bead first. Save the exterior — siding joints, window perimeters, concrete — for last, with a polyurethane or hybrid, because outdoor prep and gun control are the graduate course. A total outlay of perhaps $30 in tubes and a $10 dripless gun covers all of it.
So, what does caulk do? It is the flexible connective tissue of a building — the engineered rubber gasket at every seam where materials meet, move, and would otherwise let in the water, air, and pests that quietly destroy houses. It is also the highest-leverage skill-to-cost ratio in home maintenance: a few dollars a tube, an hour to learn, and it stands guard at every joint in the place for years. Learn to read your joints, match the chemistry to the job, and you will never look at that thin line around your bathtub the same way again.