An accessible bathroom fails or succeeds on the numbers, and the vanity is where those numbers matter most. A wheelchair accessible bathroom vanity has to let someone roll straight up to the sink, slide their knees underneath, and reach the faucet without straining or getting burned. That means specific heights, specific clearances, and a few hardware choices that make the whole thing usable. I’ve built these for aging-in-place remodels and full ADA compliance projects, and the biggest mistake people make is buying a standard vanity and hoping it works. It won’t. Here are the dimensions and details that actually meet the guidelines.
- The Core ADA Dimensions
- Why Standard Vanities Don't Work
- Open-Front and Wall-Hung Designs
- Protecting Against Pipe Burns
- Sink and Basin Choices
- Faucet and Controls
- Floor Space and Approach
- Storage Solutions Without Blocking the Knee Space
- Adjustable-Height Vanities
- Combining Accessibility With Style
- Putting the Numbers Together
The Core ADA Dimensions
Everything starts with three measurements. Miss any one and a wheelchair user can’t approach the sink comfortably.
- Counter height: No more than 34 inches from the finished floor to the top of the counter. This is the maximum, not a target; some users prefer a touch lower.
- Knee clearance: At least 27 inches of clear height under the counter at the front edge, so the user’s knees fit beneath.
- Toe clearance: Clear space continuing back at floor level, with the space extending at least 17 inches deep, and ideally to 19 inches, under the vanity.
The knee and toe clearance together form the open pocket a wheelchair rolls into. Width matters too: provide at least 30 inches of clear width at the sink so the chair fits between any cabinet sides or walls. These aren’t suggestions; they’re the framework the whole design hangs on.
Why Standard Vanities Don’t Work
A typical vanity is a closed box with a toe kick, doors, and drawers running all the way down. There’s no knee space, so a wheelchair user has to approach sideways and reach awkwardly across the counter. That defeats the purpose.
Standard comfort-height vanities also run 36 inches tall, two inches over the ADA maximum. And a cabinet base blocks the knee pocket entirely. An accessible vanity has to open up that space beneath the sink, which is why the design looks different: the plumbing is exposed or shrouded, and the cabinet either floats as a wall-hung unit or uses removable panels to create the clearance.
Open-Front and Wall-Hung Designs
To get 27 inches of knee clearance, you need to remove the cabinet from under the basin. Two designs achieve this.
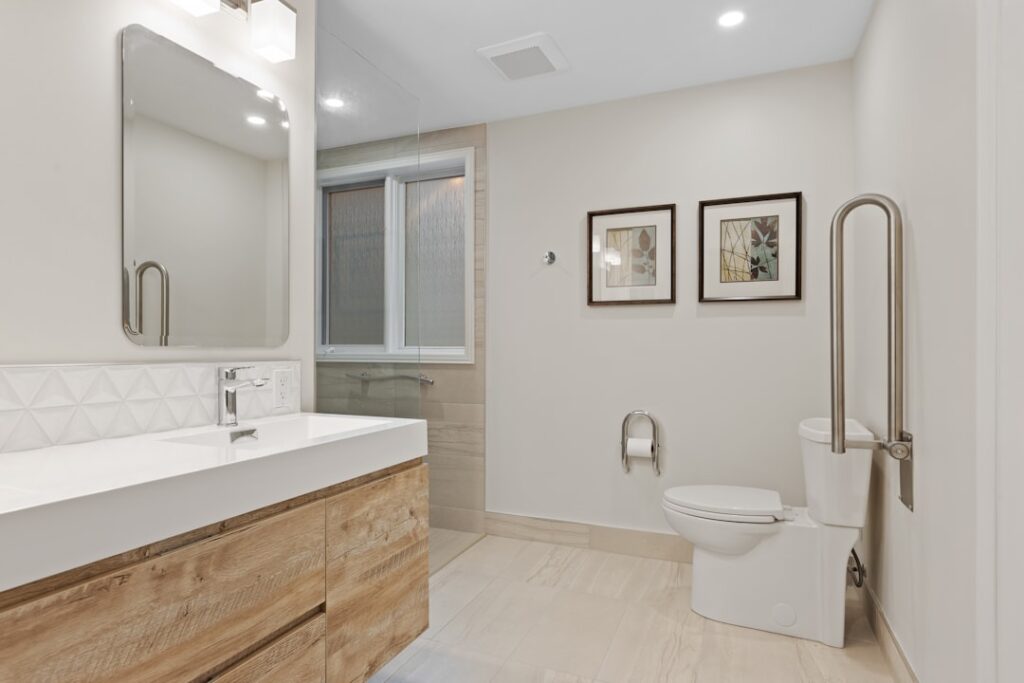
A wall-hung vanity mounts to the wall with no floor cabinet, leaving the entire space below open for knees and footrests. It’s the cleanest accessible solution and it also makes the floor easier to clean and roll across. The second option is a vanity with a fixed apron front and open knee space, sometimes with side cabinets flanking a central open bay. Whichever you choose, the sink area itself must stay open. Store your toiletries in the flanking cabinets or a nearby tower rather than under the basin.
Protecting Against Pipe Burns
Here’s a detail that gets overlooked and matters enormously. When the plumbing is exposed under an open sink, the hot water supply line and the drain trap can burn the legs of a seated user who can’t feel or move away from the heat quickly.
The guidelines require that exposed water supply and drain pipes under the sink be insulated or otherwise configured to protect against contact. Use foam pipe-insulation wraps or a molded under-sink protective cover, often sold as ADA pipe covers, over the P-trap and both supply lines. They’re inexpensive, usually $20 to $50 for a kit, and they’re not optional in a compliant install. Choose an offset drain that pushes the trap toward the back wall too, which frees up knee room and keeps the pipes farther from the user’s legs.
Sink and Basin Choices
The sink has to be shallow enough to preserve knee clearance and reachable from a seated position. A deep basin eats into the 27 inches of clearance you fought to create.
Choose a shallow basin, typically 5 to 6.5 inches deep, so the bottom of the bowl doesn’t intrude on knee space. Wall-mounted sinks and ADA-specific vanity tops are engineered with this shallow profile and an offset drain. Mount the front edge of the counter so the rim is easy to reach, and keep the basin toward the front so a seated user isn’t stretching over a wide dead counter to reach the water. The reach range for a forward approach maxes out at about 48 inches high and comes in as depth increases, so keep everything usable close to the front edge.
Faucet and Controls
Grip strength and fine motor control can’t be assumed, so the faucet has to work with a light touch. Twist knobs that require pinching and twisting fail the accessibility test.
Specify a single-lever faucet operable with a closed fist, or better yet a touchless motion-sensor faucet that needs no grip at all. Lever handles and touch-activated faucets both meet the requirement that controls be operable without tight grasping, pinching, or twisting of the wrist. Set the faucet within easy forward reach, not pushed to the back of a deep counter. If you use a touchless model, confirm the temperature is preset to a safe range so there’s no scald risk. Mount a mirror low enough to be usable seated, with the bottom edge no higher than 40 inches off the floor over the sink.
Floor Space and Approach
The vanity can be perfect and still fail if the room can’t accommodate the chair. Plan for the clear floor space that lets a user pull up to and turn around near the sink.
Provide a clear floor area of at least 30 by 48 inches in front of the vanity for a forward approach, and ideally a 60-inch turning circle in the room so the chair can maneuver. Keep the path to the vanity free of swinging doors and obstructions. If the bathroom is tight, a wall-hung vanity helps because it doesn’t consume floor space with a cabinet base, giving the wheels more room to work.
Storage Solutions Without Blocking the Knee Space
The hardest part of an accessible vanity is finding storage when the space under the sink has to stay open. You can’t put a cabinet where the knees go, so the storage has to move sideways or up.
Flanking base cabinets on either side of the open sink bay are the most common solution, keeping the center clear while giving you real drawer and door storage within reach. Choose drawers over deep doors on the accessible side, since a seated user can pull a drawer to them rather than reaching into the back of a cabinet. Wall cabinets and open shelves mounted at a reachable height, generally with usable storage no higher than 48 inches for a forward reach, add capacity without touching the floor space. A pull-out shelf or a lazy-Susan corner unit brings items forward. The goal is to keep everything a seated user needs within the accessible reach range, which for a forward approach tops out around 48 inches high and drops as the counter depth increases.
Adjustable-Height Vanities
For households where needs change or multiple people share the bathroom, an adjustable-height vanity is worth considering. These systems let the counter raise and lower on a motorized or manual frame so it suits a seated user or a standing one.
A motorized adjustable vanity can move between roughly 28 and 40 inches at the touch of a button, which is ideal in a multigenerational home or where a user’s needs may evolve. The plumbing has to accommodate the movement, so these installs use flexible supply and drain connections designed to flex through the height range. They cost more than a fixed accessible vanity, but they solve the problem of a single fixed height not suiting everyone. If you’re building for aging in place and want one bathroom to work for the long haul, the adjustable option is future-proof in a way a fixed 34-inch counter isn’t.
Combining Accessibility With Style
A common worry is that meeting the specs means a clinical, institutional look. It doesn’t have to. Plenty of accessible vanities look like any other well-designed piece while quietly meeting every requirement.
A wall-hung floating vanity, which is already a popular modern style, naturally provides the open knee space accessibility needs, so you get the look and the function in one. Choose an attractive shallow-basin top, a sleek lever or touchless faucet, and quality flanking cabinets, and the result reads as intentional contemporary design rather than a medical fixture. Insulate the pipes with a clean molded cover rather than raw foam wrap for a tidier appearance. The point is that accessibility and good design aren’t in conflict; the same features that help a wheelchair user, an open base and easy controls, also happen to be some of the most sought-after looks in current bathroom design.
Putting the Numbers Together
Build your wheelchair accessible bathroom vanity around the hard limits: 34 inches max counter height, 27 inches of knee clearance, 17 to 19 inches of toe depth, and 30 inches of clear width at the sink. Add insulated pipes, a shallow offset-drain basin, a lever or touchless faucet, and enough floor space to approach. Hit those specs and you have a vanity that genuinely serves a wheelchair user every day, rather than a standard cabinet that only looks the part. When in doubt, measure against the guidelines rather than eyeballing it, because in accessible design the numbers are the whole point.