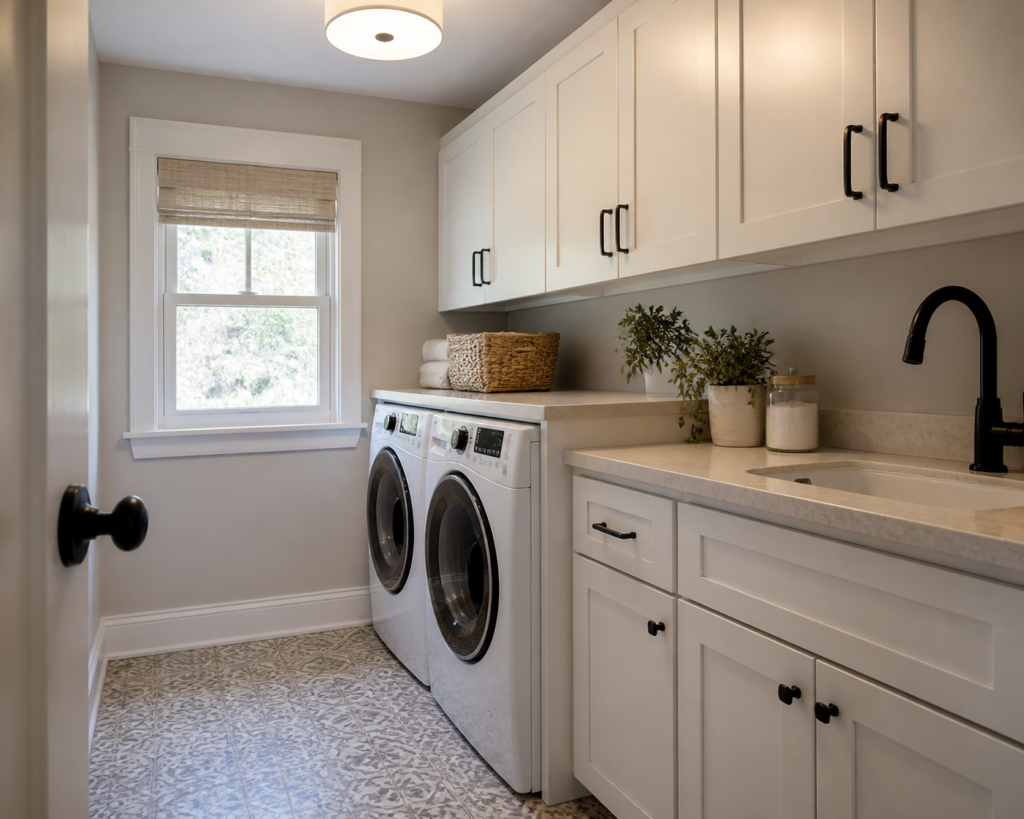
White laundry room cabinets succeed or fail at the material junctions: beside white appliances, below painted trim, above a countertop, and under the room’s permanent light. The right white is not simply the brightest sample. Its undertone, sheen, door detail, and resistance to laundry residue must work with surfaces that may each be a different white.
Part of our Kitchen Remodeling guide — explore the full guide →
Protect appliance hookups and service clearances in the basic layout, then make the finish decisions with physical samples inside the room. A deliberate contrast is usually easier to live with than an almost-match that turns yellow, blue, gray, or pink whenever the light changes.
- Choose White Laundry Room Cabinets by Undertone First
- Test White Cabinet Samples in Daylight and Task Lighting
- Pair White Cabinets With Counters, Floors, and Backsplashes
- Choose Sheen and Door Detail for Lint and Fingerprints
- Check Finish Resistance to Detergent, Bleach, and Stains
- Use Hardware and Storage Breaks to Control an All-White Room
- Plan Touch-Ups and Upkeep Before Ordering
Choose White Laundry Room Cabinets by Undertone First
Place a real cabinet-door sample beside the permanent whites, not on an isolated showroom wall. Appliance enamel often reads cooler or glossier than painted woodwork. Warm trim can make a neutral cabinet look blue; a cool gray floor can make a creamy door look dingy. Undertone is easiest to judge where two materials actually meet.
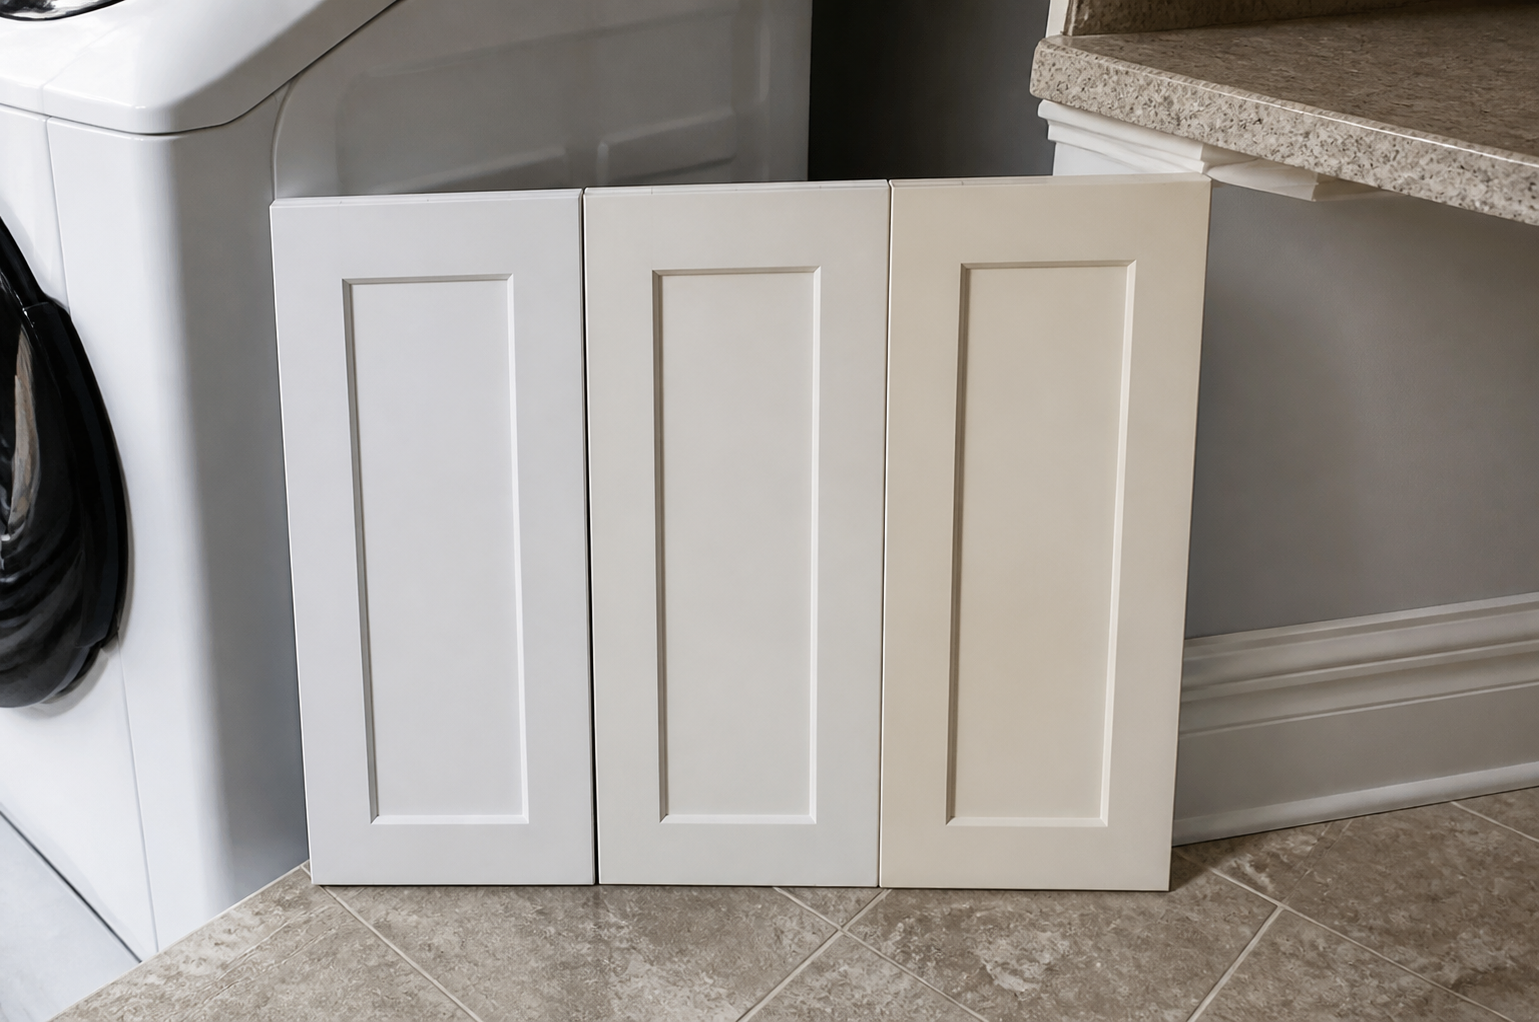
Compare large samples vertically because cabinet fronts receive light differently from counters and floors. Hold each door beside the washer, dryer, casing, baseboard, and wall paint. Step back across the room, then inspect the touching edges. Tiny color chips hide shifts that become obvious across a bank of doors.
Decide whether the goal is a confirmed match or a controlled difference. If the cabinet supplier and trim painter cannot provide the same verified color and sheen system, separate the whites with a backsplash, countertop, reveal, or contrasting hardware. The broader guide to choosing laundry cabinet colors can help compare alternatives when the room contains too many competing whites.
Test White Cabinet Samples in Daylight and Task Lighting
Review the samples through the room’s full lighting cycle. North-facing daylight can make a warm white appear muted, while direct late-day sun can exaggerate cream or yellow. A windowless laundry closet depends entirely on lamp color, fixture placement, and reflections from the floor and appliances. Test at the hours when laundry is normally done.
Use the permanent lamp type where possible. A sample selected under showroom lighting may shift under the home’s warmer or cooler lamps. Place one sample in an upper-cabinet position and another near the base because the ceiling fixture may light those faces differently. Check open doors too; the cabinet interior can reveal an unwanted contrast at every use.
Side light exposes surface waviness, fingerprints, and uneven sheen that flat frontal light hides. View the sample from the doorway and from the folding position. If daylight and electric light pull the same white in opposite directions, choose the version that remains acceptable in both rather than chasing a perfect match during one hour.
Finish the layout before the final light test. Upper cabinets can shade a counter, and a tall cabinet can block light from a side window. In a compact room, practical approaches to small laundry cabinet layouts may preserve more reflected light than filling every wall with deep storage.
Pair White Cabinets With Counters, Floors, and Backsplashes
Neighboring materials decide whether white feels crisp, soft, or disconnected. Build a portable sample board with the cabinet door, countertop, backsplash, floor, wall paint, and hardware in their actual orientation. Evaluate the group, not each sample separately. A stone with a cool background may fight a creamy door even when both look neutral on their own.
Countertops form a long horizontal edge against base or tall cabinets, so slight white mismatches show strongly there. Matching is not mandatory. A charcoal, wood-look, or clearly veined surface can create enough separation to make the cabinet white read as intentional. If using a pale counter, compare the background color rather than one dramatic vein.
Floors add reflected color. Warm wood and beige tile can soften a cool white; blue-gray resilient flooring can cool a neutral one. Bring the floor sample upright beside the door as well as placing it flat, then judge from normal standing height. Remember that rugs, baskets, and daylight will change the balance, but permanent surfaces should agree before accessories are used to rescue them.
A backsplash can bridge two whites or establish contrast. Small grout joints introduce another color that may make a near-match look busier. Test tile, grout, and cabinet together after the grout sample dries. Near a utility sink, select an assembly suited to splashes and cleaning products; visual coordination does not replace correct wet-area detailing.
Choose Sheen and Door Detail for Lint and Fingerprints
Sheen changes both color and maintenance. Glossy doors reflect appliance fronts and task lights, which can make a clean white look sharper but also show fingerprints, ripples, and misaligned doors. Very matte finishes reduce glare yet may hold oily marks or burnish when scrubbed. A satin-like factory finish often balances the two, but performance depends on the specific coating.
Door profile determines how much lint and detergent dust collect. Slab fronts have few ledges and wipe quickly. Shaker-style doors add rails and inside corners; heavily routed profiles add more grooves near a room that already produces fibers and residue. Choose detail with the household’s cleaning tolerance in mind, not solely from a kitchen display.
Inspect edge banding, painted edges, recessed corners, and the area around pulls. White makes dark gaps, chipped corners, and exposed substrate easy to see. Adjustable hinges help maintain even reveals, while handles can keep wet or product-coated fingers off the face. Confirm that chosen pulls clear adjacent walls and appliance handles before drilling.
Check Finish Resistance to Detergent, Bleach, and Stains
Laundry products can leave surfactant films, dyes, fragrances, bleach spots, and sticky rings. Ask the cabinet supplier for the approved care method and exclusions for the exact finish. Terms such as washable or durable are not a promise that every solvent, disinfectant, abrasive pad, or concentrated laundry chemical is safe.
Test an extra sample rather than the installed door. Apply a small amount of the residues the household commonly encounters, follow safe product handling, then clean the sample with the cabinet maker’s approved method. Inspect after it dries in side light. Look for color change, gloss shift, softening, edge swelling, and a persistent ring, not only whether the visible soil disappears.
Protect the vulnerable junctions. Use a washable tray under liquids, wipe drips promptly, and avoid storing a leaking bottle against an unfinished shelf edge. Near a sink, keep standing water away from door bottoms and panel seams. A white finish can make a leak visible early, but it does not make the box material waterproof.
Do not mix cleaning products or improvise chemistry to remove a mark. Bleach and other cleaners can create hazardous reactions when combined. Follow the product labels, ventilate as directed, and replace a damaged component when aggressive cleaning would spread the finish change.
Use Hardware and Storage Breaks to Control an All-White Room
Hardware gives the eye a reference point and protects the finish from repeated hand contact. Dark metal creates clear contrast; nickel can relate to appliance trim; warmer metals can connect creamier whites to wood or beige floors. Compare the actual pull against the door because polished, brushed, and aged surfaces reflect different colors.
Repeat the finish in a disciplined way. Pulls, faucet, hanging rod, and light fixture do not need to match exactly, but one dominant metal with a deliberate secondary accent is calmer than several unrelated finishes. Check that coatings are suitable for a humid utility space and follow their approved cleaners.
Use small visual breaks instead of adding decoration everywhere. A wood folding counter, contrasting backsplash, colored tall cabinet, or open niche can separate large white planes. Keep the break tied to function: a counter marks the folding zone, a darker toe kick hides floor-level scuffs, and a niche keeps daily supplies within reach.
Storage planning still starts with safe access. Keep appliance valves, drain, plugs, dryer duct, and service panels reachable; give heavy containers a low shelf; secure pods, bleach, and hazardous products away from children and pets. Those constraints need only shape a brief layout check, but no finish choice justifies trapping a machine or its shutoffs.
Plan Touch-Ups and Upkeep Before Ordering
Ask how the selected white is repaired before committing to it. Factory-finished doors may use a touch-up pen, fill stick, spray system, or replacement front; site-painted cabinetry may be easier to repaint but harder to match after the coating ages. Obtain the approved repair product and instructions while the finish is current.
Keep one labeled sample or offcut in a dark, dry place. Record the order information and photograph the label. Do not store a mystery jar of paint and assume it matches the factory coating. Aging, light exposure, and different application methods can make the correct color formula look different on a localized repair.
- Inspect high-touch edges, pull areas, sink-side panels, and toe kicks in both day and night light.
- Remove lint with a soft method before wiping so grit is not dragged across the finish.
- Use only approved cleaners and cloths, starting with the least aggressive method.
- Wipe product drips and standing water before they reach seams or raw edges.
- Adjust loose hinges and pulls before movement chips a white edge or enlarges a hole.
- Repair a small defect according to the finish system instead of disguising it with an unverified paint.
Choose white laundry room cabinets only after the same door sample works beside the appliances, trim, counter, floor, and backsplash under the room’s real lighting. If the whites almost match but separate badly at their edges, create an intentional contrast or select a different undertone. The better finish is the one the household can clean, touch up, and still like when daylight gives way to the ceiling light.