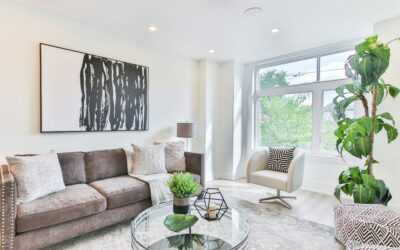
A window box seat is one of the few projects that adds seating, storage, and architectural character in a single weekend. Yet many homeowners build one at dining-chair height with a cushion on top and end up with a seat that feels like a perch instead of a lounge. A well-planned window box seat gets the dimensions, the lid hardware, and the heat vent details right from the start. This guide walks through sizing, materials, costs, and construction so yours ends up being the most-used spot in the room.
Part of our Windows & Doors guide — explore the full guide →
- What Is a Window Box Seat?
- Window Box Seat Dimensions That Actually Feel Comfortable
- Storage Options: Lid, Drawers, or Doors
- Materials and Construction Basics
- Heat Vents, Outlets, and Safety Details
- Window Box Seat Cost Breakdown
- Design Ideas to Make the Seat Look Built-In
- Flooring Considerations Under a Window Box Seat
- Maintenance and Long-Term Tips
What Is a Window Box Seat?
A window box seat is a built-in bench tucked beneath or inside a window opening, framed as a closed box with storage inside. Unlike an open-leg bench, the box is enclosed on the front and sides, which lets it hide blankets, toys, or seasonal gear. Most versions have either a hinged lid, front-facing drawers, or doors on the face.
You will see three common layouts:
- Flush wall seat: A box built against a flat wall beneath a standard window, projecting 18 to 22 inches into the room.
- Alcove or bay seat: A box that fills a bay window or a recess between two closets or bookcases, often the coziest version.
- Corner seat: An L-shaped box that wraps two walls beneath corner windows, great for breakfast nooks.
The box form is what makes this design practical. It hides framing, gives you a place to run trim, and can be built from sheet goods with basic tools.
Window Box Seat Dimensions That Actually Feel Comfortable
Getting the window box seat dimensions right matters more than any finish decision. Standard dining chairs sit at 18 inches, and that is the target for the top of your cushion, not the top of the box.
- Box height: 14 to 16 inches from the floor to the top of the lid, so a 2 to 4 inch cushion lands at 17 to 19 inches total.
- Depth for sitting upright: 18 to 20 inches.
- Depth for lounging or reading with legs up: 22 to 26 inches.
- Depth for a daybed-style seat: 28 to 32 inches, which fits a twin-size mattress width closer to 38 inches if you go full bed.
- Length: At least 36 inches for one person, 48 to 60 inches for two, and 72 inches or more if you want to stretch out.
Check your window sill height before committing. If the sill sits 20 inches off the floor, a 16 inch box leaves a 4 inch gap and a nice ledge. If the sill is lower than your planned seat, you may need to drop the box height or accept a cushion that partially covers the bottom of the glass. Also leave at least 2 inches between the top of the cushion and any window crank or lock hardware.
Storage Options: Lid, Drawers, or Doors
How you access the inside of the box changes both cost and daily usability.
Hinged Lid
The simplest and cheapest option. Use a continuous piano hinge along the back, plus two lid stays or soft-close lid supports rated for the lid weight. A 48-inch plywood lid with trim can weigh 20 to 25 pounds, so do not skip the supports. The downside: you have to remove the cushion every time you open it.
Front Drawers
Drawers let you grab items without disturbing the cushion. Use full-extension side-mount slides rated for 75 to 100 pounds, and keep drawer boxes around 20 inches deep for an 22-inch-deep seat. Drawers add roughly $60 to $150 each in hardware and material.
Cabinet Doors
Face doors work well when the box sits in an alcove and you want a furniture look. Shaker-style doors with concealed hinges suit most homes. They are better for bulky items like bins than for small, loose things.
If you want the fastest build, stock kitchen base or wall cabinets can form the box. Twelve-inch-deep wall cabinets laid on a 4-inch toe-kick platform create an 18-inch-deep seat when you add a deeper top. Many DIYers use 15 by 30 inch or 15 by 36 inch wall cabinets for this.
Materials and Construction Basics
Most window box seats are built from 3/4-inch cabinet-grade plywood for the carcass and lid, with a 2×4 or 2×3 ledger and base frame for strength.
- Build a base platform. Frame a 2×4 ladder base, shim it level, and screw it to the floor and wall studs. This doubles as a toe kick if you recess the face 3 inches.
- Attach a wall ledger. Screw a 2×3 ledger to studs at the box height minus the lid thickness, using 3-inch structural screws.
- Assemble the box. Cut plywood sides, front, and dividers. Place a vertical divider every 24 to 30 inches so the lid does not sag under two adults.
- Add the top. Use 3/4-inch plywood with a 1×2 hardwood edge band, or a 1-inch-thick solid top if you want a heavier look. Overhang the front by 3/4 to 1 inch.
- Trim and finish. Apply face frames, baseboard that matches the room, and optional applied panel molding on the front for a raised-panel look.
A seat built this way comfortably supports 500 pounds or more spread across its length. If you are building a long bench over 72 inches, add a center leg or divider so the span stays under 30 inches between supports.
Heat Vents, Outlets, and Safety Details
Many windows have a heating register or baseboard heater directly beneath them because that is where cold air collects. Covering a vent with a box seat can starve the room of heat and cause condensation on the glass.
- Floor registers: Build an internal duct box of sheet metal or plywood that routes air to a grille in the toe kick or seat face. A 4 by 12 inch register in the kick works well.
- Baseboard heaters: Hydronic and electric baseboards need clearance. Most manufacturers require 12 inches or more above and in front of the unit to combustible materials, so moving the heater is often the better option.
- Outlets: Code in many areas requires receptacles every 12 feet of wall. If your seat covers an outlet, you usually need to relocate it or bring it to the box face with an approved box extension rather than burying it.
When to call a licensed professional: Relocating a baseboard heater, moving a heating duct, or rewiring an outlet should be handled by a licensed HVAC technician or electrician, and permits are often required. Bad connections inside an enclosed box are a fire risk that may not show symptoms until it is too late. If children will use the seat, install lid supports that hold the lid open at any angle, so a heavy lid never slams on small fingers.
Window Box Seat Cost Breakdown
Costs vary widely based on size, whether you build or hire, and how much custom millwork you add.
| Approach | Typical Cost | Notes |
|---|---|---|
| DIY with stock cabinets | $250–$600 | Fastest; limited sizes |
| DIY custom plywood build | $300–$800 | Materials, hinges, paint |
| Carpenter-built, painted | $1,200–$3,000 | 4–6 foot seat with lid |
| Custom with drawers and bay fit | $3,000–$6,500 | Complex angles, hardware |
Cushions are an often-forgotten line item. A custom foam cushion with a removable, performance-fabric cover runs $150 to $500 depending on length and thickness. Use high-resilience foam of about 2.5 pounds density at 3 to 4 inches thick; cheap poly foam flattens within a year.
Design Ideas to Make the Seat Look Built-In
A box seat looks custom when it ties into the surrounding trim and architecture instead of floating as a standalone piece.
- Flank with bookcases. Adding 12-inch-deep bookcases on either side turns the window into an alcove and gives the seat walls to lean against.
- Match the baseboard. Run the room’s baseboard profile across the front of the box so it reads as part of the wall.
- Add panel molding. Picture-frame or Shaker-style panels on the front face echo wainscoting elsewhere in the house.
- Consider a sloped back. A 10 to 15 degree angled backrest panel against the wall makes lounging far more comfortable than sitting against a flat wall and sill.
- Plan lighting. A swing-arm wall sconce or a pair of small reading lights on either side makes the seat useful after dark.
Paint the box in the same color and sheen as your trim, typically satin or semi-gloss, for durability. Painted poplar face frames hold up better to kicks than MDF, which chips at the edges.
Flooring Considerations Under a Window Box Seat
Decide early whether the box sits on top of your finished floor or on the subfloor. For floating floors like laminate and luxury vinyl plank, never pin the floor under a heavy built-in. Floating floors need to expand and contract, and a screwed-down box can cause buckling or gaps elsewhere in the room. Instead, build the seat on the subfloor and run the flooring up to it with a 1/4-inch expansion gap hidden under a shoe molding.
With nail-down hardwood or tile, you can build right on top of the finished floor. Just protect it with a moving blanket during construction, and use felt pads or a cork shim under the base frame if you want to avoid scratches.
Maintenance and Long-Term Tips
Window box seats sit next to glass, so they deal with temperature swings, sunlight, and occasional condensation. A few habits keep them in good shape:
- Use a UV-resistant or solution-dyed fabric for the cushion so it does not fade within one summer.
- Drill a few small 1/2-inch vent holes in the back of the storage compartment, or add a slotted panel, so trapped air does not become musty.
- Wipe condensation from the sill in winter before it drips onto the lid.
- Check hinges and lid stays yearly; tighten screws before they strip out of plywood edges.
- Touch up chipped paint on the front edge promptly to keep moisture out of plywood.
Plan the dimensions carefully, deal with the heat and electrical details, and tie the box into your trim. Do that, and a window box seat will earn its space every day, as a reading spot, a kid hideout, extra seating for guests, and a place to finally stash the throw blankets.