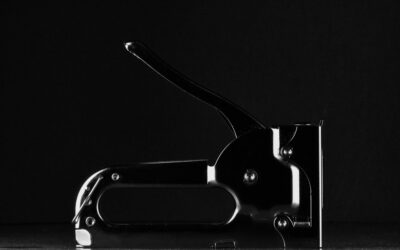
Renting the wrong tool can cost you a full box of cracked planks before lunch. A wood floor nailer is the single piece of equipment that turns a solid hardwood installation from a knuckle-busting chore into a steady rhythm of thock, tap, thock. The right gun sets a fastener at the correct angle through the tongue of every board, drives it flush, and moves you along at a plank every few seconds. This guide breaks down the types, the specs that matter, real prices, and the models that professional installers actually reach for.
Why You Need a Dedicated Wood Floor Nailer
You cannot install nail-down solid hardwood well with a standard framing or finish nailer. Floor nailers are purpose-built to drive a fastener through the tongue at a precise 45- to 50-degree angle, hidden by the next board, a technique called blind nailing. The tool’s base plate registers against the edge of the plank, setting the height and angle automatically so every fastener lands in the same spot. A mallet strike either triggers the drive on manual models or actuates the air valve on pneumatic ones, which also seats the board tight against its neighbor in the same motion.
Skip the dedicated tool and you get fasteners that split tongues, sit proud and block the next board, or angle into the finish surface. The nailer’s design prevents all three problems, which is why even DIYers doing one room usually rent or buy one rather than hand-nailing.
Cleat Nailers vs. Staplers
The first choice is between cleats and staples. Both hold, but they behave differently in the wood.
- Cleat nailers drive L-shaped or T-shaped barbed cleats, usually 16- or 18-gauge. Cleats have a little more give, letting the wood expand and contract seasonally without loosening. Most flooring manufacturers prefer cleats for wider planks and exotic species, and many warranties specify them.
- Staplers drive two-legged crown staples, typically 15.5- or 16-gauge. Staples grip aggressively and pull boards tight, which many installers like for standard 2-1/4-inch strip oak, but the rigid hold can telegraph seasonal movement as squeaks in very dry or humid climates.
Many popular guns are combination tools that drive both cleats and staples by swapping the magazine or a channel insert. If you are buying one tool to cover future projects, a combination model such as the Bostitch MIIIFN or Freeman PF1618BR gives you the most flexibility.
Pneumatic vs. Manual Nailers
The second choice is how the fastener gets driven. Manual, or ratchet-assist, nailers rely entirely on your mallet swing to seat and drive the cleat. They cost less, need no compressor, and never run out of air, but a full day of swinging is genuinely tiring and inconsistent strikes can leave fasteners proud. They shine on small jobs, tight budgets, and installs where dragging a hose is a hassle.
Pneumatic nailers use a compressor, usually run at 70 to 100 PSI, so the mallet strike only triggers the air valve. The compressor does the driving, so every fastener seats to the same depth with far less fatigue. For anything larger than a single small room, pneumatic is the clear choice. You will need a compressor delivering at least 2 CFM at 90 PSI, which most pancake and hot-dog compressors handle easily.
Specs That Actually Matter
When you compare models, focus on the details that affect your specific floor rather than marketing numbers.
- Fastener range: Common floor nailers drive 1-1/2-inch to 2-inch cleats. Match the length to your plank thickness; 3/4-inch solid hardwood over a wood subfloor wants a 2-inch cleat.
- Adjustable base plates: Look for interchangeable or shimmable base plates so the tool works with 1/2-inch, 5/8-inch, and 3/4-inch flooring. A single fixed plate limits you to one thickness.
- Non-marring foot: A rubber or composite base protects prefinished surfaces from dents. Essential if you are installing factory-finished planks.
- Weight and balance: A tool between 9 and 11 pounds is manageable all day. Heavier guns drive well but wear you out.
- Jam clearing: Tool-free nose access saves real time, because every floor nailer jams eventually.
Top Picks by Budget and Use
These models represent the sweet spots most installers land on after using several.
- Best overall: Bostitch MIIIFN (about $400). A pneumatic cleat nailer that has been an industry standard for decades. It drives 1-1/2- to 2-inch 16-gauge cleats, includes interchangeable base plates, and is nearly indestructible. Rental yards stock it because it survives abuse.
- Best value combo: Freeman PF1618BR (about $130). A 3-in-1 pneumatic that drives 16-gauge L-cleats, T-cleats, and 15.5-gauge staples. For a DIYer doing one or two rooms, it delivers 80 percent of the pro experience at a third of the price.
- Best budget manual: NuMax SFL618 or a rental ratchet nailer (about $100 to buy). Solid for a single small room where you would rather not own a compressor. Expect a sore forearm.
- Best for wide plank and exotics: Powernail 445 (about $500). A pneumatic 16-gauge cleat nailer favored by pros installing 5-inch and wider planks and dense species like Brazilian cherry that split with staples.
If you only have one floor to lay, renting makes more sense than buying. Home centers and tool-rental yards charge roughly $35 to $55 per day for a pneumatic floor nailer, often bundled with a compressor and a starter box of cleats.
How to Use a Wood Floor Nailer Correctly
Technique matters as much as the tool. Set your compressor pressure per the manual, usually 70 to 90 PSI, and drive a test fastener into a scrap board first. The cleat should sit flush in the tongue, neither proud nor sunk so deep it crushes the wood. Adjust pressure until it seats cleanly.
Face-nail or blind-nail the first two or three rows by hand near the wall, where the nailer’s base plate cannot fit against the tongue. Once you have clearance, register the tool’s foot firmly against the plank edge, hold it flat to the floor, and strike the plunger squarely with the included dead-blow mallet. Space fasteners every 8 to 10 inches and within 2 inches of each plank end, and always hit a board at least twice. Keep the base flat; tilting the tool is the number-one cause of proud fasteners and dented finish.
Maintenance and Safety
Add a few drops of pneumatic tool oil into the air inlet before each use to keep the driver blade moving freely, and blow sawdust out of the magazine at the end of the day. Store the tool with the magazine empty to protect the spring. Wear safety glasses and hearing protection; a floor nailer is loud, and the occasional deflected cleat is a real hazard. Keep your free hand clear of the drive nose, and disconnect the air line before clearing any jam.
Buy a full box or two of the manufacturer’s recommended fasteners rather than a bargain generic brand, because off-spec cleats are the leading cause of jams and misfires. A standard box holds about 1,000 cleats, and a 200-square-foot room of 2-1/4-inch strip oak burns through roughly 700 to 900 of them, so budget accordingly. Test your tool on scrap after any base-plate swap, since a plate set for 5/8-inch stock will drive too shallow on 3/4-inch planks. These small habits keep the rhythm going and protect both the floor and the finish.
Choosing the right wood floor nailer comes down to matching the fastener type to your flooring warranty, the drive method to your project size, and the base plate to your plank thickness. Get those three right, rent or buy a proven model like the Bostitch MIIIFN or Freeman PF1618BR, and a solid hardwood installation becomes one of the most satisfying DIY jobs in the house, with results that stay tight and quiet for decades.
Prefer to explore on your own?
See how new flooring looks in your actual room in seconds — free, no signup.
Try the free Floor Studio →