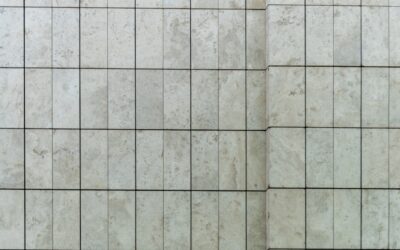
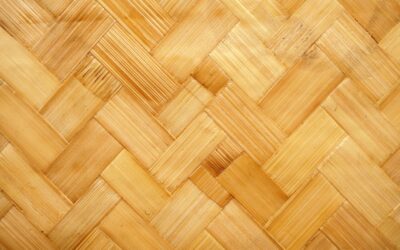
Walk into a serious tile showroom for the first time and the sheer scope can be overwhelming—wall after wall of ceramic, porcelain, marble, mosaic, and large-format slabs in finishes and formats you did not know existed. The world of tile is vast, and knowing how to navigate a tile retailer or showroom is the difference between a confident, on-budget purchase and an expensive mistake you live with for 20 years. This guide explains the main tile categories, how to shop a showroom effectively, what to budget, and how to evaluate a tile retailer before you hand over a deposit.
Part of our Tile & Grout guide — explore the full guide →
The Main Tile Categories
Understanding the core materials is the foundation of any tile purchase.
- Ceramic: Affordable, easy to cut, ideal for walls and light-traffic floors. Glazed surface resists water but the body is softer than porcelain.
- Porcelain: Denser, harder, and more water-resistant, rated for heavy floor traffic and outdoor use. The workhorse of modern tile.
- Natural stone: Marble, travertine, slate, and granite—stunning and unique, but porous and demanding more sealing and care.
- Mosaic: Small tiles on mesh sheets for backsplashes, shower floors, and decorative accents.
For floors, porcelain dominates because of its hardness and low water absorption; ceramic suits walls and budgets; stone is the luxury, higher-maintenance choice.
Reading Tile Ratings
A good showroom labels its tile with the specs that actually matter. The PEI rating measures surface wear resistance on a 1-to-5 scale—aim for PEI 3 or higher for residential floors and PEI 4 to 5 for busy entries. The water-absorption rating tells you whether a tile is suitable for wet areas, with porcelain absorbing under 0.5 percent.
For floors, also check the coefficient of friction (slip rating). A polished marble looks gorgeous but turns into a hazard when wet, so textured or honed finishes belong in bathrooms and entries.
How to Shop a Tile Showroom
A showroom rewards preparation. Bring your room dimensions, photos, and samples of your cabinets, countertop, or paint so you can judge tile against the real palette. Take full tiles—or large samples—home and view them in the actual room light at different times of day, because showroom lighting is deliberately flattering.
Ask to see a full tile rather than a chip, and lay several together to judge the variation, grout-line look, and pattern repeat. For wood-look porcelain planks especially, the difference between a single chip and a laid section is dramatic.
What Tile Costs
Tile spans an enormous price range, which is part of what makes a showroom worth visiting. Budget ceramic starts around $1 to $3 per square foot, quality porcelain runs $3 to $8, and designer porcelain or natural stone climbs to $10 to $25 or more. Specialty mosaics and handmade tiles can exceed that.
Remember the full project cost: setting materials (thinset, grout, sealer), waterproofing membrane in wet areas, and professional installation at $7 to $15 per square foot typically exceed the tile itself. Always order 10 to 15 percent extra for cuts, waste, and future repairs.
How to Evaluate a Tile Retailer
Not all tile sellers are equal, and the showroom’s depth tells you a lot.
- Range and stock: A strong retailer carries multiple price tiers and formats, not just one look.
- Knowledgeable staff: Good salespeople ask about your room, traffic, and wet areas before recommending tile.
- Setting materials and advice: A serious tile store sells the right thinset, membrane, and grout and explains how to use them.
- Sample policy: Look for generous take-home samples and a clear returns policy on overage.
Avoiding Common Mistakes
The biggest errors are buying for looks alone and under-ordering. A polished, low-friction tile in a wet bathroom, or a soft wall tile used on a floor, leads to slips and cracks. Under-ordering means a dye-lot mismatch when you need a few more boxes—always buy your overage in the same shipment.
Confirm the dye lot and batch numbers match across all boxes, and inspect for chips and warping before installation begins.
Tile Formats and Trends
Beyond material, the format you choose shapes the whole look of a room. Large-format tiles—24 by 48 inches and up—create a sleek, nearly seamless floor with fewer grout lines, making small rooms feel larger, though they demand a very flat substrate. Wood-look porcelain planks deliver the warmth of timber with tile’s waterproofing, ideal for kitchens and baths.
Smaller formats and patterns are having a moment too. Hexagons, fish-scale, and herringbone layouts add character to floors and walls, while classic subway tile remains a timeless, budget-friendly default. A good showroom lets you see these formats laid out so you can judge the grout-line density and pattern before committing.
Setting Materials and What You Really Need
The tile is only half the purchase—the materials that hold it down and fill the joints determine whether the installation lasts. You will need the correct thinset mortar for your tile and substrate, grout in a sanded or unsanded formula depending on joint width, and, in wet areas, a waterproofing membrane behind or beneath the tile.
For natural stone and unglazed tile, a penetrating sealer is essential to prevent staining, applied before grouting and periodically thereafter. A knowledgeable retailer will spec these materials for your specific project rather than selling you a generic bag, and that guidance is one of the clearest signs of a tile store worth buying from.
Making a Confident Choice
The world of tile is huge, but the decision becomes simple once you match material to use: porcelain for hard-working floors, ceramic for walls and budgets, stone for luxury you are willing to maintain. Shop a well-stocked showroom with your samples in hand, read the PEI and water-absorption ratings, budget for the full installation, and buy overage in one lot—do that, and you will walk out with tile that performs as well as it looks.
Take your time at the sample stage, because tile is one of the hardest finishes to change once it is set in mortar. View full tiles in your room’s actual light, lay several together to judge variation and grout-line spacing, and confirm the dye lot and batch numbers match across every box. Inspect each box for chips and warping before installation begins, and keep a few spare tiles from the same lot for inevitable future repairs. A little diligence up front prevents the mismatches and regrets that are nearly impossible to fix later.
Prefer to explore on your own?
See how new flooring looks in your actual room in seconds — free, no signup.
Try the free Floor Studio →