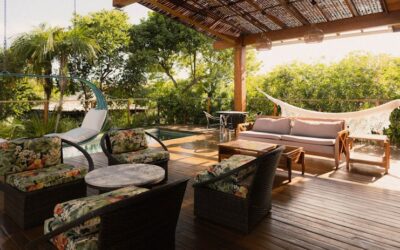
Define a patio, shade a seating area, or frame an outdoor dining space without the cost and permitting headache of a full roof, and a pergola is usually the answer. A 12×12 pergola kit hits the sweet spot for most backyards — large enough to cover a table for six or a full lounge set, small enough to assemble over a weekend and stay within budget. The 144 square feet of coverage suits the majority of residential patios, and pre-cut, pre-drilled kits take the guesswork out of construction so you are not sourcing lumber and cutting rafters from scratch.
Part of our Decks & Outdoor guide — explore the full guide →
Why Choose the 12×12 Size
Twelve feet by twelve feet is the most popular residential pergola footprint for good reason. It comfortably shelters a six- to eight-person dining table with chairs pulled out, or an L-shaped outdoor sofa with a coffee table. It scales to most standard patios without overwhelming a mid-size yard. And because the size is so common, kits are widely stocked, keeping prices competitive and replacement parts easy to source. Anything smaller can feel cramped once furniture goes underneath; much larger often requires engineered footings and permits.
Material Options Compared
The material you choose drives cost, maintenance, and lifespan more than any other factor. When shopping for a 12×12 pergola kit, you will generally choose among four materials:
- Pressure-treated pine — the budget option at roughly $1,500 to $3,000; requires staining or sealing every 2 to 3 years and can warp if not maintained
- Cedar — naturally rot- and insect-resistant with beautiful grain, typically $3,000 to $5,500; still needs periodic sealing to hold color
- Aluminum — powder-coated, rustproof, and virtually maintenance-free at $3,500 to $7,000; many include integrated gutters and adjustable louvered roofs
- Vinyl or fiberglass — low-maintenance and clean-looking at $4,000 to $8,000; fiberglass spans longer distances without sagging
Wood delivers the warmest, most classic look and the lowest entry price, but expect ongoing upkeep. Aluminum and vinyl cost more upfront and reward you with decades of no sanding, staining, or rot.
Louvered vs. Fixed Roofs
A traditional pergola has fixed rafters and open sky between them, providing partial, dappled shade. If you want control over sun and rain, consider a kit with an adjustable louvered roof. Motorized or hand-cranked louvers rotate from fully open to fully closed, letting you dial in shade through the day and shed rain when a storm rolls in. Louvered aluminum kits cost considerably more — often $6,000 to $12,000 for a 12×12 — but they transform a fair-weather structure into a genuinely all-weather outdoor room.
Footings and Anchoring
How you anchor the posts determines whether your pergola survives the first big windstorm. On an existing concrete patio, most kits use surface-mount post bases bolted down with concrete anchors — quick, but only as strong as the slab. For freestanding installations on soil, dig footings below your local frost line, often 30 to 48 inches deep in northern states, set post anchors in poured concrete, and let it cure before mounting posts. In high-wind or coastal regions, verify your kit’s wind rating and consider deeper footings or additional bracing. Never skip proper anchoring; a 12×12 pergola presents a large sail area and can lift or rack in strong gusts if merely resting on the ground.
What Comes in the Kit
Quality kits arrive with pre-cut posts, beams, rafters, and decorative end rafters, plus all stainless or galvanized hardware, brackets, and post bases. Better kits pre-drill bolt holes and include a clear illustrated manual and sometimes a template for rafter spacing. Before buying, confirm whether footings, concrete, and any shade canopy are included — they usually are not. Read whether the listed dimensions are the post-to-post footprint or the outside rafter span, since the shaded area and the space between posts differ by a foot or more.
Assembly: What to Expect
Most homeowners with basic tools can build a 12×12 kit in one to two days with a helper. The general sequence looks like this:
- Set and level the four post bases, ensuring the layout is perfectly square by measuring both diagonals
- Stand and temporarily brace the posts plumb
- Bolt the main support beams to the post tops
- Lay and fasten the cross rafters at even spacing
- Add the top purlins or slats, then any decorative brackets
You will want a power drill, socket set, a 4-foot level, a ladder, and ideally a second person to hold beams while you fasten. Renting or borrowing a laser level makes squaring the posts dramatically easier. Take your time on the leveling stage — a pergola that starts out of square only gets harder to correct as you add rafters.
Permits, Setbacks, and Wind Ratings
Before ordering a kit, check with your local building department, because rules vary widely by municipality. Many jurisdictions allow a freestanding pergola under a certain size — often 120 or 200 square feet — without a permit, which puts a 12×12 right at the threshold in some areas. Attached pergolas that tie into the house almost always require a permit and sometimes an inspection, since they affect the structure. Homeowners association rules add another layer, frequently dictating allowable materials, colors, and placement.
Setback requirements determine how close to your property line, septic field, or easements the structure can sit, and ignoring them can force an expensive relocation later. Wind rating matters too, especially in hurricane-prone coastal zones and open plains where gusts hit hard. Aluminum and steel kits typically publish wind ratings; wood kits rely on proper footing depth and bracing to resist uplift. A quick call to the permit office before you buy saves headaches, and reputable dealers can often supply the engineering documentation inspectors want to see.
Maintenance by Material
How much upkeep your pergola demands depends entirely on what it is made of, so factor long-term care into your buying decision. Here is what to expect from each:
- Pressure-treated pine: clean annually and reseal or re-stain every 2 to 3 years to prevent graying, warping, and rot
- Cedar: naturally rot-resistant but still needs a UV-blocking sealer every 2 to 4 years to hold its warm color rather than fading to silver
- Aluminum: essentially maintenance-free; an occasional hose-down removes pollen and dirt, and the powder coating resists fading for decades
- Vinyl and fiberglass: wipe clean with soapy water; no sealing or painting required, though fiberglass can be repainted if you want a new color
Wood rewards the diligent owner with a rich, natural look but punishes neglect with splitting and decay. If you know you will not keep up with sealing, spend more upfront on aluminum or vinyl and buy yourself years of freedom from the ladder and the stain brush. Inspect any pergola each spring for loose hardware, since seasonal expansion and contraction can back out bolts over time.
Adding Shade and Finishing Touches
An open-rafter pergola blocks only a portion of direct sun. To boost shade, add a retractable canopy that slides along wires between the rafters, weave outdoor fabric shades through the top, or train climbing plants like wisteria, trumpet vine, or grape up the posts for living shade over a few seasons. String lights wrapped around the beams turn the structure into an evening gathering spot. For wood kits, apply a UV-blocking sealer or semi-transparent stain before your first season to lock in color and prevent gray weathering. With the right material choice and solid footings, a 12×12 pergola becomes the anchor of your outdoor living space for 15 to 30 years. Add comfortable seating, an outdoor rug, and a few weatherproof cushions beneath it, and the structure quickly becomes the most-used room in the house during the warm months, extending your living area right out into the yard.