6×24 tile is the format that made wood-look porcelain a mainstream choice, and it is still the size I reach for when a client wants the warmth of a plank floor with the toughness of tile. The 6-inch by 24-inch plank mimics a standard hardwood board closely enough to fool guests, yet it is waterproof, scratch-resistant, and rated for bathrooms, kitchens, and mudrooms where real wood would swell and cup. Installing 6×24 tile well takes more finesse than a plain square, though, because those long planks introduce lippage and layout challenges that catch first-timers off guard.
I have set thousands of square feet of these planks, and the jobs that look flawless all share the same handful of decisions: a dead-flat substrate, the right offset pattern, and patient lippage control. This guide walks you through the layout options, the pitfalls, and the real-world costs so your plank floor reads as convincingly as the samples in the showroom.
Why the 6×24 Plank Format Works
The proportions are the whole point. At a 4-to-1 ratio, a 6×24 plank matches the look of a real wood board better than a chunky 12×24 or a stubby square. Manufacturers print realistic grain, knots, and color variation across the face, and better lines carry a dozen or more unique patterns so the floor never shows an obvious repeat.
Because it is porcelain, the plank brings advantages wood cannot match. It is fully waterproof, so it belongs in showers, laundry rooms, and basements. It rates PEI 4 or 5 for hardness, shrugging off pet claws and dragged chairs. And it needs no refinishing, ever. For open-concept homes, running the same plank from the kitchen through the living room creates a seamless, hardwood-look expanse that stands up to spills and traffic that would destroy a real oak floor.
Choosing the Right Offset Pattern
The pattern you choose is the single biggest factor in how realistic, and how flat, the finished floor looks. Long planks amplify any layout mistake, so this decision comes before the first tile goes down.
The One-Third Offset Rule
The industry standard, and the pattern I use almost exclusively, is a one-third offset. Each plank starts one-third of its length past the one before it, so the end joints stagger in a repeating three-step rhythm. This looks natural and, crucially, keeps end joints away from the center hump that most planks have.
Why to Avoid a 50 Percent Brick Offset
A 50 percent offset, where each plank centers on the joint below it, is a trap with long tile. Nearly every plank has a slight lengthwise crown, so its highest point sits at the center. In a running-bond layout, that high center lands right next to a neighbor’s low end, producing pronounced lippage, an uneven ridge you can feel with a bare foot. The Tile Council of North America specifically warns against exceeding a one-third offset on planks longer than 15 inches. Stick to one-third or a random stagger and you sidestep the problem entirely.
- One-third offset: the safe, realistic default for any plank over 15 inches.
- Random or 25 percent stagger: also acceptable and very natural-looking.
- 50 percent brick offset: avoid; it maximizes lippage from plank crowning.
Controlling Lippage on Long Planks
Lippage, the height difference between adjacent tile edges, is the number-one complaint on plank installs. Two things beat it: a flat substrate and a leveling system.
Start by getting the subfloor flat to within 1/8 inch over 10 feet, which is tighter than the 1/4 inch you can accept with small tile. Grind down high spots and fill low ones with self-leveling underlayment before you set a single plank. Then use tile leveling clips and wedges, spaced every 8 to 12 inches along each plank, to hold neighboring edges flush while the thinset cures. These clips snap off the next day and are the cheapest insurance you can buy on a plank floor.
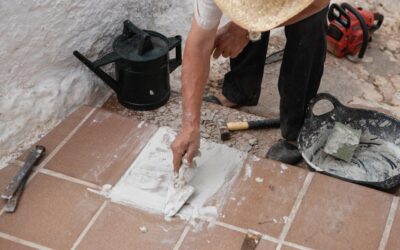
Back-butter every plank for full mortar coverage, and use a large-format trowel, typically a 1/2-inch notch, combed in the direction of the plank’s length. Full support under the tile prevents the flexing that cracks planks over voids. Take your time; a rushed plank job telegraphs every mistake.
Layout and Installation Steps
- Acclimate and inspect the tile, and dry-lay several planks to preview the color variation and pattern repeat.
- Prep the substrate flat to 1/8 inch over 10 feet with backer board or self-leveler as needed.
- Snap your reference lines and plan a one-third offset that avoids thin sliver cuts at the walls.
- Spread medium-bed mortar with a 1/2-inch notch trowel and back-butter each plank.
- Set leveling clips along every joint and check flush as you go.
- Grout the next day with a 1/8 to 3/16-inch joint; unlike wood, tile planks need a grout line.
A note on grout joints: butting plank tiles tight like hardwood is a mistake. Slight size and bow variations between porcelain planks mean you need at least a 1/8-inch joint, and rectified planks can go to 3/16 inch. Match the grout to the plank color for the most seamless wood look.
What 6×24 Tile Costs
Wood-look porcelain spans a broad price range, and the plank format sits squarely in mid-tier tile pricing.
- Budget planks: $2 to $3.50 per square foot for basic wood-look lines.
- Mid-range: $3.50 to $6 per square foot for realistic multi-face patterns and textured surfaces.
- Premium: $6 to $10 per square foot for designer collections and rectified edges.
- Installation: $7 to $14 per square foot professionally, higher than square tile because of the leveling labor.
Add materials, medium-bed mortar, leveling clips, and grout, at roughly $2 to $3 per square foot. All in, a professionally installed plank floor runs $10 to $22 per square foot, still a fraction of what quality hardwood costs to buy, install, and maintain over its life. Remember to buy 10 to 15 percent extra for cuts and breakage, more for a diagonal or herringbone layout, and hold back a full box of spares in case a plank ever needs replacing years down the road.
Keeping a Plank Tile Floor Looking New
Upkeep is minimal, which is half the appeal. Sweep or dry-mop to clear grit, then damp-mop with a pH-neutral floor cleaner; steam mops are fine on porcelain but keep them off the grout if it is not fully cured. Seal cement grout on install and reseal it every year or two in kitchens and baths to stop it from graying. Unlike hardwood, you will never sand, stain, or refinish this floor, and that hands-off durability is why so many homeowners choose the plank over the real thing.
Is 6×24 Tile Right for Your Home
Before you commit, weigh the plank against alternatives. Luxury vinyl plank costs less and installs faster over an imperfect subfloor, but it dents under heavy furniture and can fade in direct sun. Engineered hardwood brings real wood underfoot yet cannot go in a shower or a wet basement. The 6×24 porcelain plank sits in the sweet spot: it survives water and abuse like no wood product can, and it looks more authentic than most vinyl. The trade-off is the tougher, more labor-intensive install, which is why getting the substrate and offset right matters so much.
If you want the look of wood in a space that gets wet, sees heavy traffic, or houses pets and kids, the plank format is hard to beat. It gives you a realistic hardwood appearance with waterproof, refinish-free durability, and it works from the front entry to the shower floor. Just respect what the long format demands: a flat substrate, a one-third offset, and leveling clips on every joint. Get those three right, and you will have a floor that looks like a designer hardwood install and outlasts one by decades.
Prefer to explore on your own?
See how new flooring looks in your actual room in seconds — free, no signup.
Try the free Floor Studio →