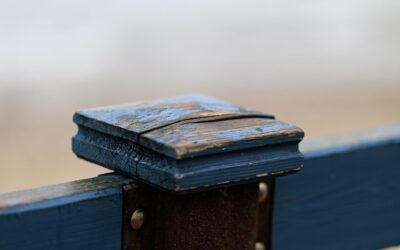
Most returned 6×6 post caps come back for one reason: the post was not actually 6 inches wide. A standard dressed 6×6 measures about 5.5 by 5.5 inches, while a rough-sawn post can be a full 6 inches or more, and a cap built for one will rattle loose or refuse to slide onto the other. Measure first, then choose a style and material that matches your deck or fence. A good cap sheds rain off the end grain, which is the most vulnerable part of any wood post, and it can add light or trim detail at the same time.
The short version: measure each post with a tape at the top, buy caps labeled for that actual dimension, use slip-over caps where you want the post top fully sealed, use flat caps where you want a clean modern line, and pick copper, vinyl, aluminum, wood or solar based on budget and how much upkeep you can tolerate.
How to Size 6×6 Post Caps Correctly
Lumber is sold by nominal size, not by its real dimensions. A pressure-treated 6×6 from a home center is planed on all four faces, which brings it down to roughly 5-1/2 inches square. Cedar and redwood posts are often the same, but specialty mills and older homes may have rough-sawn timbers that measure 5-3/4 to 6 inches, and the faces may not be perfectly square. Treated wood also swells when it arrives wet from the yard and shrinks as it dries over the first season.
Here is the measuring routine that avoids a second trip to the store:
- Measure across two adjacent faces at the very top of the post, where the cap will sit. Write down both numbers.
- Check three or four posts, not just one. Variation of 1/8 inch between posts is common.
- Note whether the post top is cut square and level. A crooked cut leaves a gap under a flat cap.
- If the wood is still wet from treatment, expect it to shrink slightly. Size a slip-over cap for the dry dimension and plan to shim or caulk if it ends up loose.
Caps marketed as “6×6 nominal” usually fit 5.5 inch posts. Caps marketed as “true 6×6” or “rough-sawn” are cut for 6 inch posts. When product listings show an inside dimension, compare it to your measurement and look for about 1/16 to 1/8 inch of clearance. Less than that and the cap will bind; more than that and it will need adhesive or shims to stay tight.
When the post is in between sizes
A post that measures 5-3/4 inches is the awkward middle case. You have three options: buy a flat cap that overhangs and does not care about exact width, plane or sand the top few inches of the post down to 5.5 inches for a nominal slip-over, or buy a true 6 inch slip-over and shim each side with thin strips of composite or exterior trim. Flat caps are the easiest fix for mixed-size runs.
Slip-Over Caps vs Flat Caps
Two basic designs cover nearly every deck and fence post, and they behave differently in weather.
Slip-over caps are open-bottom sleeves with a closed top that slide down 1 to 3 inches over the post. They hide the cut end completely and shed water well because the skirt overlaps the post faces. They need an accurate size match, and they trap a little moisture if the post top is not cut with a slight slope or vented. Pyramid, ball-top and solar styles are usually slip-over designs.
Flat caps are solid plates that sit on top of the post and overhang every side by 3/4 to 1-1/2 inches. They work with any post width inside their footprint, so sizing is forgiving. Wood flat caps often get a chamfered edge and a drip groove cut underneath so water falls clear of the post instead of running back down the face. Stacked flat caps, a thin plate topped by a smaller one, give a classic trimmed look on porch columns and deck newels.
| Feature | Slip-over | Flat |
|---|---|---|
| Sizing tolerance | Tight, must match post | Forgiving |
| Water protection | Excellent on end grain and top inches | Good on end grain |
| Look | Decorative, traditional | Clean, modern or craftsman |
| Install time | Fast | Fast to moderate |
Materials for Deck and Fence Post Caps
Material drives both the look and how often you will think about your 6×6 post caps again. Deck post caps take more hand contact and sun than fence caps, so finish durability matters more on a deck.
Copper
Copper caps start bright and weather to brown and eventually green. They last decades and look at home on cedar and painted trim. Copper can react with some wood treatment chemicals, so many copper caps are sold over a wood or plastic core, and it is smart to fasten them with copper or stainless nails rather than plain steel. Expect copper to cost the most of the common options, often several times the price of vinyl.
Vinyl and PVC
Vinyl caps are the budget choice and the standard on vinyl fences. They never need paint, come in white, tan and gray, and slide on with a dab of PVC cement or exterior adhesive. Cheap vinyl can yellow or turn brittle after several years of strong sun, so look for UV-stabilized material if your fence faces south or west.
Aluminum and powder-coated steel
Metal caps in black or bronze match modern railings and cable rail systems. Powder coating holds up well, but a scratch in a steel cap can rust, so aluminum is the safer pick near salt air or pools.
Wood
Cedar, redwood or treated pine caps can be cut on site to any size, which makes them ideal for odd posts. They need the same finish as the surrounding deck boards and periodic recoating. A wood flat cap with a bevel on top and a drip edge underneath is the most adaptable choice for rough-sawn timbers.
Composite
Composite caps pair with composite decking and color-matched post sleeves. They resist rot and splitting, but most are sized to fit over a post sleeve, not bare lumber, so check the inside dimension carefully.
Solar Post Cap Lights
Solar post cap lights combine the cap and a small light into one unit, which is the easiest way to add low-level lighting to a deck perimeter or fence line without running any wire. A small panel on top charges a rechargeable battery during the day, and an LED turns on automatically at dusk.
Things to compare before you buy:
- Fit: Most solar caps include an adapter or base plate for 4×4 and 6×6 posts. Confirm the base actually matches your measured post, since adapters are often sized for 5.5 inch lumber.
- Light output: Low-output models give an accent glow. Brighter models in the 15 to 50 lumen range help with stairs and walkways.
- Sun exposure: Posts under a tree or roof overhang may only get a few hours of charge. Expect short run times in shade and in winter.
- Battery access: Choose a cap that lets you replace the rechargeable cell. Batteries usually fade after one to three seasons, and a swap is far cheaper than a new cap.
- Weather sealing: Look for gasketed housings so rain does not reach the battery compartment.
Keep spare rechargeable cells indoors at room temperature, recycle old ones properly, and never substitute standard alkaline batteries for the rechargeable type the light was designed around.
How to Install Post Caps Step by Step
Tools and materials: tape measure, speed square, circular saw or handsaw, exterior wood sealer or end-grain preservative, exterior construction adhesive or PVC cement (for vinyl), stainless or coated finish nails or screws, a hammer or drill, and a level.
- Trim the post tops. Snap or mark a level line along the fence or deck run so every post ends at the same height. Cut square. On posts that will get flat caps, a slight 5 to 10 degree slope on top helps water run off under the cap.
- Seal the end grain. Brush preservative onto fresh cuts of treated lumber. End grain soaks up water like a straw, and the cap is a second line of defense, not the only one.
- Dry fit each cap. Slide or set the cap in place and check for rock or gaps. Sand or shim as needed.
- Fasten. Vinyl caps usually get adhesive only. Metal and copper caps typically use small nails through pre-punched holes in the skirt. Wood flat caps get two or more stainless screws angled down into the post, plus a bead of adhesive if you like.
- Check alignment. Sight down the run before the adhesive sets so every cap faces the same way and sits at the same height.
- Charge solar caps. Turn the switch on, if there is one, and give them a full sunny day before judging brightness.
Work from a stable stance on the ground or deck surface. If you need a ladder to reach tall gate or arbor posts, set it on firm level ground and keep three points of contact.
Troubleshooting Common Cap Problems
- Cap is loose or rattles: The post shrank or the cap is a true 6 inch size on a 5.5 inch post. Add thin shims on two sides and glue, or switch to a flat cap.
- Cap will not slide on: The post is swollen or rough-sawn. Sand the top 2 inches or wait for the wood to dry, then try again.
- Post top is rotting under the cap: Water got trapped. Remove the cap, let the wood dry, cut back to sound wood if needed, treat the end grain, and reinstall with a small vent gap or a sloped top.
- Vinyl cap turned yellow: UV damage. Replace with UV-stabilized caps; paint will not bond well to aged vinyl.
- Solar light dies early in the evening: Clean the panel, check for shade, and replace the rechargeable battery if it is more than a couple of seasons old.
- Black streaks on wood near copper: Tannin or fastener reaction. Use copper or stainless fasteners and clean the stain with an oxalic acid wood brightener.
What Post Caps Cost
Prices vary widely by material and region, but general ranges help with budgeting. Basic vinyl caps are the least expensive, often a few dollars each. Plain wood flat caps you cut yourself cost little more than the lumber. Aluminum and powder-coated caps land in the middle. Solar caps run from modest to fairly pricey depending on brightness and build quality. Copper caps are the premium option and can cost many times more than vinyl per post. For a typical 12 by 16 foot deck with 10 to 14 posts, the spread between a vinyl and a copper set can easily be several hundred dollars.
When to Hire a Pro
Installing 6×6 post caps is one of the easiest outdoor upgrades you can do yourself. Call a carpenter or deck contractor if posts are visibly rotted at the top or base, if a railing post wobbles when you push on it, or if you want hardwired post lights rather than solar units (any new wiring belongs with a licensed electrician). Wobbly railing posts are a safety issue, and a new cap will not fix a loose connection to the rim joist.
Frequently Asked Questions
What size are 6×6 deck post caps on the inside?
Caps made for standard dressed lumber have an inside opening of roughly 5-5/8 inches to fit a post that measures 5-1/2 inches. Caps for rough-sawn timber open to about 6-1/8 inches. Always compare the listed inside dimension to your measured post.
Do post caps really protect the wood?
Yes. The cut end of a post absorbs water much faster than the faces, and repeated soaking leads to checking and rot. A cap that sheds water, combined with sealed end grain, adds years to an exposed post.
Can I put a flat cap on a post that is not square?
Usually yes. A flat cap overhangs every side, so small differences in width or slight twist are hidden. Make sure the top cut is level so the cap sits flat without rocking.
How long do solar post cap lights last?
The housing and LED often last many years. The rechargeable battery is the weak point and usually needs replacement every one to three seasons, depending on climate and how much sun the post receives.
Should I glue or nail post caps?
Vinyl caps are normally glued. Metal and copper caps are nailed through the skirt with matching nonferrous fasteners. Wood caps are screwed down, with optional adhesive for extra hold.